Installing a tool
2-6
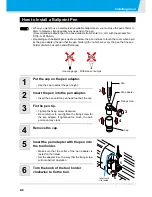
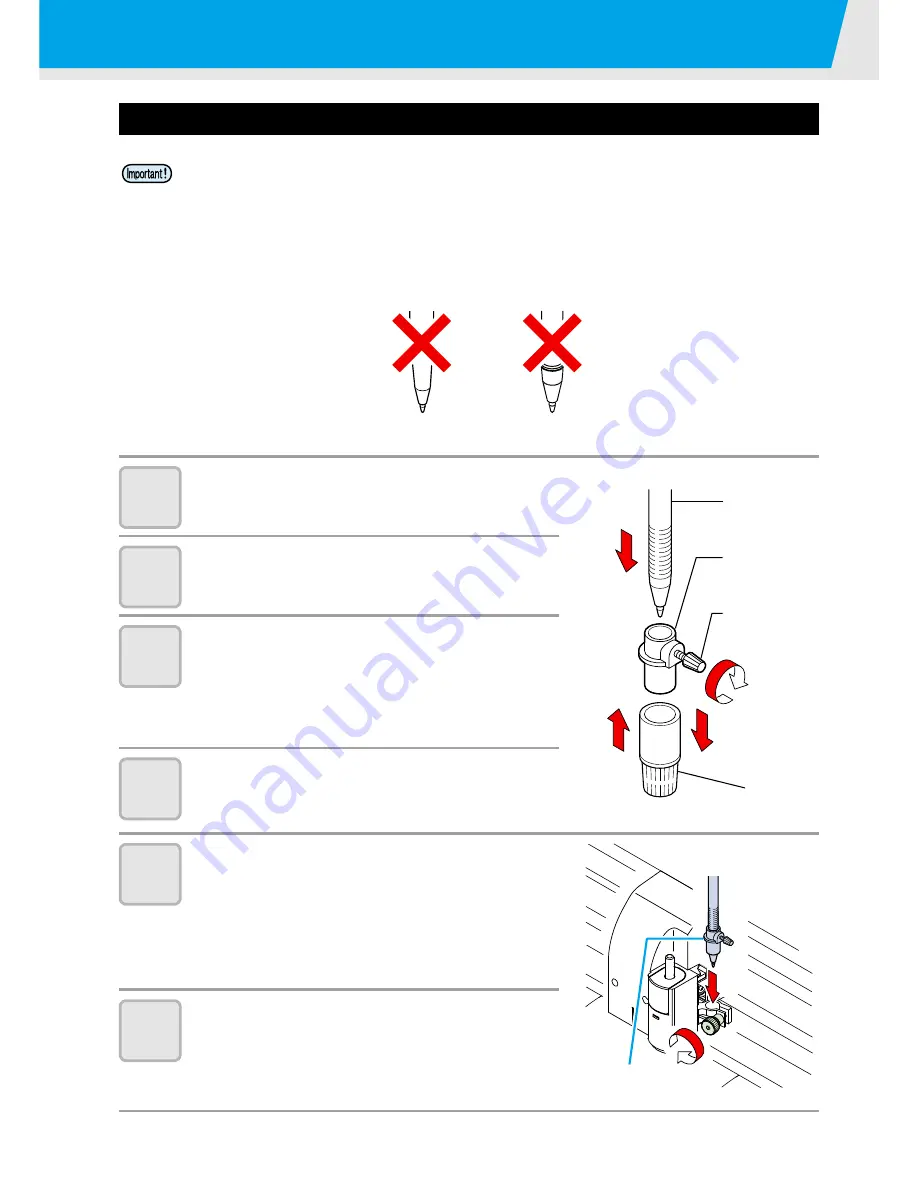
How to Install a Ballpoint Pen
1
Put the cap on the pen adapter.
• Use the cap to adjust the pen height.
2
Insert the pen into the pen adapter.
• Insert the pen until the pen head reaches the cap.
3
Fix the pen tip.
• Tighten the fixing screw clockwise.
• Be careful not to over-tighten the fixing screw for
the pen adapter. If tightened too much, the ball-
point pen may crack.
4
Remove the cap.
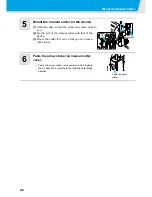
5
Insert the pen adapter with the pen into
the tool holder.
• Make sure that the collar of the pen adapter is
rested on the holder.
• Set the adapter in such a way that the fixing screw
will not obstruct operation.
6
Turn the knob of the tool holder
clockwise to fix the tool.
• When you want to use a commercially available ballpoint pen, you must use the pen of 8mm to
9mm in diameter. Image quality may depend on the pen.
(Recommended ballpoint pen: the one available from Pentel Co., Ltd. with the product No.:
K105-A, K105-GA)
• Regarding such ballpoint pens as shown below, the pen inclines to touch the cover when held
by the pen adapter (the pen that the pen holder girth of which may vary, the pen that the pen
holder of which has umbo and differences)
Uneven gauge
With steps or bumps
N G
N G
N G
N G
N G
N G
1
2
4
3
Pen
Pen adapter
Fixing screw
Cap
6
5
Insert until
it is rested
Содержание CG-60SR
Страница 1: ...D201611 16 MIMAKI ENGINEERING CO LTD URL http www mimaki co jp...
Страница 5: ...iv...
Страница 14: ...xiii...
Страница 139: ...5 13 Function Flowchart 5 Appendix ON OFF AUTO FEED ON OFF 10 5100 AREA OFF Enable to setting SORTING is ON...
Страница 141: ...Function Flowchart 5 15 5 Appendix FORM TYPE1 4 40 SPEED 1 0 cm s TYPE1 TYPE2...
Страница 142: ...5 16...
Страница 143: ...D201611 16 30112011...
Страница 144: ...EM FW 1 80 MIMAKI ENGINEERING CO LTD 2011...

