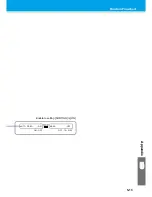
Cutter blade
5-5
5
Appendix
Adjusting the cutter blade
After the completion of adjustment, be sure to set cutting conditions and perform test cutting to check the
cutting quality.
1
Remove the cutter holder, and loosen
the lock nut.
」
2
Turn the adjusting knob to adjust the
protruding amount of the cutter blade.
3
Tighten the lock nut so that the
adjusting knob will not turn.
Replacing the blade of any cutter other than that supplied with the plotter
1
Remove the cutter holder cap by
turning it.
2
Replace the blade with a new one using
tweezers or the like.
3
Adjust the protruding amount of the
cutter blade.
• arrow to protrude the cutter blade.
( 0.5 mm per revolution)
• The blade adjuster (adjuster: OPT-S1005) will facilitate the adjustment of the protruding
amount of the blade.
Lock nut
Adjusting knob
Cutter holder
Cutter
Cap
Cutter blade
Adjusting knob
Содержание CG-60SR
Страница 1: ...D201611 16 MIMAKI ENGINEERING CO LTD URL http www mimaki co jp...
Страница 5: ...iv...
Страница 14: ...xiii...
Страница 139: ...5 13 Function Flowchart 5 Appendix ON OFF AUTO FEED ON OFF 10 5100 AREA OFF Enable to setting SORTING is ON...
Страница 141: ...Function Flowchart 5 15 5 Appendix FORM TYPE1 4 40 SPEED 1 0 cm s TYPE1 TYPE2...
Страница 142: ...5 16...
Страница 143: ...D201611 16 30112011...
Страница 144: ...EM FW 1 80 MIMAKI ENGINEERING CO LTD 2011...


