


69 of 271
7. Repeat step 4, then verify that the rotational hook timing is still correct. If it is not, repeat the rota-
tional hook timing adjustment.
8. While still at 201.5°, check and adjust, if needed, the needle to hook gap.
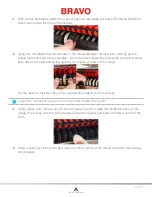
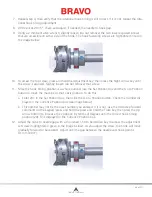
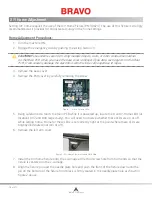
9. Using a 2 mm bent allen wrench, slightly loosen (do not remove) the two lower exposed screws
that are accessible on either side of the hook. The hook fastening screws are highlighted in red in
the image below.
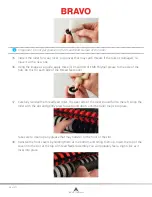
10. To access the top screw, press and hold the Adjustment key, then press the Right Arrow key until
the screw is exposed. Slightly loosen (do not remove) that screw.
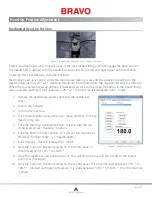
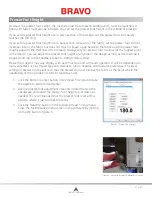
11. Since the hook timing position is a whole number (use the Set Position box and the Go to Position
button to move the machine to that z-axis position. To do this,
a. Enter 201 in the Set Position box, then click the Go to Position button. Check the number dis-
played in the Current Z Position box (see image below).
b. This number may not be the exact number you entered. If it is not, use the microstep forward
command on the keypad (press and hold the press and hold the Trace key, then press the Up
Arrow button) to increase the z position by tenths of degrees until the correct hook timing
position (201.5) is displayed in the Current Z Position box.
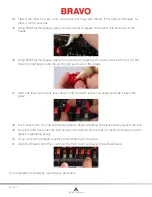
12. Adjust the hook to needle gap with a shortened 1.5mm bent Allen key to access the adjustment
set screw (highlighted in green in the image below). As you adjust the screw, the hook will move
gradually forward or backwards. Adjust until the gap between the needle and hook point is
0.1mm (.004”).
Table of Contents
Содержание Bravo
Страница 1: ...Technical Manual Rev 082115 ...


