66 of 271
7. Replace the base cover.
8. Open the Tools>Maintenance menu and then click the Head Timing tab.
9. In the Head Timing tab, click the Head Up button (or on the machine keypad, press the
Adjustment key and the Up Arrow key.
10. Use the machine keypad to move the needle case to the closest needle noted in the machine
casting.
11. If the needle is bent or damaged, replace the needle.
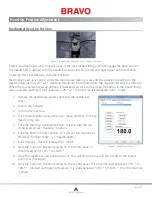
12. To inspect hook timing you need to adjust the machine to
201.5° ± 0.5°. Since the hook timing position is a whole number
(use the Set Position box and the Goto Position button to move
the machine to that z-axis position. To do this, enter 201 in the
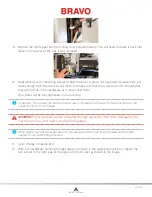
Set Position box, then click the Goto Position button. Check
the number displayed in the Current Z Position box (see image
below). This number may not be the exact number you entered.
If it is not, use the microstep forward command on the keypad
(press and hold the Trace key, then press the Up Arrow button
to increase the z position by tenths (of degrees) until the cor-
rect hook timing position (201.5) is displayed in the Current Z
Position box.
•
NOTE:
If you microstep too far, use the GoTo function of the software to move to 201° and
microstep forward. Do not microstep backward.
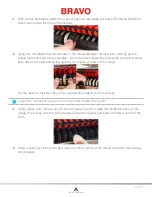
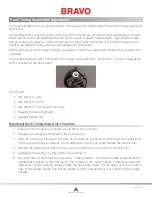
13. You can now inspect the hook timing, which refers to the rotational position of the hook point
in relation to the needle. To check the hook timing, stand directly in front of the machine, then
locate the needle. The hook point should be even with the left side of the needle. Use the image
below to locate the hook point behind the needle (it may be helpful to use a magnifying glass to
see this).
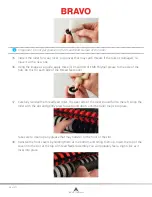
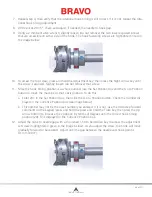
14. The optimal hook point position is displayed in the image below. The hook point should be even
with the left side of the needle. If the hook point is not even with the left side of the needle, you
will need to perform a hook timing adjustment.
Table of Contents
Содержание Bravo
Страница 1: ...Technical Manual Rev 082115 ...


