39 of 271
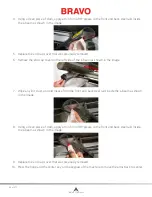
3. Carefully lift the EMI shield from the main PCB. If required, disconnect the fan connector from the
main PCB.
CAUTION!!
Be careful not to drop metallic hardware or tools onto the Main PCB while it is
exposed. Doing so can result in severe damage to the electronics that might be expensive to
repair.
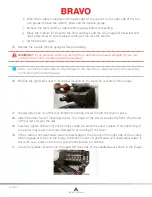
4. Use any compressed air labeled as ESD safe (and labeled for use on electronic components) to
blow any accumulated dust out of the base interior. When doing so, do not touch the main PCB.
Some compressed air brands have a liquid accelerant that is discharged from the container while blow-
ing dust off the machine. Always allow any liquid discharge to completely evaporate before turning the
machine back on.
5. Carefully place the EMI shield over the main PCB and re-install the screws.
6. Replace the base cover before turning the machine back on.
Rotary Hook and Trimmer Assembly area
Lint and dust can build up in the trimmer assembly and the rotary hook. Clean this at least once per day.
1. Turn off the machine.
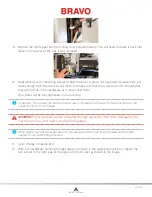
2. Remove the needle plate by removing the two screws on the underside of the extrusion.
3. Clean the exposed area with canned or compressed air.
•
Note: Excessive thread or lint buildup may require removal or disassembly of the trimmer.
You should also frequently check this area for loose thread.
If you are frequently performing applications that require you to use adhesive spray, it is recommended
that you clean the rotary hook area at least once a day with a lightweight lubricant spray (such as WD-
40). To do this:
1. Turn off the machine.
2. Remove the needle plate by removing the two screws on the underside of the extrusion.
3. Clean the exposed area with canned or compressed air.
4. Spray the exposed area with a lubricant spray.
5. Turn the machine back on, then rotate the hook all the way around a couple of times.
6. Spray the exposed area with canned or compressed air again.
7. Re-install the needleplate.
Table of Contents
Содержание Bravo
Страница 1: ...Technical Manual Rev 082115 ...


