


25
Using the Main Menu
PTZ
Use the PTZ Setup menu to configure settings
for a connected PTZ camera (not included).
NOTE:
Consult the instruction manual of your
PTZ camera for complete information about
your camera, including protocol and baud rate.
To configure a PTZ camera:
1. Connect a PTZ camera to the BNC and
485A (TX, +) and 485B (RX, -) ports and
power outlet. For more details on
connecting a PTZ camera, see “Appendix
D: Connecting a PTZ CAMERA” on page 53.
2. Under PROTOCOL, select
PELCO-D
or
PELCO-P
for the selected channel. Click
NEXT PAGE
for additional channels
(8-channel models only).
3. Under BAUD RATE, select
1200
,
2400
,
4800
, or
9600
.
4. Under DATA BIT select
5
,
6
,
7
, or
8
.
5. Under STOP BIT, select
1
or
2
.
6. Under VERIFY, select
ODD
,
EVEN
,
MARK
,
SPACE
, or
NONE
.
7. Under ADDRESS, enter an address from
001~255
using the Virtual Keyboard. Refer
to your PTZ camera’s instruction manual
for further details.
8. Click
APPLY
. Click
CLOSE
in the
confirmation window.
9. Click
EXIT
in all menus until all windows
are closed.
NETWORK
Use the Network Setup menu to configure your
network and DNS settings.
To configure network settings:
1. Under TYPE, select
DHCP
(default),
PPPoE
, or
STATIC
. If DHCP, go to
step 5
. If
PPPoE, go to
step 2
. If STATIC, go to
step 3
.
NOTE:
DHCP allows you to quickly connect to
your network by obtaining an IP address from
the router. After the initial setup, we recommend
that you disable DHCP and set the IP address
between 1~100. For example, if your IP address
is 192.168.0.107, change the last digits to 90 (i.e.
192.163.0.90). This ensures that port forwarding
will not change in the event of power failure or
resetting of your network.
2. If you select
PPPoE
in step 1, enter your
PPPoE user name
and
password
in the
respective fields using the Virtual
Keyboard.
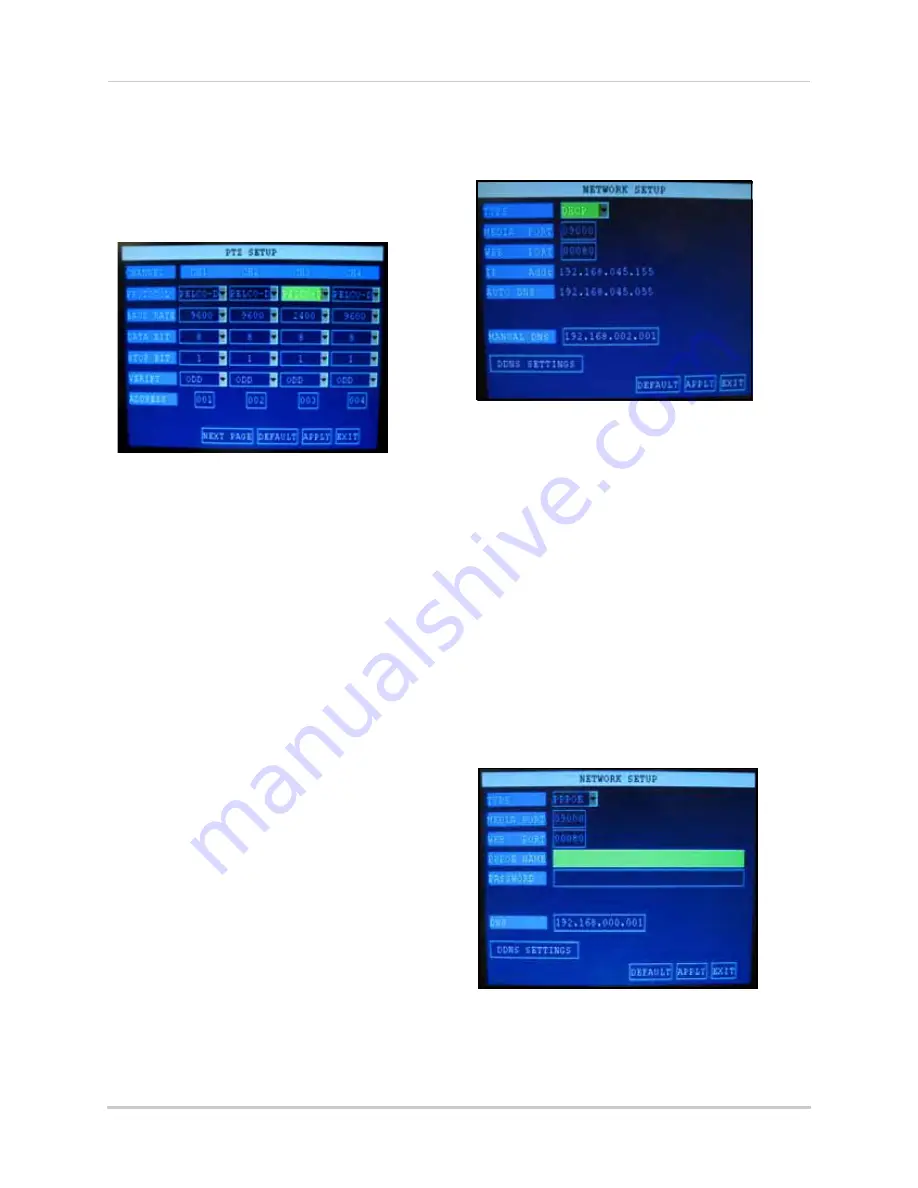
Figure 20.0 PTZ Setup menu
Figure 21.0 Network menu (DHCP default)
Figure 21.1 PPPoE setup