4. Operation
MX-FR Series Modular Matrix Frames – User's Manual
46
Applied CPU2 firmware: v3.5.7b8 | LDC software: v2.5.17b2
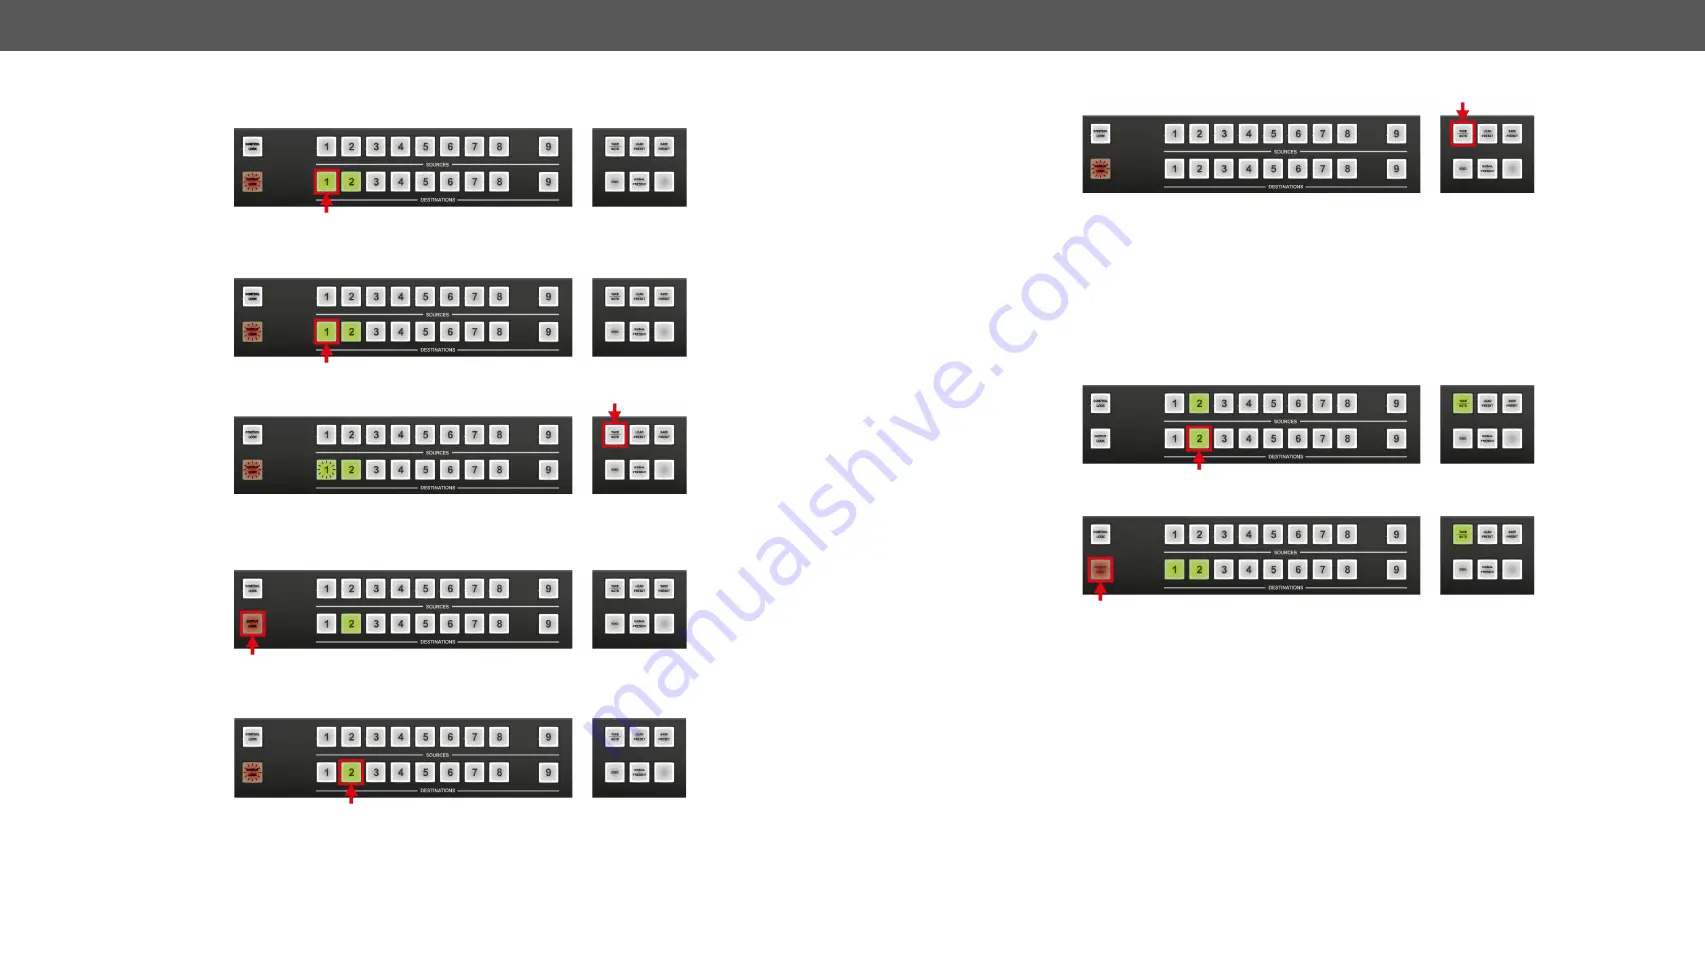
Locking an Output in TAKE Mode
Step 1.
Press and release the
Output Lock
button.
Now the
Output Lock
button starts to blink and the buttons of all the locked
outputs
shine green (view
state). If no button is pressed for three seconds, the router returns to idle state.
Step 2.
Press the desired
output
buttons.
If an unlit output button is pressed, it starts to blink, indicating that it is preselected for output locking.
Step 3.
Press and release the
Take
button.
The selected destinations are now locked.
Unlocking an Output in Take Mode
Step 1.
Press and release the
Output Lock
button.
Now the
Output Lock
button starts to blink and all the locked output’s buttons shine green (view
state). If no button is pressed for three seconds, the router returns to idle state.
Step 2.
If a shining
output
button is pressed, it goes off to indicate that it is preselected for unlocking.
Step 3.
Press and release the
Take
button.
The deselected destinations are now unlocked.
View Locked Outputs in Autotake Mode
In
Autotake
mode a destination is selected all the time. Therefore the currently selected output and input
buttons are illuminated. The
Output Lock
button shines regarding the lock state of the current output.
Viewing all locked outputs is not possible in
Autotake
mode, as pressing the
Output Lock
button instantly locks
or unlocks the current output.
#unlock
Locking an Output in Autotake Mode
Step 1.
Press and release the required
destination
button.
Now the selected destination button and the currently configured source button light up (view mode).
Step 2.
Press and release the
Output Lock
button.
Now the
Output Lock
button lights up in red, and lock function is activated at once. No source can be
changed at the locked destination.


