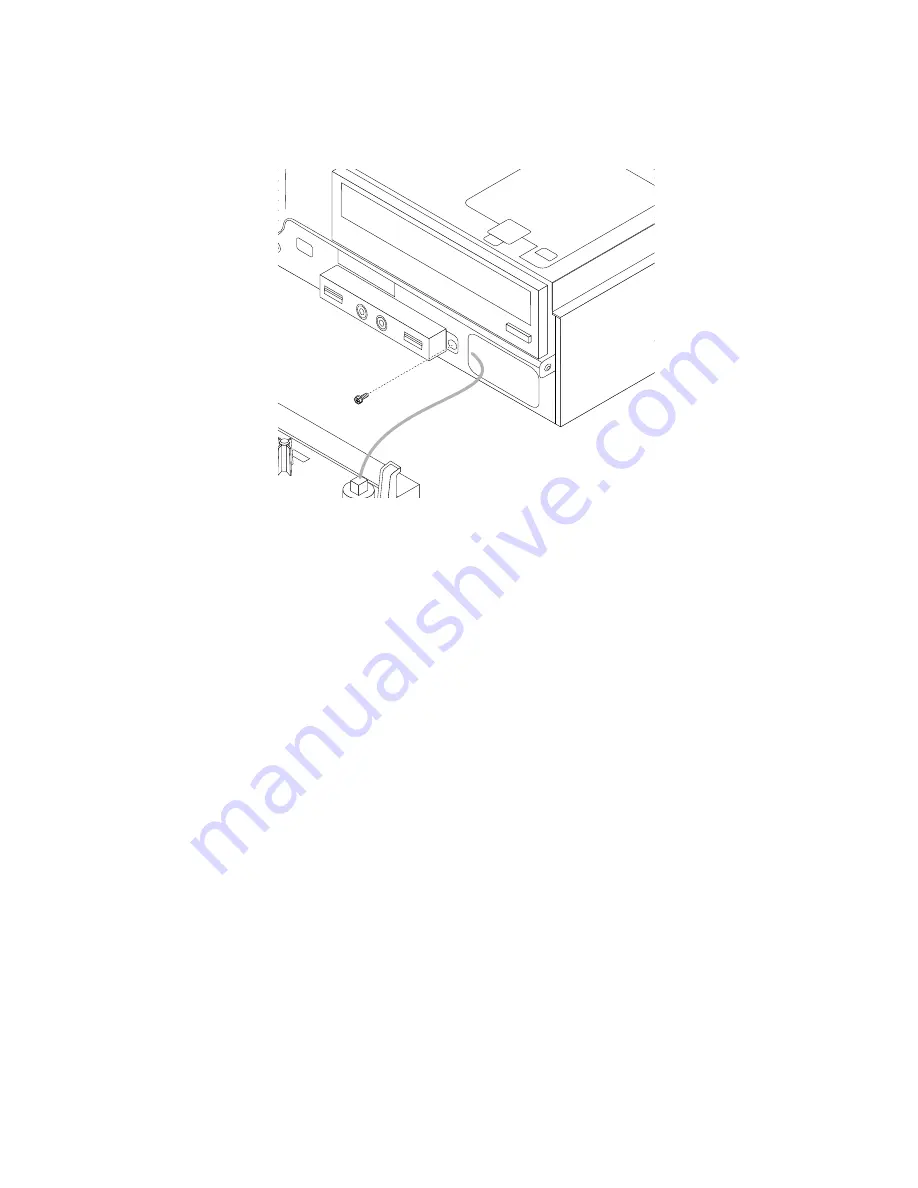
6. Remove the screw that secures the front audio and USB assembly bracket. Then remove the front
audio and USB assembly bracket from the chassis.
Figure 54. Removing the front audio and USB assembly
7. Remove the two screws that secure the front audio and USB assembly to its bracket. Then remove the
failing front audio and USB assembly from the bracket.
8. Install a new front audio and USB assembly into the bracket and install the two screws to secure the
front audio and USB assembly to the bracket.
9. Install the front audio and USB assembly bracket to the chassis and align the screw hole in the bracket
with the corresponding hole in the chassis.
10. Install the screw to secure the front audio and USB assembly bracket to the chassis.
11. Pivot the drive bay assembly upward and reconnect the front USB and front audio cables to the system
board. See “Locating parts on the system board” on page 34.
12. Lower the drive bay assembly. See “Accessing the system board components and drives” on page 108.
13. Reinstall the front bezel. See “Removing and reinstalling the front bezel” on page 106.
What to do next:
• To work with another piece of hardware, go to the appropriate section.
• To complete the installation or replacement, go to “Completing the parts replacement” on page 151.
Replacing the system fan assembly
Attention:
Do not open your computer or attempt any repair before reading and understanding the Chapter
1 “Read this first: Important safety information” on page 1.
To replace the system fan assembly, do the following:
1. Remove any media from the drives and turn off all attached devices and the computer. Then, disconnect
all power cords from electrical outlets and disconnect all cables that are connected to the computer.
2. Remove the computer cover. See “Removing the computer cover” on page 105.
3. Remove the front bezel. See “Removing and reinstalling the front bezel” on page 106.
138
ThinkCentre M79 Hardware Maintenance Manual
Содержание ThinkCentre M79
Страница 1: ...ThinkCentre M79 Hardware Maintenance Manual Machine Types 10CT 10CU 10CV and 10CW ...
Страница 6: ...iv ThinkCentre M79 Hardware Maintenance Manual ...
Страница 8: ...vi ThinkCentre M79 Hardware Maintenance Manual ...
Страница 16: ... 18 kg 37 lb 32 kg 70 5 lb 55 kg 121 2 lb 8 ThinkCentre M79 Hardware Maintenance Manual ...
Страница 19: ...1 2 Chapter 1 Read this first Important safety information 11 ...
Страница 20: ...1 2 12 ThinkCentre M79 Hardware Maintenance Manual ...
Страница 21: ...Chapter 1 Read this first Important safety information 13 ...
Страница 27: ...Chapter 1 Read this first Important safety information 19 ...
Страница 31: ...Chapter 1 Read this first Important safety information 23 ...
Страница 40: ...Figure 4 Component locations 32 ThinkCentre M79 Hardware Maintenance Manual ...
Страница 68: ...Figure 8 Installing a padlock 60 ThinkCentre M79 Hardware Maintenance Manual ...
Страница 80: ...72 ThinkCentre M79 Hardware Maintenance Manual ...
Страница 98: ...90 ThinkCentre M79 Hardware Maintenance Manual ...
Страница 112: ...104 ThinkCentre M79 Hardware Maintenance Manual ...
Страница 168: ...160 ThinkCentre M79 Hardware Maintenance Manual ...
Страница 172: ...164 ThinkCentre M79 Hardware Maintenance Manual ...
Страница 175: ...Appendix D China Energy Label Copyright Lenovo 2014 167 ...
Страница 176: ...168 ThinkCentre M79 Hardware Maintenance Manual ...
Страница 178: ...170 ThinkCentre M79 Hardware Maintenance Manual ...
Страница 184: ...176 ThinkCentre M79 Hardware Maintenance Manual ...
Страница 185: ......
Страница 186: ......


