6600-NG User’s Manual
125-9110A
Page 80
20.
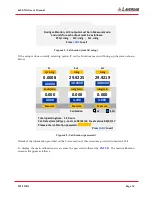
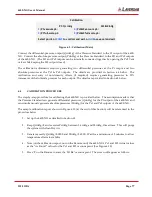
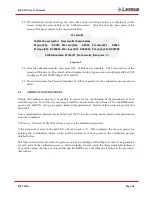
The calibration results showing the zero offset values and slope values are displayed in this
screen. Enter the current date as the ‘Calibration date’. After the Year has been entered, the
screen will appear similar to the one shown below.
Figure 6.9
21.
Note the calibration results, then press
GO
. Calibration is complete. The Lower section of the
screen will blank out. The Actual values displayed in the Upper section should typically be 0.000
QcinHg for Pt and 38.000 inHg for Ps1 and Ps2.
22.
Do not disconnect the Pressure Standard. It will be required for the verification process shown
below.
6.5
VERIFICATION PROCEDURE
During the verification process, it is possible to correct for the non-linearity of the transducers at each
verification point. To do this, it is necessary to send the non-linearity offsets from a PC to the RS232 serial
port on the 6600-NG, using a program similar to Hyperterminal. Details of this setup are provided in
Section 8.1.
Once communication between the 6600-NG and the PC has been setup and verified, in Hyperterminal,
enter the command:
CP=xxxxxx followed by ENTER, where ‘xxxxxx’ is the calibration password.
If the password is correct, the 6600-NG will echo back a ‘0’. This completes the setup required for
entering the non-linearity offsets, which will be entered at various points in the verification process
detailed below.
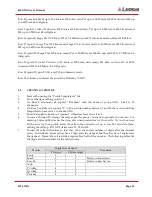
The table shown below provides the pressure values for QcinHg and PsinHg that need to be generated
for each point of the verification process. It also includes, for each point, the offset commands (followed
by specific values) that may be entered through the RS232 port. This table is referenced in the procedure
that follows.
Cal. results
Calibration successful. New results shown below
Pt zero (PZ): -0.0023 Ps2 zero (DZ): -0.0016 Ps1 zero (SZ): 0.0014
Pt slope (PS): 0.999865 Ps2 slope (DS): 0.999654 Ps1 slope (SS): 0.999798
Calibration date: 07/04/17 Note results, then press
GO


