


Working with Internal Drives
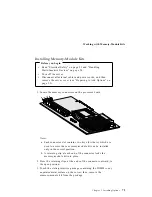
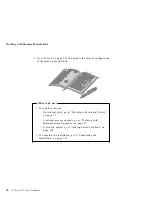
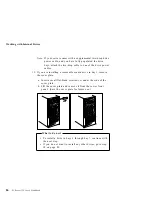
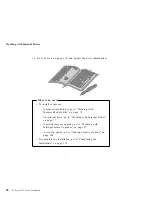
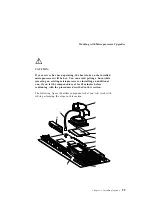
6. Place the drive on the tray, with the connectors facing the rear
of the tray.
7. Insert the screws that come with the drive into the holes on the
tray. Tighten the screws.
Attention:
To ensure that the drive functions properly, do not
overtighten the screws.
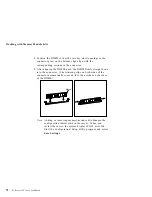
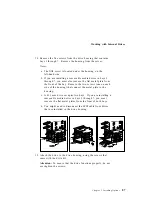
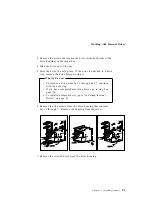
8. Slide the drive and tray into the target bay.
9. Reinstall and tighten the four screws that you removed in step 5
on page 84. Go to step 11.
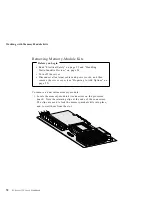
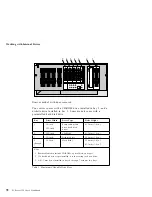
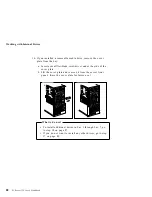
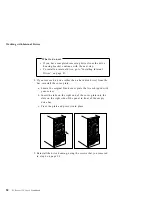
10. If you are installing a 5.25-inch drive in bay 1 or bay 2:
a. Position the drive with the connectors facing the rear of the
server.
b. Slide the drive to the rear until it stops.
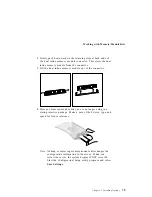
c. Loosely reinstall the four screws that you removed from the
tray housing in step 5 on page 84.
Attention:
To ensure that the drive functions properly, do
not overtighten the screws.
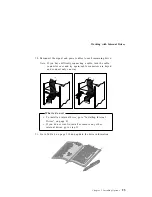
d. Store the drive tray in a safe place.
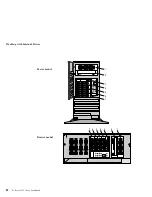
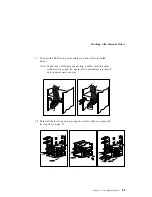
11. Connect the drive to a connector on the SCSI cable.
12. Connect one of the 4-pin power cables to the drive.
Chapter 3. Installing Options
85
Содержание PC Server 325
Страница 1: ...PC Server 325 User s Handbook IBM...
Страница 6: ...vi PC Server 325 User s Handbook...
Страница 10: ...Laser Compliance Statement x PC Server 325 User s Handbook...
Страница 136: ...Updating the Server Configuration 122 PC Server 325 User s Handbook...
Страница 212: ...Resolving Configuration Conflicts 198 PC Server 325 User s Handbook...
Страница 238: ...Installed Device Records 224 PC Server 325 User s Handbook...
Страница 287: ......
Страница 288: ...IBM Part Number 76H8831 Printed in U S A September 1996 76H8831...