3
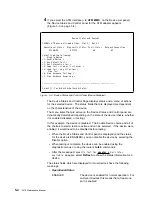
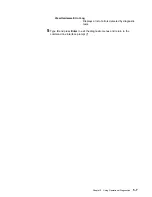
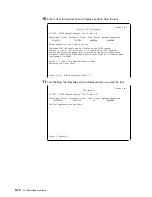
Install the fiber, then enter 1 to start the test. Because this is a “long running
test,” the Device Status and Control Menu will be displayed again. Notice
that the Diagnostic Status is TESTING. This indicates that the test is now
running and will take about 20 seconds to complete.
@
Screen 1 of 1
Device Status and Control Menu
LIC 287 - ESCON Channel Adapter, Slot 4, Net # 0
Operational Status
Diagnostic Status
Fault Status
Network Connection
NOT CONFIGURED
TESTING
OK
UNKNOWN
Do not remove this device while testing.
Select from the following:
Disable Device
Enable Device
Run Default Test
Run Interactive Test
Loop Test - stop on first error
Loop Test - Log all errors
Stop Looping Test
< 1. View Test History Log >
< 2. View Hardware Error Log >
Select (1-2 or
B=Back R=Refresh H=Help ):r
4
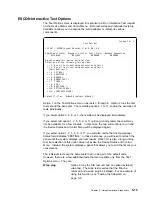
After the message
Diagnostic Test for adapter_x has status available
appears, select Refresh to show the status information for a device. At this
point, the following panel is displayed.
@
Screen 1 of 1
Restore From Light Reception Test
LIC 287 - ESCON Channel Adapter, Slot 4, Net # 0
Operational Status
Diagnostic Status
Fault Status
Network Connection
NOT CONFIGURED
MESSAGE
OK
UNKNOWN
Do not remove this device while testing.
Leave the fiber connected to the ESCON adapter located in slot 4
if it is the fiber intended for this adapter.
If it is not the fiber intended for this adapter,
connect the correct fiber now.
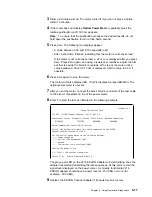
Select Back to see the results of the test.
Select (
B=Back R=Refresh H=Help ):b
5
Typically, you do not need to do anything here. If you are testing cables, this
simply tells you that the test has completed and that you should ensure that
the correct fiber is connected.
Chapter 5. Using Operational Diagnostics
5-13
Содержание Nways 2216
Страница 1: ...2216 Nways Multiaccess Connector ÉÂÔ Service and Maintenance Manual SY27 0350 02 ...
Страница 2: ......
Страница 3: ...2216 Nways Multiaccess Connector ÉÂÔ Service and Maintenance Manual SY27 0350 02 ...
Страница 8: ...vi 2216 Maintenance Manual ...
Страница 10: ...Common Tasks and the IBM 2216 Library viii 2216 Maintenance Manual ...
Страница 45: ...6 Remove the adapter from its location Chapter 2 Removal and Replacement Procedures 2 15 ...
Страница 60: ...3 6 2216 Maintenance Manual ...
Страница 84: ...4 24 2216 Maintenance Manual ...
Страница 104: ...A 2 2216 Maintenance Manual ...
Страница 106: ...Assembly 1 Final Assembly 2216 Model 400 B 2 2216 Maintenance Manual ...
Страница 110: ...B 6 2216 Maintenance Manual ...
Страница 114: ...1 2 3 4 5 6 7 8 9 10 Figure C 1 Power Cord Plugs by Country C 4 2216 Maintenance Manual ...
Страница 138: ...F 12 2216 Maintenance Manual ...
Страница 150: ...UWAGA Całkowicie wypełnione urządzenie IBM 2216 waży około 43 1 kg H 6 2216 Maintenance Manual ...
Страница 164: ......
Страница 167: ......


