background image

MOTION ALARM

NOTE:   

This  submenu  is  available  to  logged  in

Service Technicians and Supervisors and visible on
all trucks.

Use  this  menu  to  enable  or  disable  the  Motion
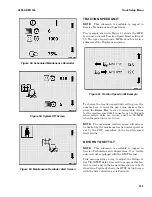
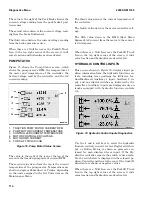
Alarm feature. Figure 65 shows the Motion Alarm

Setup Screen with the alarm option set to On.

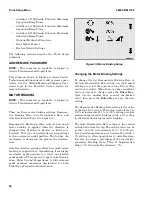
Figure 65. Motion Alarm Setup Screen

Use the 2 and 3 soft keys to toggle the setting be-
tween On and Off. An X over the fork lift truck icon
indicates the Motion Alarm feature is set to Off. If
this feature is Off and you want to enable it, press
the  2  or  3  soft  key  to  have  the  system  display  the
icon  without  an  X  over  it,  then  press  the  Enter
Key
 to store the setting.

LIFT HYDRAULIC FUNCTION MAXIMUM

SPEED AND RAMP TIMES

Flow rate adjustment of the lift function is availa-
ble on all trucks.

Ramp  up  and  ramp  down  rate  adjustments  of  the
hoist function are available only on trucks equipped
with E-Hydraulics.

Use  this  menu  to  enable  or  disable  the  valve
whether the truck has E-Hydraulics or manual hy-
draulics. Valid maximum flow rate settings can be
from 0% to 100%. A value of 0% deactivates the hy-
draulic function and associated diagnostics.

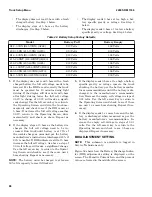
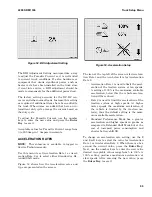
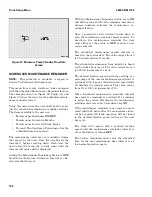
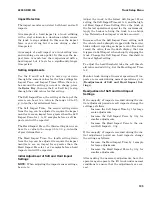
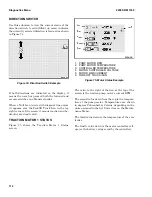
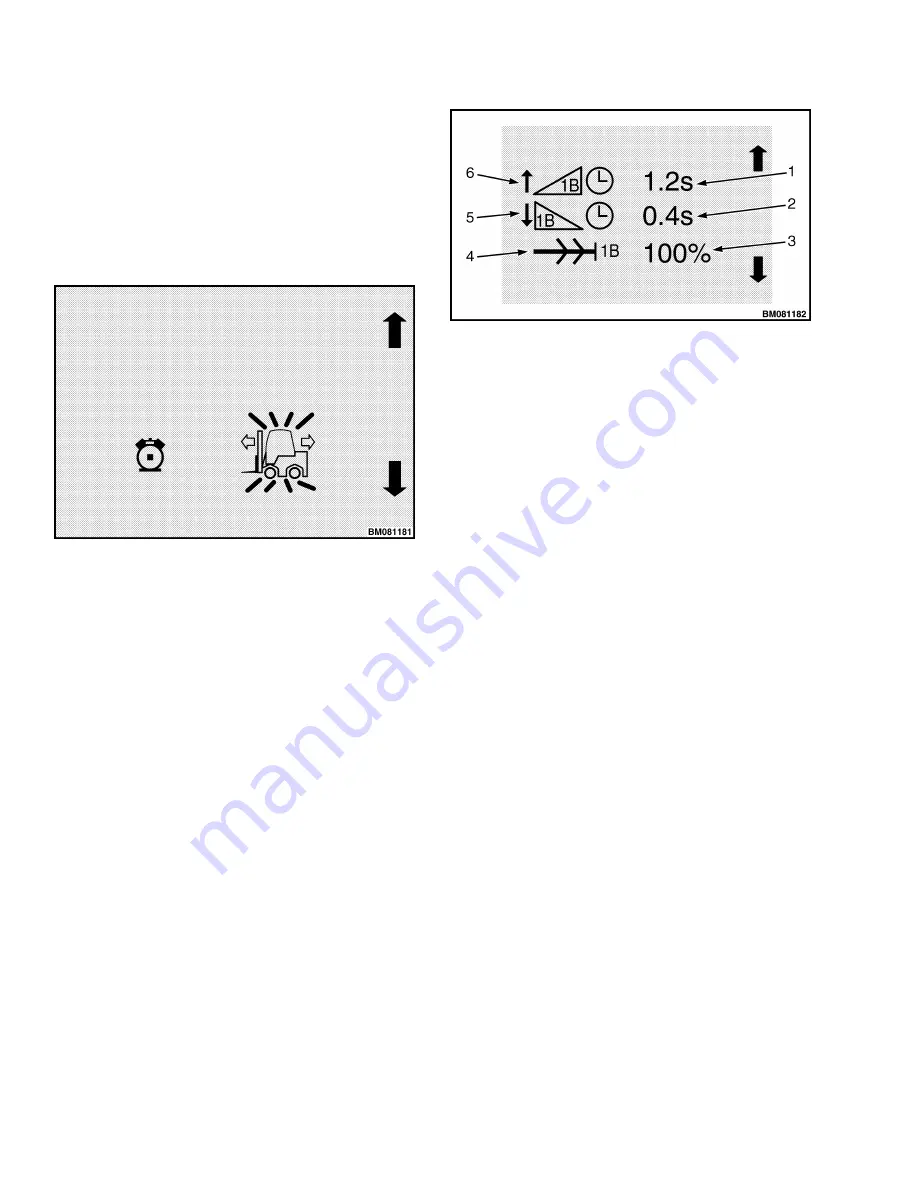
Figure  66  shows  the  Lift/Lower  Max  Speed  Setup
Screen.

1. LIFT RAMP UP TIME SETTING

2. LIFT RAMP DOWN TIME SETTING

3. LIFT MAXIMUM SPEED CURRENT SETTING

4. LIFT MAXIMUM SPEED INDICATOR

5. LIFT RAMP DOWN TIME INDICATOR

6. LIFT RAMP UP TIME INDICATOR

Figure 66. Lift/Lower Max Speed Setup Screen

To change the ramp up time setting, use the 2 and
3  soft  keys  to  select  the  value  beside  the  top  left
icon, the hoist function's ramp up time. When there
is  a  box  around  this  value,  press  the  Enter  Key,
then  use  the  2  or  3  soft  key  to  step  through  the
valid settings for ramp up time, which can be from
0 to 2 seconds in 0.1 second increments. When you
have  the  desired  value  displayed,  press  the  Enter
Key
.

To  change  the  ramp  down  time  setting,  follow  the
same procedure except in this case, select the value
beside the second icon down.

To adjust the maximum hydraulic flow supplied for
the  lift  function  (1B),  select  the  value  beside  the
lower left icon and press the Enter Key. Then use
the number keys to enter the desired value for the
maximum  hydraulic  flow,  which  can  be  0%  to
100%. A value of 0% deactivates this function.

LOWER HYDRAULIC FUNCTION

MAXIMUM SPEED AND RAMP TIMES

To change the ramp up or down time setting or to
adjust  the  maximum  flow  supplied  for  the  Lower
function (the hydraulic function 1A settings), follow
the  procedure  given  in  Lift  Hydraulic  Function
Maximum Speed and Ramp Times.

Set  the  maximum  hydraulic  flow  to  a  value  from
0%  to  100%.  A  value  of  0%  deactivates  this  func-
tion.

Truck Setup Menu

2200 SRM 1336

106

Содержание A1.3-1.5XNT

Страница 1: ...XN E5 0XNS E80 120XN E100XNS A099 A1 3 1 5XNT A25 30XNT D203 J1 5 2 0XNT J30 40XNT K160 E2 2 3 5XN E45 70XN A268 E1 6 2 0XN E30 40XN A269 J2 2 3 5XN J45 70XN A276 J1 6 2 0XN J30 40XN A935 J4 0 5 0XN J80 100XN A970 PART NO 1688879 2200 SRM 1336 ...

Страница 2: ...odic Maintenance section Keep the unit clean and the working area clean and orderly Use the correct tools for the job Keep the tools clean and in good condition Always use HYSTER APPROVED parts when making repairs Replacement parts must meet or ex ceed the specifications of the original equipment manufacturer Make sure all nuts bolts snap rings and other fastening devices are removed before using ...

Страница 3: ...enu Icons 22 Calibration Submenu Icons 24 Display Submenu Icons 28 Status Submenu Icons 30 Truck Setup Submenu Icons 35 Diagnostics Submenu Icons 49 Operating Screen 59 Introduction 59 Performance Mode Controls 60 Status and Warning Icons 61 Battery Discharge Indicator 62 Direction and Parking Brake Indicators 63 Hazard Flashers and Lighting Controls 63 Steer Angle Indicator 63 System Time 63 Load...

Страница 4: ...troduction 92 VSM Versions 92 Display Versions 93 Truck Serial Number 93 Hour Meters 93 E Hydraulic Controller Versions 94 Pump Motor Controller Versions 94 Traction Motor Controller 1 Versions 94 Traction Motor Controller 2 Versions 94 Light Controller Versions 94 Impact Sensor Versions 94 Truck Setup Menu 95 Introduction 95 Add Remove Password 96 Motor Braking 96 Changing the Motor Braking Setti...

Страница 5: ...aulic Function Maximum Speed and Ramp Times 108 Optional Hydraulic Functions 108 Rear Lights Control 108 Restore Default Settings 109 Diagnostics Menu 109 Introduction 109 Fault Code Log 110 Fault Log Details 110 Speedometer 111 Direction Switch 112 Traction Motor 1 Status 112 Traction Motor 2 Status 113 Occupancy Sensor 113 Brake System Sensors 113 Pump Status 114 Hydraulic Control Inputs 114 E H...

Страница 6: ... THE QUALITY KEEPERS HYSTER APPROVED PARTS ...

Страница 7: ... KEYS 2 SCROLL FORWARD KEY RIGHT ARROW 3 5 6 7 8 9 AND 0 KEYS 4 KEYLESS START SWITCH OR KEY SWITCH 5 SCROLL BACK KEY LEFT ARROW 6 1 AND 4 KEYS 7 POUND KEY KEY 8 ENTER KEY STAR KEY The operator password screen appears at startup as shown in Figure 2 if Operator Passwords are enabled Figure 2 Password Screen Use the number keys on the Display Panel to enter your five digit Service Technician Passwor...

Страница 8: ...me and direction indicator are always dis played All available menus are grouped by function under the main menu screens which are also called top level title menus When you select a main menu screen the system then presents submenus also known as second level menus that you can cycle through using the UP or DOWN keys until you find the one you want on the Display Panel Two main menu screens the O...

Страница 9: ...Figure 3 Technician Flowchart Sheet 1 of 4 2200 SRM 1336 Menu Flowchart 3 ...

Страница 10: ...Figure 3 Technician Flowchart Sheet 2 of 4 Menu Flowchart 2200 SRM 1336 4 ...

Страница 11: ...Figure 3 Technician Flowchart Sheet 3 of 4 2200 SRM 1336 Menu Flowchart 5 ...

Страница 12: ...Figure 3 Technician Flowchart Sheet 4 of 4 Menu Flowchart 2200 SRM 1336 6 ...

Страница 13: ...r 2 Version Set Daylight Saving Time 6 Valve Threshold E Hydraulic Sensors AUX 2B Adjustments Traction Motor Controller 1 Version 7 Hydraulic Control Inputs AUX 2A Adjustments Pump Motor Controller Version 8 Return to Set Tilt Stop Pump Status AUX 1B Adjustments E Hydraulic Controller Version 9 Brake System Sensors AUX 1A Adjustments Hour Meters 10 Occupancy Sensor Tilt Back Adjustments Truck Seri...

Страница 14: ...utral Truck Disabled Due to Left Traction Controller Acceleration Rates 26 SHEET 4 Release Park Brake Temperature Too High Hydraulic Function 2 Out of Neutral or Function 2 Button Out of Neutral Truck Disabled Due to Pump Controller BDI Adjustment 27 Operator out of Seat Lift Limit Exceeded Hydraulic Function 3 Out of Neutral or Function 3 Button Out of Neutral Battery Setup 28 Release Accelerator...

Страница 15: ...rator Passwords are de activated in this case the Activity Log Title Screen appears After entering your password success fully the system displays the Operating Screen on the orange 1 5 x 2 5 inch LCD screen of the Display Panel as shown in Figure 4 When a title screen or a menu screen is displayed on the LCD screen the screen is still referred to as the screen in a generic way but the actual Oper...

Страница 16: ...reen do not have submenus below them The other title screens are all main menus which have submenus under them Submenus can also be called second level menus Figure 5 is an example of a main menu screen Service Technicians have access to all title screens while Supervisors have access to the Activity Log Calibration Display Status and Truck Setup Title Screens Operators can use only the Password S...

Страница 17: ...and each icon represents 1 a setting that can be changed or 2 a status value that can be viewed such as a truck s serial number or 3 an action that can be taken such as clearing the fault log Only a logged in user who has the proper privileges can change a setting view a status value or take an ac tion A setting is a value that controls the operation of a lift truck in some way For example there a...

Страница 18: ...rs The preceding example shows how the system al lows a user to select one value out of a series of val ues In some menus you will use the number keys 0 through 9 to enter a value directly These are The 1 2 3 and 4 soft keys These keys can be used as number keys only in the menus that accept numerical input These keys are programmed for use as soft keys in most me nus The 5 6 7 8 9 and 0 keys Thes...

Страница 19: ...se Icon Press the 3 soft key to decrease performance Trash Can Icon Used to delete all entries in a log Press the 4 soft key or the soft key in some cases to empty a log Up Arrow soft key Press 2 to scroll up in most screens Also used to view next log entry in log screen Table 2 Soft Key Icons Continued Icon Description Down Arrow soft key Press 3 to scroll down in most screens Also used to view n...

Страница 20: ...with another icon not by itself Table 3 shows the overlay icons and de scribes how they are used Table 3 Overlay Icons Icon Description Null Symbol Icon When this icon overlays another icon it indicates that a setting value is invalid or out of range X Icon This icon indicates that a feature has been deactivated disabled SYSTEM OFF SCREEN AND ALERT SCREENS The System Off Screen and the various Ale...

Страница 21: ...d Icon Description Alert Service Required Icon Hydraulics Icon Alert Screens Cycle the Key Table 4 Alert Screen Icons Continued Icon Description Alert Secure Battery Release Park Brake Operator Out of Seat 2200 SRM 1336 Icon Glossary 15 ...

Страница 22: ... Continued Icon Description Alert Release Pedal Release Hydraulic Input Traction Switch Table 4 Alert Screen Icons Continued Icon Description Alert Hydraulic Switch Temperature Too High Lift Limit Icon Glossary 2200 SRM 1336 16 ...

Страница 23: ...ked Impact Detected See Supervisor to Unlock Fault Detected Table 4 Alert Screen Icons Continued Icon Description Alert Direction Select in Neutral Hydraulic Function 1 Out of Neutral Hydraulic Function 2 Out of Neutral or Function 2 Button Out of Neutral 2200 SRM 1336 Icon Glossary 17 ...

Страница 24: ...ulic Function 4 Out of Neutral or Function 4 Button Out of Neutral Truck Disabled Due to E Steer Controller Table 4 Alert Screen Icons Continued Icon Description Alert Truck Disabled Due to Right Single Traction Controller Truck Disabled Due to Left Traction Controller Truck Disabled Due to Pump Controller Icon Glossary 2200 SRM 1336 18 ...

Страница 25: ...ssociated submenus but the other main menus lead to submenus When you are at the main menu level pressing the Scroll Back Key takes you to the previous main menu screen Pressing the Scroll Forward Key takes you to the next main menu screen If you are in a submenu pressing the Scroll Back Key or Scroll Forward Key returns you to the main menu screens Table 5 presents the main menu screens Table 5 M...

Страница 26: ...Operat ing Screen Normally the icons convey status or op erating information such as battery charge level steer angle front and rear work light soft keys and system time Sometimes icons are displayed to pro vide critical information such as warnings Refer to the Operating Screen topic for more information NOTE The icons displayed on the Operating Screen vary from any one time to another depend ing...

Страница 27: ...Level Low Warning Icon Displayed only on trucks that have the Hydraulic Fluid Level Monitoring option Hydraulic Filter Warning restriction Icon Displayed only on trucks that have the Hydraulic Filter Monitoring option Table 6 Operating Screen Icons Continued Icon Description Service Due Soon Warning Icon or Fault Hazard Flashers Icon See Table 2 for more information Forward Direction Indicator Ico...

Страница 28: ...r when you turn on the key switch or turn the keyless switch to the ON posi tion See the Password Screen topic for more infor mation Table 7 Password Screen Icons Icon Description Password Lock Icon A field with five blanks appears below the Password Lock Icon See Figure 2 Activity Log Submenu Icons Table 8 presents the icons that appear on the Activ ity Log Submenus These icons provide status inf...

Страница 29: ...Failed Icon Checklist Passed Icon Password Lock Icon Hidden or no password Field Log Entry Icon Table 8 Activity Log Submenus and Icons Continued Icon Description Clock Icon for occurrence date Hourglass Icon for system time Operator Password Type Icon Supervisor Password Type Icon Service Password Type Icon 2200 SRM 1336 Icon Glossary 23 ...

Страница 30: ...esents the icons that appear on the Cali bration Submenus See Calibration Menu for more information Table 9 Calibration Submenus and Icons Icon Description Load Weight Display Submenu Position Empty Forks To Load Weight Height Prompt Icon Enter Known Load Weight Prompt Icon Position Load Weight To Height Prompt Icon Icon Glossary 2200 SRM 1336 24 ...

Страница 31: ...y and is used for load weight calibration in this submenu Return to Set Tilt Stop Point Submenu Table 9 Calibration Submenus and Icons Continued Icon Description Return to Set Tilt RTST Set Point Prompt Icon This icon points to the key and is used for RTST calibration in this submenu Valve Threshold Submenu Valve Threshold Function 1 A Direction Prompt Icon 2200 SRM 1336 Icon Glossary 25 ...

Страница 32: ...Direction Prompt Icon Valve Threshold Function 4 A Direction Prompt Icon Valve Threshold Function 4 B Direction Prompt Icon This icon points to the key and is used for valve calibration in this submenu Table 9 Calibration Submenus and Icons Continued Icon Description Steering Wheel Knob Center Point Submenu Center Steering Wheel Prompt Icon This icon points to the key and is used for steering whee...

Страница 33: ...nts to the key and is used for steer axle position calibration in this submenu Manual Hydraulics Submenu Table 9 Calibration Submenus and Icons Continued Icon Description Main Manual Hydraulic End Point Calibration Prompt Icon This icon points to the key and is used for manual hydraulic end point calibration in this submenu 2200 SRM 1336 Icon Glossary 27 ...

Страница 34: ...enus and Icons Icon Description Set Date and Time Format Submenu Clock Icon for setting time Table 10 Display Submenus and Icons Continued Icon Description Calendar Icon for setting date 24 Hour Clock Icon 12 Hour Clock Icon DD MM YY Europe Date Format Icon MM DD YY USA Date Format Icon YY MM DD ISO 8601 Date Format Icon Icon Glossary 2200 SRM 1336 28 ...

Страница 35: ...stment Enable Icon Daylight Savings Start Month Indicator Icon Table 10 Display Submenus and Icons Continued Icon Description Daylight Savings Start Day Indicator Icon Daylight Savings End Month Indicator Icon Daylight Savings End Day Indicator Icon First Sunday Icon Last Sunday Icon 2200 SRM 1336 Icon Glossary 29 ...

Страница 36: ... 14 variations Set Time and Date Submenu Clock Icon for setting time Calendar Icon for setting date Table 10 Display Submenus and Icons Continued Icon Description Set Units Submenu Set Units Icon Imperial Units Indicator Icon Metric Units Indicator Icon Status Submenu Icons Table 11 presents the icons that appear on the Sta tus Submenus See Status Menu for more informa tion Icon Glossary 2200 SRM ...

Страница 37: ...rdware Version Indicator Icon Software Version Indicator Icon Display Version menu Table 11 Status Submenus and Icons Continued Icon Description Hardware Version Indicator Icon Software Version Indicator Icon Truck Serial Number Submenu Truck Serial Number Symbol Icon 2200 SRM 1336 Icon Glossary 31 ...

Страница 38: ...Hour Meter Icon Traction Hour Meter Icon Pump Hour Meter Icon Table 11 Status Submenus and Icons Continued Icon Description Secure Hour Meter Indicator Icon E Hydraulic Controller Version Submenu Hardware Version Indicator Icon Software Version Indicator Icon Icon Glossary 2200 SRM 1336 32 ...

Страница 39: ...ion Indicator Icon Software Version Indicator Icon Traction Controller 1 Version Submenu Table 11 Status Submenus and Icons Continued Icon Description Hardware Version Indicator Icon Software Version Indicator Icon Traction Controller 2 Version Submenu Hardware Version Indicator Icon 2200 SRM 1336 Icon Glossary 33 ...

Страница 40: ... Icon Light Controller Version Submenu Hardware Version Indicator Icon Table 11 Status Submenus and Icons Continued Icon Description Software Version Indicator Icon Impact Sensor Version Submenu Hardware Version Indicator Icon Software Version Indicator Icon Icon Glossary 2200 SRM 1336 34 ...

Страница 41: ...n Table 12 Truck Setup Submenu Icons Icon Description Add Remove Password Submenu Password Icon Table 12 Truck Setup Submenu Icons Continued Icon Description Null Symbol Icon Operator Password Type Icon Supervisor Password Type Icon Service Password Type Icon Trash Can Icon Hare increase performance Icon 2200 SRM 1336 Icon Glossary 35 ...

Страница 42: ... Icon Table 12 Truck Setup Submenu Icons Continued Icon Description Pedal Up Setting Icon This setting lets the lift truck coast until the pedal is fully released Proportional Setting Icon With this setting the lift truck decelerates in proportion to how far the pedal is released in relation to the current traction speed Supervisor Icon Battery Setup Submenu Icon Glossary 2200 SRM 1336 36 ...

Страница 43: ... Submenu Parasitic Current Icon Table 12 Truck Setup Submenu Icons Continued Icon Description Acceleration Rates Submenu Visible to Service Technicians only Low Speed Acceleration Rate Setting Icon High Speed Acceleration Rate Setting Icon Performance Type Indicator Icon Standard Performance Rate Icon Extended Shift Performance Rate Icon 2200 SRM 1336 Icon Glossary 37 ...

Страница 44: ...ible to Service Technicians only Truck Hour Meter Icon Traction Hour Meter Icon Pump Hour Meter Icon Table 12 Truck Setup Submenu Icons Continued Icon Description Impact Monitor Shutdown Submenu Impact Shutdown Delay Icon Impact Shutdown Type Icon Impact Detection Icon Icon Glossary 2200 SRM 1336 38 ...

Страница 45: ...Setup Submenu Icons Continued Icon Description NOTE The icons displayed when using this submenu correspond to the submenu icons for the various functions Up to 30 checklist items can be enabled for the Operator Checklist Check Park Brake Icon Check Fuses Icon Check Horn Icon Check Hoses Icon Check Hydraulics Icon Check Mast Icon 2200 SRM 1336 Icon Glossary 39 ...

Страница 46: ...the key Enter Key below this icon to indicate proper operation of the current checklist item Table 12 Truck Setup Submenu Icons Continued Icon Description Press the key below this icon to indicate improper operation of the current checklist item to indicate a problem with it Minimum Pump Standby Submenu Minimum Standby Pump Flow Rate Icon Icon Glossary 2200 SRM 1336 40 ...

Страница 47: ...uled Maintenance Reminder enabled ON Scheduled Maintenance Reminder disabled OFF Interval Month Setting Icon Table 12 Truck Setup Submenu Icons Continued Icon Description Interval Hourmeter Setting Icon Derated Traction Speed Icon Traction Speed Limit Submenu Forward MPH Icon 2200 SRM 1336 Icon Glossary 41 ...

Страница 48: ...rse MPH Icon Forward km h Icon Reverse km h Icon Return to Set Tilt RTST Submenu Table 12 Truck Setup Submenu Icons Continued Icon Description Return To Set Tilt Delay Icon Tilt Forward Only Icon Tilt Both Ways Icon Infinity Symbol Icon Icon Glossary 2200 SRM 1336 42 ...

Страница 49: ...ay Submenu Auto Power Off Time Delay Indicator Icon Impact Monitor Settings Submenu Table 12 Truck Setup Submenu Icons Continued Icon Description Soft Impact Force Icon Soft Impact Time Icon Hard Impact Force Icon Hard Impact Time Icon Motion Alarm Submenu 2200 SRM 1336 Icon Glossary 43 ...

Страница 50: ...Adjustments Submenu Visible to service technicians only Table 12 Truck Setup Submenu Icons Continued Icon Description Ramp Up Time Indicator Icon Ramp rate can be from 0 to 2 seconds in 0 1 second increments Ramp Down Time Indicator Icon Ramp rate can be from 0 to 2 seconds in 0 1 second increments Lower Max Speed Indicator Icon Lift Adjustments Submenu Visible to service technicians only Icon Glo...

Страница 51: ...ndicator Icon Tilt Forward Adjustments Submenu Visible to service technicians only Table 12 Truck Setup Submenu Icons Continued Icon Description Ramp Up Time Indicator Icon Ramp rate can be from 0 to 2 seconds in 0 1 second increments Ramp Down Time Indicator Icon Ramp rate can be from 0 to 2 seconds in 0 1 second increments Tilt Forward Max Speed Indicator Icon Tilt Back Adjustments Submenu Visib...

Страница 52: ...ax Speed Indicator Icon Aux 1A Adjustments Submenu Visible to service technicians only Table 12 Truck Setup Submenu Icons Continued Icon Description Ramp Up Time Indicator Icon Ramp rate can be from 0 to 2 seconds in 0 1 second increments Ramp Down Time Indicator Icon Ramp rate can be from 0 to 2 seconds in 0 1 second increments Aux 1A Max Speed Indicator Icon Aux 1B Adjustments Submenu Visible to...

Страница 53: ...x Speed Indicator Icon Aux 2A Adjustments Submenu Visible to service technicians only Table 12 Truck Setup Submenu Icons Continued Icon Description Ramp Up Time Indicator Icon Ramp rate can be from 0 to 2 seconds in 0 1 second increments Ramp Down Time Indicator Icon Ramp rate can be from 0 to 2 seconds in 0 1 second increments Aux 2A Max Speed Indicator Icon Aux 2B Adjustments Submenu Visible to ...

Страница 54: ... increments Aux 2B Max Speed Indicator Icon Optional Hydraulics Functions Submenu Slip Sheet Control Icon Table 12 Truck Setup Submenu Icons Continued Icon Description Dual Function Control Icon Rear Lights Submenu Visible to Service Technicians only The Service Technician can use this menu to turn ON or turn OFF brake tail and backup lamps Brake Lamp Indicator Icon Brake Lamp Status Icon enabled ...

Страница 55: ...ts to the key and is used for restoring defaults in this submenu Diagnostics Submenu Icons Table 13 presents the icons that appear on the Di agnostics Submenus See Diagnostics Menu for more information Table 13 Diagnostic Submenu Icons Icon Description Fault Code Log Submenu Up Arrow soft key Down Arrow soft key Hour Meter Icon 2200 SRM 1336 Icon Glossary 49 ...

Страница 56: ...of first occurrence Hour Meter Time Stamp of last occurrence Hydraulic Pump Icon Light Controller Icon E Hydraulic Valves Icon Table 13 Diagnostic Submenu Icons Continued Icon Description Impact Icon Display Icon View Next Device Fault Log Icon View Previous Device Fault Log Icon Speedometer Submenu Icon Glossary 2200 SRM 1336 50 ...

Страница 57: ...k Disabled Icon indicates that traction and hydraulics are disabled Table 13 Diagnostic Submenu Icons Continued Icon Description Direction Select Submenu Forklift Truck Enabled Icon Forklift Truck Disabled Icon indicates that traction and hydraulics are disabled Direction Indicator Icon Filled up arrow means forward direction is selected Direction Indicator Icon Filled N indicates truck is in neut...

Страница 58: ...uck is not in neutral Direction Indicator Icon Unfilled down arrow means reverse direction is not selected Park Brake On Icon Traction Motor 1 Status Submenu Table 13 Diagnostic Submenu Icons Continued Icon Description C Temperature in degrees Celsius F Temperature in degrees Fahrenheit Forklift Truck Enabled Icon Forklift Truck Disabled Icon RPM Indicator Icon Icon Glossary 2200 SRM 1336 52 ...

Страница 59: ...oltage Indicator Icon Motor RMS Current Indicator Icon RMS Root Mean Squared Table 13 Diagnostic Submenu Icons Continued Icon Description Traction Motor 2 Status Submenu The icons on the Traction Motor 2 Status submenu are the same as on the Traction Motor 1 Status submenu Occupancy Sensor Submenu Forklift Truck Enabled Icon 2200 SRM 1336 Icon Glossary 53 ...

Страница 60: ...f seat belt monitoring is in effect and no occupancy is detected the seat belt icon has an X overlay icon over it Brake System Sensors Submenu Table 13 Diagnostic Submenu Icons Continued Icon Description Forklift Truck Enabled Icon Forklift Truck Disabled Icon Park Brake Indicator Icon Brake Fluid Sensor Icon Measures brake fluid voltage Brake Pressure Icon Brake pressure sensor reports current br...

Страница 61: ...enheit Forklift Truck Enabled Icon Forklift Truck Disabled Icon Table 13 Diagnostic Submenu Icons Continued Icon Description RPM Indicator Icon Motor Temperature Indicator Icon Motor Controller Temperature Indicator Icon Motor Controller Voltage Indicator Icon Motor RMS Current Indicator Icon RMS Root Mean Square 2200 SRM 1336 Icon Glossary 55 ...

Страница 62: ...ic Function 2 Input Indicator Icon Hydraulic Function 3 Input Indicator Icon Hydraulic Function 4 Input Indicator Icon Button Pressed Icon for Functions 1 5 This icon shows the status of the function This icon is not displayed on trucks not equipped with Hydraulic functions Button Released Icon for Functions 1 5 This icon shows the status of the function This icon is not displayed on trucks not eq...

Страница 63: ...ued Icon Description Hydraulic Function 1 Output Indicator Icon Hydraulic Function 2 Output Indicator Icon Hydraulic Function 3 Output Indicator Icon Hydraulic Function 4 Output Indicator Icon Engaged Icon for Functions 1 5 This icon means the auxiliary solenoid is being driven Disengaged Icon for Functions 1 5 This icon means the auxiliary solenoid is not being driven 2200 SRM 1336 Icon Glossary ...

Страница 64: ...ft Truck Disabled Icon Hydraulic Temperature Indicator Icon Tilt Sensor Indicator Icon Table 13 Diagnostic Submenu Icons Continued Icon Description Height Sensor Indicator Icon Load Weight Sensor Indicator Icon System Voltages Submenu Forklift Truck Enabled Icon Forklift Truck Disabled Icon Icon Glossary 2200 SRM 1336 58 ...

Страница 65: ...eature Operating Screen INTRODUCTION The Operating Screen shown in Figure 9 is located on the Display Panel along with the numeric keys and control keys At key on the Password Screen is the first screen displayed unless Operator Pass words are disabled After a valid password is en tered the Operating Screen appears by default The Operating Screen uses small graphic images called icons to provide c...

Страница 66: ...ore information Depending on the maximum performance mode allowed it may be possible for the operator to use the Performance Mode soft keys on the Display Panel to change the current performance mode MODE 4 This is the highest performance mode Other modes are a lower percentage of Mode 4 MODE 3 Top speed is the same as Mode 4 Acceleration is 80 percent of Mode 4 MODE 2 Top speed is 80 percent of M...

Страница 67: ...rnings to the operator as shown in Fig ure 11 Also see the Operating Screen Icons topic 1 SERVICE DUE 2 MOTOR TEMPERATURE HIGH 3 BRAKE FLUID LOW WARNING 4 SEAT BELT WARNING 5 DIRECTION PARK BRAKE INDICATORS 6 STEER ANGLE Figure 11 Status and Warning Icons NOTE Icons for front and rear lights are shown These are optional features Depending on conditions the following icons can appear in this area s...

Страница 68: ...rning is based on seat occupancy not the seat belt connection itself If the operator selects a screen other than the Operating Screen before the ten seconds are up the fasten seat belt icon will no longer be displayed BATTERY DISCHARGE INDICATOR NOTE Because the Battery Discharge Indicator BDI algorithm determines the Battery State Of Charge BSOC based on information gathered dur ing operation it ...

Страница 69: ... ON and OFF by pressing the 3 soft key The Hazard Flashers Icon a triangle on the lower left of the screen is always visible if the lift truck is equipped with hazard flash ers The operator can press the soft key to toggle the truck s hazard flashers ON and OFF STEER ANGLE INDICATOR The Steer Angle indicator is displayed in the lower center of the Operating Screen as shown in Fig ure 11 The purpos...

Страница 70: ... The System Off Screen displays the Truck Hour Meter in the upper right corner of the Operating Screen and the Hydraulic Pump Hour Meter in the lower right If equipped the System Off screen can show any two of the following four hour meters The Truck Hour Meter shows the total time the operator has been in the seat with the key or keyless switch in the ON position The Pump Hour Meter shows the tot...

Страница 71: ...reen appears causes the system to return to the last screen displayed 1 EXAMPLE FAULT CODE 2 WRENCH ICON 3 ICONS OF DISABLED PERFORMANCE LIMI TED FUNCTIONS Figure 14 Example Fault Screen The Interlock Notification Screen appears when ever the operator tries to apply an input that is not available because one or more interlock conditions have not been met For example if the operator is not seated a...

Страница 72: ...he Add Remove Password submenu accessed through the Truck Setup menu follow PASSWORD SCREEN NOTE Operator passwords are used only on trucks equipped with software enable option As already stated the Password Screen is the first screen to appear when the key switch or keyless switch is turned on unless Operator Passwords are deactivated The Password Screen is visible at all password access levels F...

Страница 73: ...list the factory default Service Technician level password 55555 can be used to gain access to the system Use the factory default Service Technician level password 55555 when installing the lift truck at the customer location to set up customer pass words When initial installation is complete choose a new Service Technician level password However once a new Service Technician level password has be...

Страница 74: ...w password using keys 0 through 9 Press Enter Key First Press the Up Arrow or Down Arrow Soft Key to select password access level Operator Supervisor or Service Technician password access level Then Press Hare 4 soft key to cycle through performance modes Available performance modes are minimum 1 to maximum 4 the default Press the Enter Key to add this password Password Screen 2200 SRM 1336 68 ...

Страница 75: ...CIAN 2 UP ARROW SOFT KEY ICON 3 DOWN ARROW SOFT KEY ICON 4 TRASH CAN SOFT KEY ICON 5 CURRENT PERFORMANCE MODE 6 HARE SOFT KEY ICON 7 CURRENT PASSWORD ICON AND FIELD In order to remove an individual password or mod ify the privileges associated with it you need to know the password number In addition you must have a privilege level equal to or greater than the privilege level of the password being ...

Страница 76: ...rd Press the Up Arrow or Down Arrow Soft Key to select password access level Operator Supervisor or Service Technician Icon displays Press Hare 4 soft key to cycle through performance modes Available performance modes are minimum 1 to maximum 4 the default Press the Enter Key to update this password To remove a password Press Trash Can soft key to remove this password from the list ess the key to ...

Страница 77: ...he Scroll Back Key or Scroll For ward Key until the Activity Log Title Screen is displayed as shown in Figure 19 Press the Enter Key to enter the Activity Log Menu Three submenus are available under this menu as shown in Figure 20 Figure 19 Activity Log Title Screen 1 OPERATOR CHECKLIST LOG 2 PASSWORD LOG 3 IMPACT EVENTS LOG Figure 20 Activity Log Submenus The first of the three submenus provided ...

Страница 78: ...oll Back Key or Scroll Forward Key while anywhere in this submenu returns the Activity Log main menu title screen to the Operat ing Screen Figure 22 shows an example Operator Checklist Log screen and indicates the available controls 1 PASSWORD VALUE AT LOG OCCURRENCE 2 TYPE OF ENTRY PASS FAIL 3 UP ARROW SOFT KEY ICON 4 CURRENT LOG ENTRY OR EMPTY SYM BOL 5 DOWN ARROW SOFT KEY ICON 6 CHECKLIST ITEM ...

Страница 79: ... OCCURRENCE 9 SYSTEM DATE AT LOG OCCURRENCE Figure 23 Failed Checklist Log Entry If there are no log entries or the final log entry has been scrolled past an empty log screen is dis played as shown in Figure 24 1 EMPTY SYMBOL 2 SYSTEM TIME ICON 3 SYSTEM DATE ICON 4 PASSWORD ICON Figure 24 Empty Log Screen The process for viewing and removing the operator checklist logs from the system is shown in ...

Страница 80: ...g submenu Press Enter Key The most recent Operator Checklist Log entry will display Press the Up Arrow or Down Arrow soft key to scroll through the log entries To remove a log entry Press the Trash Can soft key to remove this password log entry An empty log screen replaces this log screen Press either Scroll Key or to exit Activity Log Menu 2200 SRM 1336 74 ...

Страница 81: ...sociated with each password Figure 25 shows the title screen for this menu Figure 25 Password Log Menu Pressing the Scroll Back Key or Scroll Forward Key while anywhere in this submenu will return the Activity Log main menu title screen to the Op erating Screen Figure 26 shows an example Password Log screen and indicates the available controls The process for viewing and removing password logs fro...

Страница 82: ...enu Press Enter Key The most recent Password Log entry will display Press the Up Arrow or Down Arrow soft key to scroll through the log entries To remove all log entries Press Trash Can Key to remove all password log entries This log screen is replaced by the Empty log screen Press either Scroll Key or to exit Activity Log Menu 2200 SRM 1336 76 ...

Страница 83: ...ft impact 0 2 to 2 5 g in tenths of g force or Hard impact 0 5 to 3 0 g in tenths of g force as defined during the Truck Setup process Figure 27 shows the title screen for this menu Figure 27 Impact Events Log Menu Pressing the Scroll Back Key or Scroll Forward Key while anywhere in this submenu returns the Activity Log main menu title screen to the Operat ing Screen Figure 28 shows an example Imp...

Страница 84: ... the log entries To remove all log entries Press Trash Can Key to remove all log entries his log screen is replaced by the Empty log screen Press either Scroll Key or to exit When a person with Supervisor password level ac cess views the log any recorded events under Serv ice Technician level access are shown as in stead of the actual password number Also if there was no password logged in at the ...

Страница 85: ...ess the Enter Key to enter the Calibration Menu and the system will display the first sub menu in the Calibration Menu the Load Weight Display submenu which is shown in Figure 30 Press the Enter Key again if you want to enter this submenu If you want a different submenu use the Scroll Back Key or Scroll Forward Key to move to another submenu and press the Enter Key Figure 30 Load Weight Display Su...

Страница 86: ...just ing the tilt and height of the mast and forks to the load weight height 7 Press the Enter Key The system stores the new setting and returns to the Calibration Menu RETURN TO SET TILT STOP POINT CALIBRATION NOTE This calibration must be done by a service technician or supervisor and is only available on trucks that have the Return to Set Tilt feature Figure 31 shows the screen display during a...

Страница 87: ... the forks as slowly as possible Press the Enter Key and the system records the valve reading When prompted move the lever toward the rear of the truck the B direction until the forks begin to creep and press the Enter Key The system records the valve reading Steps 5 and 6 provide the hydraulic input for function 1 NOTE If a valve reading is not within the accept able range an abort message appear...

Страница 88: ...gure 34 Calibrating Steer Axle Position To calibrate the Steer Axle Position 1 Starting from the Calibration Menu scroll to the Steer Axle Position screen and press the Enter Key 2 When prompted turn the steering wheel counterclockwise until the axle hits the stop 3 Press the Enter Key 4 When prompted turn the steering wheel clockwise until the axle hits the stop 5 Press the Enter Key If the setti...

Страница 89: ... the Display Title Screen is dis played as shown in Figure 36 Figure 36 Display Title Screen Press the Enter Key to enter the Display Menu and the system will display the Set Date and Time Format screen as shown in Figure 37 Press the Enter Key again to enter this submenu For a dif ferent submenu use the Scroll Back Key or Scroll Forward Key to move to the desired sub menu and press the Enter Key ...

Страница 90: ... to select either the 12 hour or the 24 hour clock format When you have the desired format displayed press the Enter Key and the system will begin using the selected clock hour format for all menus in the sys tem To set the Current Date Format use the 3 Down Arrow soft key to change the focus to the Current Date Format Icon There are three options for the Current Date For mat USA MM DD YY Europe D...

Страница 91: ...e Set Date and Time Format screen will display Use the 2 Up Arrow soft key to select the Set Time Format Icon and display the 12 hour or 24 hour clock icon Next Use the 3 Down Arrow soft key to select the Set Date Format Icon and display the three date formats Press Enter Key to update the time and date format for all menus in the system Press either Scroll Key or to exit 2200 SRM 1336 Display Men...

Страница 92: ...IGHT SAVINGS END DAY SETTING 6 END DAY INDICATOR 7 DAYLIGHT SAVINGS END DAY INDICATOR 8 DAYLIGHT SAVINGS END MONTH INDICATOR 9 DAYLIGHT SAVINGS START DAY INDICATOR 10 DAYLIGHT SAVINGS START MONTH INDICA TOR Procedure for Setting Up Automatic Daylight Savings Time NOTE To exit from the Daylight Savings submenu at any time without making any changes press the Scroll Back Key or Scroll Forward Key Th...

Страница 93: ...cycle through the numbers first days of the week and last days of the week to the desired end day and press the Enter Key 7 Exit from the Daylight Savings submenu and return to the Display menu by pressing the Scroll Back Key or Scroll Forward Key Table 21 Set Daylight Saving Time Menu Main Menu Setup Display Press Enter Key Setup Display Set Day light Saving Press Enter Key Set Day light Saving D...

Страница 94: ... Enter Key Daylight Save Start Last Su Select the Day of the Week from available selec tions and press Enter Key SCROLL Daylight Save Start Last Sa SCROLL SCROLL Daylight Save Start Day first Press Enter Key Daylight Save Start first Su Select the Day of the Week from available selec tions and press Enter Key SCROLL Display Menu 2200 SRM 1336 88 ...

Страница 95: ...ns and press Enter Key Daylight Save End Day 31 Select the Day of the Month from available selec tions and press Enter Key SCROLL SCROLL SCROLL Set Day light Saving Back One Level Daylight Save End Month 01 Daylight Save End Day 01 SCROLL Daylight Save End Day Last Press Enter Key Daylight Save End Last Su Select the Day of the Week from available selec tions and press Enter Key SCROLL 2200 SRM 13...

Страница 96: ...st Su Select the Day of the Week from available selec tions and press Enter Key SCROLL Daylight Save End first Sa SET TIME AND DATE MENU A Service Technician or a Supervisor can use this menu to set the time and date on the on board clock Figure 41 shows the title screen for this menu Figure 41 Set Date and Time Menu Display Menu 2200 SRM 1336 90 ...

Страница 97: ...is correct simply press the Enter Key The system puts the new time settings into ef fect immediately 3 To set the system date use the 2 or 3 soft key to select the Date Icon and press the Enter Key The system will display a flashing line under the left segment of the date If the Current Date For mat is DD MM YY for example then the left segment displayed is the day of the month Cur rent Date Forma...

Страница 98: ...ifferent submenu use the Scroll Back Key or Scroll Forward Key to move to the desired submenu and press the Enter Key Figure 44 Status Menu The Status Menu provides these submenus VSM Versions Display Versions Truck Serial Number Hour Meters E Hydraulic Controller Versions Pump Motor Controller Versions Traction Motor Controller 1 Versions Traction Motor Controller 2 Versions Light Controller Vers...

Страница 99: ...ws how the informa tion is presented on the screen The top line lists the hardware version the second line lists the soft ware version TRUCK SERIAL NUMBER Use this submenu to view the serial number as signed to the truck The truck serial number al ways has 11 characters plus a 3 digit version num ber The serial number can include letters with the numbers Figure 46 shows how the serial number is di...

Страница 100: ...sion information is presented on the screen as shown in Figure 45 TRACTION MOTOR CONTROLLER 2 VERSIONS NOTE The manufacturer s hardware and software versions may not match the hardware and software versions shown on the device s exterior label Use this submenu to view the manufacturer s inter nal hardware and software versions of Traction Mo tor Controller 2 Traction Motor Controller 2 con trols t...

Страница 101: ...submenu For a dif ferent submenu use the Scroll Back Key or Scroll Forward Key to move to the desired sub menu and press the Enter Key Figure 49 Add Remove Password Submenu The Truck Setup Menu presents these submenus Add Remove Password Motor Braking Battery Setup BDI Adjustment Settings Acceleration Rates Hour Meter Initialization Impact Monitor Shutdown Operator Checklist Minimum Pump Standby F...

Страница 102: ... controls how much motor braking is applied when transitioning from higher accelerator pedal position to a lower acceleration pedal position There are two types of Auto Deceler ation Pedal Up and Proportional A fully released pedal produces maximum deceleration for both Pedal Up or Proportional deceleration Figure 50 Motor Braking Setup Changing the Motor Braking Settings To change the Set Regener...

Страница 103: ...y Amp Hour Capacity use the soft keys to move the selection box to the Battery AHr symbol and press the Enter Key Enter three or four digits as required The last digit will be rounded to the nearest 10 Press the Enter Key to save it The available values for the Full Cell Voltage Charged range from 1 00 to 3 00 V in 0 01 Volt in crements To change use the soft keys to move the selection box to the ...

Страница 104: ...ay stays at 5 bars as the battery dis charges the full cell voltage need to be in creased Run truck until battery is at 75 of the usable charge as measured per the battery manufacturer s instructions discharged 20 if 80 is usable If BDI indicator is still at 5 bars increase the full cell voltage As above a step of 0 01cell voltage will make a significant change Use the left arrow key to return to ...

Страница 105: ...eration rates and type are presented on the screen Figure 53 Acceleration Setup The icon at the top left of the screen is for Accelera tion Rate 1 and the icon below it is for Acceleration Rate 2 Acceleration Rate 1 is used to limit the accel eration of the traction system at low speeds A setting of 100 is the maximum available acceleration below this the vehicle accelera tion will be reduced Rate...

Страница 106: ...e number keys to enter a new value up to 99999 and press the Enter Key to save it IMPACT MONITOR SHUTDOWN NOTE This submenu is available to logged in Service Technicians and Supervisors This menu makes it possible to adjust the way the system reacts after an impact is detected These settings are laid out on the screen as shown in Fig ure 55 Figure 55 Setup Screen for Impact Settings The top left i...

Страница 107: ...ant to enable or disable If the currently displayed icon has an X over it press the Enter Key The system will ena ble the checklist function the icon represents and redraw the icon with no X over it and the checklist function will now be programmed to appear during the Operator Checklist sequence If the currently displayed icon does not have an X over it press the soft key to disable the checklist...

Страница 108: ...ature Once a previously active interval counts down to zero the maintenance reminder becomes active To deactivate the maintenance reminder the user must either set the status to OFF or enter a new service interval The scheduled maintenance month interval is based on the system date The value ranges from 0 to 99 in increments of 1 month The scheduled maintenance hour interval is based on the trucks...

Страница 109: ...ey to save it Acceptable values for the traction speed limit range from 1 to 99 km h when metric units are in use and 1 to 99 MPH when Imperial units are in use NOTE The maximum traction speed will always be limited by the maximum traction motor speed as set by the CDF regardless of the traction speed limit setting RETURN TO SET TILT NOTE This submenu is available to logged in Service Technicians ...

Страница 110: ...n Service Technicians and Supervisors This menu can be used to shut the lift truck OFF if the operator has left the seat for a set number of minutes This menu can be used to adjust the setting for the amount of time before the truck enters the Power Off mode Figure 63 shows an Auto Power Off De lay Setup Screen that has a 20m delay setting value which is a 20 minute delay Figure 63 Auto Power Off ...

Страница 111: ...and Hard Impact Settings NOTE When adjusting the impact sensor settings be sure to Adjust the truck to the lowest Soft Impact Force setting the Soft Impact Time set to 6 and the high est Hard Impact Force Setting Drive the truck at the fastest operational speed for the environment Apply the brakes to bring the truck to an abrupt stop Determine if an impact event has occurred Increase either the So...

Страница 112: ... SETTING 3 LIFT MAXIMUM SPEED CURRENT SETTING 4 LIFT MAXIMUM SPEED INDICATOR 5 LIFT RAMP DOWN TIME INDICATOR 6 LIFT RAMP UP TIME INDICATOR Figure 66 Lift Lower Max Speed Setup Screen To change the ramp up time setting use the 2 and 3 soft keys to select the value beside the top left icon the hoist function s ramp up time When there is a box around this value press the Enter Key then use the 2 or 3...

Страница 113: ...66 AUXILIARY 1A HYDRAULIC FUNCTION MAXIMUM SPEED AND RAMP TIMES To change the ramp up or down time setting or to adjust the maximum flow supplied for hydraulic function 3A follow the procedure given in Lift Hy draulic Function Maximum Speed and Ramp Times Set the maximum hydraulic flow to a value from 0 to 100 A value of 0 deactivates this func tion Set the ramp time settings to a value of 0 to 2 ...

Страница 114: ...ped als are released and the associated hydraulic func tion is engaged standard interlocks still apply If equipped with an automatic park brake the brake shall be released Auxiliary Hydraulics This feature enables disables control of a diverter solenoid allowing control of 2 hydraulic functions from a single valve In some ap plications customers may wish to add an addi tional function to the hydra...

Страница 115: ... a main menu top level menu that is visible only at the Service Technician password access level To enter this menu cycle through the main menu title screens by pressing the Scroll Back Key or Scroll Forward Key until the Diagnostics Title Screen is dis played as shown in Figure 70 Figure 70 Diagnostics Title Screen Press the Enter Key to enter the Diagnostics Menu The system will then display the...

Страница 116: ...lt log displays first Figure 72 Fault Log Menu Order Press the 2 Up Arrow soft key to view a previous log or press the 3 Down Arrow soft key to view the next log To clear the fault log for the device being viewed press the 4 soft key near the Trash Can Icon Fault Log Details Each log entry presents the fault code the number of occurrences the truck hour at the time of the first occurrence the syst...

Страница 117: ...this submenu to view the current wheel based travel speed which is shown in MPH or km h A positive value indicates a forward travel speed a negative value indicates a reverse travel speed The type of speed units MPH or km h is set in a submenu of the Display main menu The accelerator pedal percentage indicator displays the current calculated accelerator pedal percent where less than 2 is considere...

Страница 118: ...ION MOTOR 1 STATUS Figure 75 shows the Traction Motor 1 Status screen 1 PUMP MOTOR RPM 2 PUMP MOTOR TEMPERATURE 3 CONTROLLER TEMPERATURE 4 MOTOR CONTROLLER VOLTAGE 5 MOTOR RMS CURRENT 6 FORKLIFT TRUCK ICON Figure 75 Motor Status Example The value to the right of the icon at the top of the screen is the traction pump motor s current RPM The second value down from the top is the tempera ture of the ...

Страница 119: ...cator Icon is the current voltage of the occupancy sensor If seat belt monitoring is engaged the seat belt sta tus is also shown by the icon in the lower right cor ner of the screen If the occupancy sensor detects the presence of an operator the Seat Belt Icon is shown if the seat is not occupied an X is displayed over the Seat Belt Icon When there is a Null Icon over the Forklift Truck Icon in th...

Страница 120: ... third value down is the current temperature of the controller The fourth value down is the motor controller volt age The fifth value down is the RMS Root Mean Squared AC current from the motor to the control ler in Amperes When there is a Null Icon over the Forklift Truck Icon in the top right corner of the screen it indi cates traction and hydraulics are deactivated HYDRAULIC CONTROL INPUTS This...

Страница 121: ...lue is a positive number it is a value in the A direction the A direction means mo tion toward the front or the right of the truck If the value is a negative number the value shown is in the B direction motion toward the rear or the left of the truck If the forklift truck is equipped with this function the state of the auxiliary function solenoid is dis played This icon at the top of the screen in...

Страница 122: ...ng voltage of the 5 V supply The value to the right of the second icon down from the top of the screen is the current system operat ing voltage of the 12 V supply The value to the right of the third icon down is the battery voltage STEERING POSITION SENSORS Figure 83 shows the Steering Sensor screen Figure 83 Steering Sensor Screen This submenu displays the current voltage output from the steering...

Страница 123: ......

Страница 124: ...TECHNICAL PUBLICATIONS 2200 SRM 1336 2 14 8 13 4 13 12 12 3 12 12 11 ...

Отзывы: