◦
“Rebooting the library (Operations> Reboot library)” (page 106)
◦
“Enabling password locks (Operations > Enable Library Password Locks)” (page 106)
•
“Support” (page 107)
“Powering a drive on or off (Support > Power On/Off Drives)” (page 107)
◦
◦
“Running the demonstration (Support > Run Demo)” (page 107)
◦
“Running the slot to slot test (Support > Run Slot To Slot Test)” (page 108)
◦
“Running the wellness test (Support > Run Wellness Test)” (page 108)
◦
“Upgrading firmware (Support > Library FW Upgrade, Support> Drive FW Upgrade)”
(page 109)
◦
“Forcing the drive to eject a tape (Support > Force Drive To Eject Tape)” (page 111)
◦
“Viewing logs (Support > Library Error Log)” (page 110)
◦
“Downloading a support ticket (Support > Download Support Ticket)” (page 110)
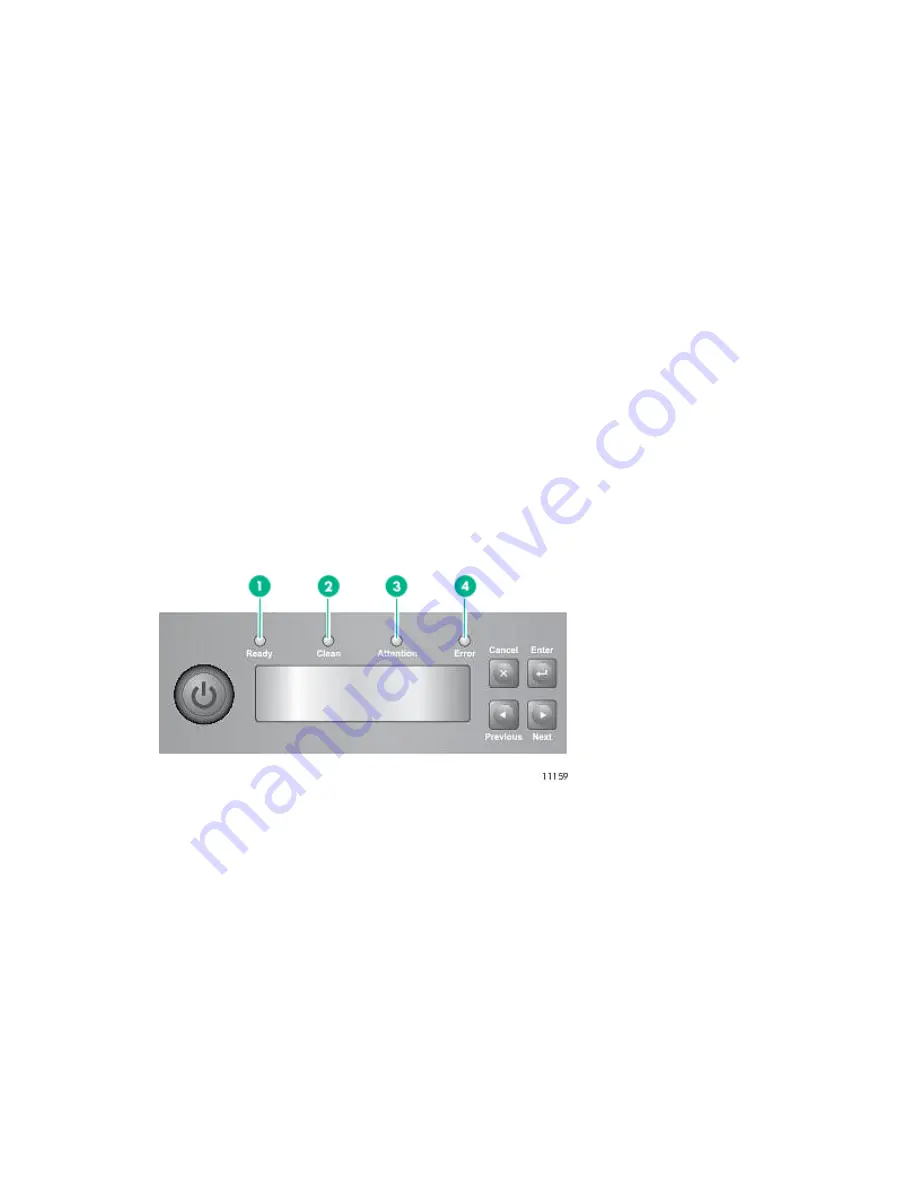
LED indicators
The operator panel includes four LEDs that provide a summary of the device status as detailed
in
Figure 65 (page 89)
.
Figure 65 LEDs
Ready
. Illuminated when power is on. Blinking during tape drive or robotics activity.
Green
1.
Clean
. Illuminated when a cleaning cartridge should be used.
Amber
2.
Attention
. Illuminated if the device has detected a condition that requires attention.
Amber
3.
Error
. Illuminated if an unrecoverable error occurs. A corresponding error message displays
on the LCD screen.
Amber
4.
Library home screen
The first line of the Home screen displays the device's product name. The second line displays
a brief status message.
Drive status definitions are listed in
Table 16 (page 90)
.
Using the MSL2024 OCP
89


