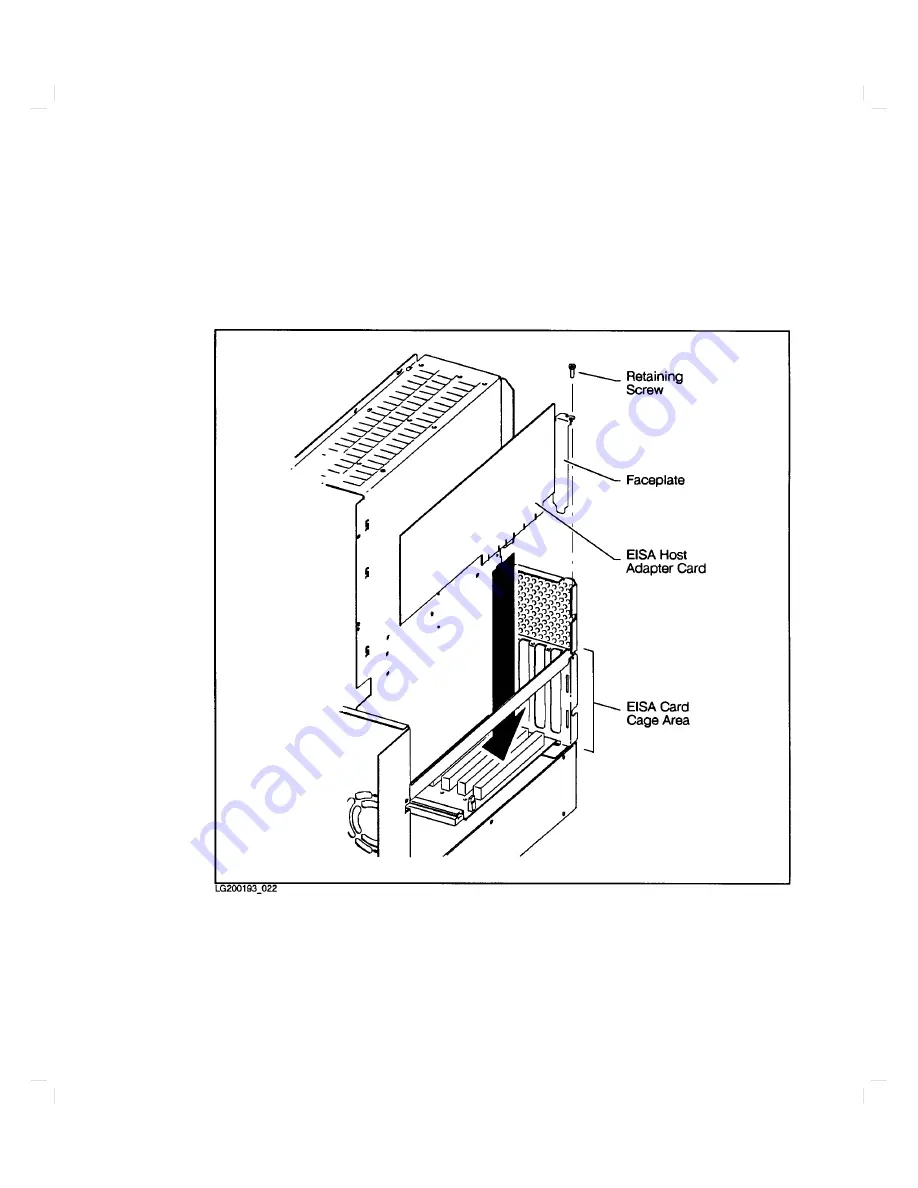
6.
Remo
v
e
the
retaining
screw
from
the
blank
faceplate
(if
y
ou
are
adding
a
card)
or
the
existing
card
(if
y
ou
are
replacing
or
removing
a
card).
See
Figure
5-10.
Sa
v
e
the
screw.
Figure
5-10.
Installating/Remo
ving/Replacing
EISA
or
ISA
Cards
Expanding
Y
our
Computer
and
Replacing
Its
P
arts
5-21
Содержание Apollo 9000 750
Страница 24: ...Figure 1 5 Connectors Mounted on the System Bulkhead 1 8 Your HP Apollo 9000 Model 750 Computer ...
Страница 27: ...Figure 1 7 Color Graphic Card Bulkhead Your HP Apollo 9000 Model 750 Computer 1 11 ...
Страница 28: ...Figure 1 8 Grayscale Graphic Card Bulkhead 1 12 Your HP Apollo 9000 Model 750 Computer ...
Страница 29: ...Figure 1 9 Graphic Interface Card Bulkhead Your HP Apollo 9000 Model 750 Computer 1 13 ...
Страница 32: ......
Страница 60: ...15 Click on the NNNNNNNNNNNNNNNNNNNNNNNNNN Main Menu softkey d a c b 2 28 Starting Up Your Computer ...
Страница 67: ...5 When this window appears double click on the HALTSYS icon d a c b Starting Up Your Computer 2 35 ...
Страница 98: ......
Страница 108: ......
Страница 119: ...Figure 5 4 SIMM Card Removal Replacement Addition Expanding Your Computer and Replacing Its Parts 5 11 ...
Страница 121: ...Figure 5 5 Lithium Battery Location Expanding Your Computer and Replacing Its Parts 5 13 ...
Страница 123: ...Figure 5 6 Location of the LAN Type Jumpers on the System Card Expanding Your Computer and Replacing Its Parts 5 15 ...
Страница 125: ...Figure 5 7 Graphics Card Removal Expanding Your Computer and Replacing Its Parts 5 17 ...
Страница 168: ...Figure 6 1 LED Array 6 26 Troubleshooting ...
Страница 174: ......


