Hospira GemStar System Operating Manual
175
Chapter 15. Optional System Components
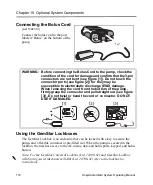
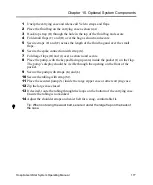
1
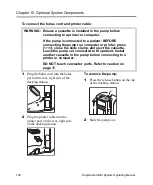
Place the pump on the inside front
window (
A
). Ensure the keypad is
facing the “window.”
2
Secure the pump with the large side
straps (
B
) and (
C
). Then secure the
top (
D
) and bottom (
E
) straps.
3
Place the fluid bag on the backside
of the compartment (
F
).
4
Secure the bag with flaps (
G
) and
(
H
).
5
Secure the bag spike with strap (
I
).
Ensure the fluid flow is not
restricted.
6
Use a “figure-8” pattern to wrap the
tubing. Secure the tubing to the
inside of the case with tabs (
J
) and
(
K
). Ensure the tubing is not kinked.
7
Zip the case closed. Ensure the
tubing exits through one of the sides
near the zipper tab when the case is
closed.
A
D
E
F
B
C
Содержание GemStar Series
Страница 9: ...Notes viii Hospira GemStar System Operating Manual ...
Страница 11: ...Chapter 1 Introduction 2 Hospira GemStar System Operating Manual GemStar Pump Layout Shown approximate size ...
Страница 27: ...Notes 18 Hospira GemStar System Operating Manual ...
Страница 67: ...Notes 58 Hospira GemStar System Operating Manual ...
Страница 77: ...Notes 68 Hospira GemStar System Operating Manual ...
Страница 87: ...Notes 78 Hospira GemStar System Operating Manual ...
Страница 95: ...Notes 86 Hospira GemStar System Operating Manual ...
Страница 103: ...Notes 94 Hospira GemStar System Operating Manual ...
Страница 165: ...Notes 156 Hospira GemStar System Operating Manual ...
Страница 173: ...Chapter 14 Operation Test 164 Hospira GemStar System Operating Manual ...
Страница 175: ...Notes 166 Hospira GemStar System Operating Manual ...
Страница 187: ...Chapter 15 Optional System Components 178 Hospira GemStar System Operating Manual A B D C I H G F E J N M K L ...
Страница 193: ...Notes 184 Hospira GemStar System Operating Manual ...
Страница 221: ...Notes 212 Hospira GemStar System Operating Manual ...

