Honeywell HX3 Скачать руководство пользователя страница 91

5 - 51

Move the slider to allocate more memory for programs or storage.  If there isn’t enough space for a file, increase the 
amount of storage memory.  If the mobile device is running slowly, try increasing the amount of program memory.
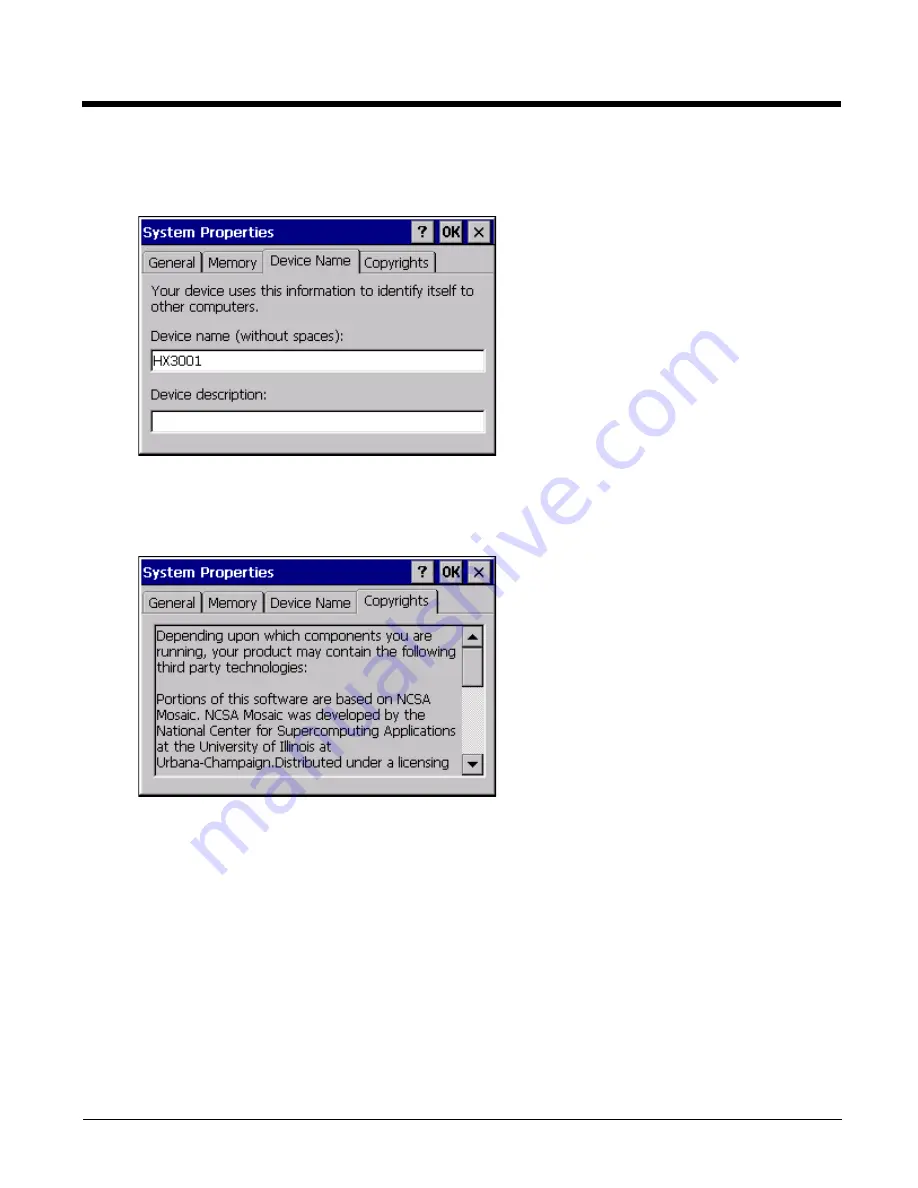
Device Name Tab

The device name and description can be changed by the user.  Enter the name and description using either the keypad 
or the Input Panel and tap OK to save the changes.  This information is used to identify the HX3 to other computers 
and devices.

Copyrights Tab

This screen is presented for information only.  The Copyrights information cannot be changed by the user.

Содержание HX3

Страница 1: ...HX3 Wearable Computer User s Guide ...

Страница 2: ...istered trademarks or trademarks of Microsoft Corporation Intel and Intel XScale are trademarks or registered trademarks of Intel Corporation or its subsidiaries in the United States and other countries Summit Data Communications the Laird Technologies Logo the Summit logo and Connected No Matter What are trade marks of Laird Technologies Inc The Bluetooth word mark and logos are owned by the Blue...

Страница 3: ...ector 2 3 Ring Scanner and Ring Imager 2 3 Laser Scanner 2 3 Continuous Scan Mode 2 3 Laser Imager 2 4 Ring Scanner and Ring Imager Extended Cable 2 4 Audio Connector and Battery Connection Cable 2 4 Li Ion Battery 2 5 Assembling the HX3 Voice Computer and Accessories 2 6 Assembling the Headset Cable 2 6 Adjusting Headset Microphone and Securing Cable 2 7 Connecting the Cable to the Battery 2 7 Co...

Страница 4: ... Audio Support 3 3 Speaker 3 3 Voice 3 3 Chapter 4 Power Modes and Batteries Modes 4 1 Primary Events Listing 4 1 On Mode 4 1 Suspend Mode 4 1 Off Mode 4 1 Batteries 4 1 Checking Battery Status 4 2 Status LED and the Batteries 4 2 Low Battery Warning 4 2 Main Battery Pack 4 2 Battery Hotswapping 4 2 Backup Battery 4 3 Handling Batteries Safely 4 3 Chapter 5 Software Configuration Using ActiveSync ...

Страница 5: ...es 5 9 LAUNCH EXE 5 9 App Note 5 9 LAUNCH EXE and Persistent Storage 5 10 REGEDIT EXE 5 10 REGLOAD EXE 5 11 REGDUMP EXE 5 11 WARMBOOT EXE 5 11 WAVPLAY EXE 5 11 Command line Utilities 5 11 COLDBOOT EXE 5 11 PrtScrn EXE 5 11 Warmboot Notes 5 11 Desktop 5 12 Desktop Icons 5 12 Taskbar 5 12 Taskbar Icons 5 12 My Device Folders 5 13 Wavelink Avalanche Enabler Option 5 13 Internet Explorer 5 14 Start Me...

Страница 6: ... 26 Autolaunch TimeSync 5 26 Disable SNMP 5 26 Wakeup on PWR Button Only 5 26 LXE BTRS Enabled 5 26 Misc 5 27 Enable Auto Launch IP Wait 5 27 IP Wait Timeout 5 27 Installed Programs 5 28 Keyboard 5 29 Languages 5 29 KeyPad 5 30 Remap a Key to a Single Key 5 31 Remap a Key to a Key to a Unicode Value 5 31 Remap a Key to a Key Sequence 5 31 Remap a Key to a Key to a Sequence of Unicode Values 5 32 R...

Страница 7: ...l 6 3 Discover 6 3 Stop Button 6 3 Bluetooth Device List 6 4 Clear Button 6 4 Bluetooth Device Menu 6 4 Right Click Menu Options 6 5 Bluetooth Properties Panel 6 6 Settings Panel 6 6 Turn Off Bluetooth Button 6 6 Settings 6 7 Computer is connectable 6 7 Computer is discoverable 6 7 Prompt if devices request to pair 6 7 Continuous Search 6 7 Filtered Mode 6 7 Printer Port COM9 6 7 Logging 6 7 Compu...

Страница 8: ...Auto Reconnect 6 15 Using OPP 6 16 Pairing with an OPP Device 6 16 Remote Device Pushes File to HX3 6 16 HX3 Pushes File to Remote Device 6 17 LXEZ Pairing and External Application 6 17 Chapter 7 Bar Code Scanner Wedge Introduction 7 1 Bar Code Readers 7 1 Return to Factory Default Settings 7 1 Bar Code Processing Overview 7 1 Main Tab 7 2 Port 7 2 Output 7 2 Send Key Messages WEDGE 7 2 Enable Int...

Страница 9: ... Suffix Control 7 13 Add Prefix 7 13 Add Suffix 7 14 Length Based Bar Code Stripping 7 14 Hat Encoding 7 16 Chapter 8 Enabler Installation and Configuration Introduction 8 1 Installation 8 1 Installing the Enabler on Mobile Devices 8 1 Enabler Uninstall Process 8 2 Stop the Enabler Service 8 2 Update Monitoring Overview 8 2 Wireless and Network Settings 8 2 Preparing a Device for Remote Management...

Страница 10: ...eless Zero Config Utility and the Summit Radio 9 2 Using the Wireless Zero Config Utility 9 2 Switching Control to SCU 9 2 Main Tab 9 3 Auto Profile 9 4 Admin Login 9 4 Profile Tab 9 5 Buttons 9 5 Profile Parameters 9 7 Status Tab 9 9 Diags Tab 9 10 Global Tab 9 11 Custom Parameter Option 9 12 Global Parameters 9 12 Sign On vs Stored Credentials 9 16 Using Stored Credentials 9 16 Using a Sign On S...

Страница 11: ...e Footprint 11 4 Table Mounting 11 4 Power Cable 11 4 Connecting Input Output Cables 11 5 USB Cable 11 5 Serial Cable 11 6 Indicators 11 6 Cradle PWR LED 11 7 B1 and B2 LED 11 7 Docking and Undocking the HX3 11 7 Docking the HX3 11 8 Undocking the HX3 11 8 Docked HX3 Mode States 11 8 Ring Scanner Storage 11 8 Inserting and Removing a Tethered Battery 11 9 Inserting a Tethered Battery into the Char...

Страница 12: ...orage and Service 12 10 Battery Cleaning Storage and Service 12 10 Chapter 13 Specifications and Reference Material Technical Specifications 13 1 HX3 Voice Computer 13 1 Dimensions and Weight 13 1 Environmental Specifications 13 1 Network Card Specifications 13 2 Summit 802 11 b g CF 2 4GHz 13 2 Summit 802 11 a b g CF 2 4 5 0GHz 13 2 Bluetooth 13 2 Desktop Cradle 13 2 Battery Charger 13 3 Electric...

Страница 13: ...or the following models HX3 Label Locations Caution RISK OF EXPLOSION IF BATTERY IS REPLACED BY AN INCORRECT TYPE The battery should be disposed of by a qualified recycler or hazardous materials handler Do not incinerate the battery or dispose of the battery with general waste materials Left Side of Scanner head Right Side of Scanner Head Back of HX3 Battery Bottom of Battery Charger Bottom of Des...

Страница 14: ...thered ring bar code decoders contain an engine with a laser aimer Laser Safety Statement This device has been tested in accordance with and complies with IEC60825 1 2007 and EN60825 1 2007 Complies with 21 CFR 1040 10 and 1040 11 except for deviations pursuant to Laser Notice No 50 dated June 24 2007 LASER LIGHT DO NOT STARE INTO BEAM CLASS 2 LASER PRODUCT 1 0 mW MAX OUTPUT 630 680nM Caution Lase...

Страница 15: ...ield below Depth of Field 20 50 8 cm Width of Field 15 38 1 cm 10 31 6 cm 5 12 7 cm 0 0 cm 20 50 8 cm 15 38 1 cm 10 31 6 cm 5 12 7 cm 0 0 cm 5 12 7 cm 10 25 4 cm 15 38 1 cm 20 50 8 cm 25 63 5 cm 30 76 2 cm 35 88 9 cm 40 101 6 cm 45 114 3 cm ...

Страница 16: ...rienced radio television technician for additional suggestions The user may find the following booklet helpful Something About Interference This is available at FCC local regional offices Honeywell is not responsible for any radio or television interference caused by unauthorized modifications of this equipment or the substitution or attachment of connecting cables and equipment other than those s...

Страница 17: ...h its antenna complies with FCC and Industry Canada RF exposure limits set for an uncontrolled environment This equipment has shown compliance with FCC and Industry Canada Specific Absorption Rate SAR limits Highest reported SAR for the HX3 is 0 641W kg on body Any accessories not provided by Honeywell should not be used with this device This device must not be co located or operating in conjuncti...

Страница 18: ...is toxic or hazardous substance contained in at least one of the homogeneous materials for this part is above the limit requirement in China s SJ T11363 2006 有毒有害物质名称及含量的标识 Names and Content of Hazardous Substances or Elements 部件名称 Parts Name 有毒有害物质或元素 Toxic and Hazardous Substances or Elements 铅 Pb 汞 Hg 镉 Cd 六价铬 Cr6 多溴联苯 PBB 多溴二苯醚 PBDE 扫描模块 Scanner Module x o o o o o 印刷电路部件 PCA x o o o o o 外壳 Hou...

Страница 19: ...ed are setup and use instructions for the Battery Charger and Desktop Cradle Out of the Box After you open the shipping carton verify it contains the following items HX3 wearable voice computer Rechargeable battery Quick Start Guide If you ordered accessories for the HX3 verify they are also included with the order Keep the original packaging material in the event the HX3 should need to be returne...

Страница 20: ...Right Side Ring on Right Hand 1 Ring Scanner Tether cable channel 1 Retaining Clip for Ring Scanner Tether Connector 1 Ring Scanner cable connector 1 Battery Cable connector 1 Retaining Clip for Tethered Battery Connector 1 Tethered Battery Cable channel 1 Cradle Connector 1 Tethered Battery Cable channel 1 Retaining Clip for Tethered Battery Connector 1 Battery Cable connector 1 Ring Scanner cabl...

Страница 21: ... external power through the cradle connector USB Keyboard or USB Mouse input is received by the HX3 through the cradle connector when the HX3 is in a powered desktop cradle Ring Scanner and Ring Imager The trigger module and ring strap module are user replaceable Laser Scanner Continuous Scan Mode If Continuous Scan Mode has been enabled factory default setting is Disabled the laser or imager is a...

Страница 22: ...Extended Cable Clips are used to secure the cable to clothing Wristband is used to secure the cable to the user s wrist Audio Connector and Battery Connection Cable 1 Illumination LEDs 2 Scan Window 3 Trigger 4 Ring Strap 5 Connector Connect to HX3 ...

Страница 23: ...placing the tethered battery in a battery sleeve ensure the Battery Charge Connect terminals are protected from accidental damage by keeping them covered by the sleeve fabric at all times Do not allow water or chemical cleaning agents of any kind to come in contact with the battery charging contacts or the battery cable connector they may be damaged If necessary clean them with a soft bristle dry ...

Страница 24: ...e end 6 to the back of the HX3 The following pages contain detailed installation instruction for the above steps Assembling the Headset Cable 1 Connect the HX3 voice cable I O connector to the I O port on the HX3 The HX3 internal microphone and speaker are automatically disabled 2 Slide the voice cable ends together until they click and lock in place Do not twist or bend the connectors The HX3 is ...

Страница 25: ...head Over Clothing Use clothing clips to hold the cable close to your body Tuck the cable under the belt but leave a small loop where it goes under the belt Do not wear the cable on the front of your body It may get in your way or get caught on protruding objects Connecting the Cable to the Battery To connect the cable to the battery complete the following steps Hold the battery with one hand with...

Страница 26: ...he HX3 body worn components Connecting the Ring Scanner Imager to the HX3 When you want to switch connectors from left to right or vice versa first gently press downward on the Retaining Clip then pinch and pull the cable connector not the cable straight up and away from the HX3 Do not use a metal object or extreme force to remove the cable connector from the HX3 Re connect cables and reassemble t...

Страница 27: ...l the ring scanner is comfortably snug and the scan aperture is secured in the desired location The ring scanner has a built in quick disconnect designed for occasional safety hazards It is not intended for frequent normal removal of the ring scanner from the hand Do not touch push against or brace your finger on the scan aperture at any time 1 Slide finger into opened loop 2 Remove shipping film ...

Страница 28: ...sure the tethered cable for the ring accessory is on the outside of the voice case 5 Slip the battery into the battery sleeve and connect the battery to the battery cable The battery charge terminals small metallic circles should always be covered by the sleeve 6 Press the hook and loop fabric at the top of the device together 7 The HX3 in the Voice Case is ready for use 8 Put the belt on Adjust t...

Страница 29: ...e grouped together at the top left on the front of the HX3 They are System Status LED located on the right in the group of three LEDs indicates power management status Wireless Activity LED located on the left in the group of three LEDs Bluetooth Status LED located in the middle of the group of three LEDs indicated Bluetooth client functions System Status LED Bluetooth Status LED Wireless Activity...

Страница 30: ...lume settings that match those supported by the Volume and Sounds Control panel Volume does not roll over from minimum to maximum or from maximum to minimum Continuously holding down the up or down arrow keys does not cause an automatic repeat of the up or down arrow key Using the Control Panel Note When the HX3 is connected via ActiveSync to a PC running LXEConnect the Volume and Sounds option in...

Страница 31: ...n Indicator LED Connection Indicator When the Bluetooth LED on the HX3 is off Bluetooth hardware has been turned off or it does not exist in the HX3 When the Bluetooth LED on the HX3 is on the HX3 is paired with another Bluetooth device but is out of range or not connected or is paired and connected to another Bluetooth device or is discovering other Bluetooth devices The Bluetooth LED Blinks slow...

Страница 32: ...sh Cold Boot Start Run The cold boot function reboots the HX3 erases all registry data and user specified settings The factory default settings are restored when the HX3 powers on again Click Start Run and type COLDBOOT EXE or COLDBOOT This command is not case sensitive Click the OK button Cold boot terminates the host computer connection The host computer connection must be re established after t...

Страница 33: ...Memory Card The HX3 has one SD card interface for storage of operating system and program code as well as persistent storage The SD slot is inaccessible and ships with a qualified 128MB optional 512MB SD Flash card The internal SD flash card supports a FAT file system via a special device driver and appears to the OS as a folder This allows the contents to be manipulated via the standard Windows C...

Страница 34: ...airing devices If a pairing device requests authentication or encryption the HX3 displays a prompt for the PIN or passcode Maximum encryption is 128 bit Encryption is based on the length of the user s passcode The Bluetooth client can simultaneously connect to one Bluetooth scanner and one Bluetooth printer Up to four Bluetooth devices can be paired and managed using a control panel Start Settings...

Страница 35: ...e The default is 1 beep for a good scan and 2 beeps for a bad scan Volume Control Volume control is managed by a Windows CE control panel applet an API and key sequences To adjust speaker volume use the Blue White Volume Up and Blue Green Volume Down buttons Volume control is covered in greater detail later in this guide Voice All Microsoft supplied audio codecs are included in the OS image The ha...

Страница 36: ...3 4 ...

Страница 37: ...ng imager pressed Docked in a powered cradle Power button tap When the unit wakes up the Power Off timers begin the countdown again When any one of the above events occurs prior to the Power Off timer expiring the timer starts the countdown again The HX3 should be placed in Suspend Mode before hotswapping the main battery Hotswapping the Ring Scanner does not require placing the HX3 in Suspend Mod...

Страница 38: ... The battery pack is resistant to impact damage Under normal conditions a properly tethered Standard battery should last a minimum of approximately eight hours before requiring a recharge the Extended battery a minimum of approximately 16 hours Battery Hotswapping Important When the backup battery power is Low or Very Low Start Settings Control Panel Power Battery tab dock the HX3 in a powered doc...

Страница 39: ...y is capable of supporting the operation of the mobile device The duration of backup battery life is dependent upon operation of the HX3 its features and any operating applications The backup battery has a minimum service life of two years The backup battery is not user serviceable The backup battery can be discharged recharged and conditioned using a CE Control Panel applet Tap Start Settings Con...

Страница 40: ...4 4 ...

Страница 41: ...s between your device and host computer Control when synchronization occurs by selecting a synchronization mode For example you can synchronize continually while connected to your host computer or only when you choose the synchronize command By default ActiveSync does not automatically synchronize all types of information Use ActiveSync Options to specify the types of information you want to synch...

Страница 42: ...on the cable connects to a USB port on a PC or laptop Note The ActiveSync cable for the HX3 does not appear to fit tightly with the cradle connector but at an angle This is normal Synchronizing from the HX3 To initiate synchronization from your host computer tap Start Programs Communication ActiveSync to begin the process Tap Sync to connect and synchronize View synchronization status Tap Tools to...

Страница 43: ...om numbers and unique names of all devices having a partner ship with it Two clients cannot have a partnership with the same host computer if they have the same name Control Panel System Device Name If the cold booted mobile device tries to reestablish the partnership with the same host PC a new random number is gener ated for the mobile device and ActiveSync will insist the unique name of the mob...

Страница 44: ...ing system on your host computer replace ActiveSync with Windows Mobile Device Center ActiveSync is already installed on the HX3 The HX3 is preconfigured to establish a USB ActiveSync connection to a PC when the proper cable is attached to the HX3 and the PC If the HX3 uses a serial port for ActiveSync it will be necessary to configure the HX3 to use the serial port Complete details on the proper ...

Страница 45: ...connection 9 Execute the setup exe file that was copied to the host computer This setup program installs the LXEConnect util ity 10 Follow the on screen installation prompts The default installation directory is C Program Files LXE LXEConnect 11 When the installation is complete create a host computer desktop shortcut to the following file C Program Files LXE LXEConnect LXEConnect exe If a differe...

Страница 46: ... The dialog box automatically times out and disappears after approximately 20 seconds 5 The HX3 can now be configured from the host computer LXEConnect window Input from the PC s mouse and keyboard are recognized as if they were attached to the HX3 6 When the remote session is completed terminate the LXEConnect program by selecting File Exit or clicking on the X in the upper right hand corner to c...

Страница 47: ...ers Therefore the sections that follow describe only those Windows capabilities that are unique to the HX3 and its Windows CE environment General Windows CE Keyboard Shortcuts Use the keyboard shortcuts in the chart below to navigate with the HX3 keyboard displayed in the LXEConnect window on a host computer These are standard keyboard shortcuts for Windows CE applications Reboot Two reboot sequen...

Страница 48: ...HX3 saves the registry when you Tap Start Run then type Warmboot Tap OK Perform a Suspend Resume function by pressing the Pwr key and then pressing it again The registry save process takes 0 3 seconds If nothing has been changed nothing is saved e g 0 seconds The registry is automatically saved every 20 minutes It is also saved every tenth time the registry settings are changed Registry settings a...

Страница 49: ...ion about software development can be found on the Technical Support Portal Contact Customer Support page 14 1 for more information or to access the portal Access Files on the Flash Card Click the My Device icon on the Desktop then click the System icon A flash card is used for permanent storage of the HX3 drivers CAB files and utilities It is also used for registry content back up CAB files when ...

Страница 50: ...ity opens the registry database and reads the list of CAB files to auto launch First it looks for FileName to see if the CAB file is present If not the registry entry is ignored If it is present and the Installed flag is not set auto launch makes a copy of the CAB file since it gets deleted by installation and runs the Microsoft utility WCELOAD to install it If the Installed flag is set auto launc...

Страница 51: ...n the background Command line Utilities Command line utilities can be executed by Start Run program name COLDBOOT EXE Command line utility which performs a cold boot all RAM is erased Passwords are lost upon cold boot If a password is set that password must be entered to begin the cold boot power cycle process PrtScrn EXE Command line utility which performs a screen print and saves the file in BMP...

Страница 52: ...ms Storage for files that are to be deleted Discover and then pair with nearby discoverable Bluetooth devices Storage for downloaded files applications Connect to the Internet intranet Used for accessing the appropriate wireless configuration SCU Summit Client Utility A shortcut to the Remote Desktop Configuration utility Wavelink Avalanche Mobility Center Avalanche MC is a remote client managemen...

Страница 53: ...files loaded but not installed on the mobile device when it is shipped The installation files are located in the System folder on CE devices The installation application must be run manually the first time Avalanche is used After the installation application is manually run a reboot is necessary for the Enabler to begin normal performance Fol lowing this reboot the Enabler will by default be an au...

Страница 54: ...rt or USB to the HX3 Start FTP Server Stop FTP Server Begin and end connection to FTP server These shortcuts call the Services Manager to start and stop the FTP server The server defaults to Off for security unless it is explicitly turned on from the menu Command Prompt The command line interface in a separate window Type help cmd at the command prompt to view valid Pocket PC Console commands Exit...

Страница 55: ...Connection Help Settings Access to all Control Panels a shortcut to the Network and Dialup Control Panel and access to Taskbar options Summit Set Summit radio network parameters Use this option to set up radio client profiles The Summit Control Panel can also be accessed by double clicking the Summit icon in the taskbar or on the desktop The Certs option displays a readme file containing details o...

Страница 56: ...ar Advanced tab Note HX3 applications operating system settings and control panels can be viewed and edited updated using LXEConnect and ActiveSync on a host computer cabled to the HX3 General Tab Advanced Tab Expand Control Panel Tap the check box to have the Control Panel folders appear in drop down menu format from the Settings Control Panel menu option Clear Contents of Document Folder Tap the...

Страница 57: ...uter 3 Download the OS files from the desktop laptop to the HX3 System folder 4 During the file copy process to the HX3 System folder when asked Overwrite select Yes to All 5 Review the files that were downloaded to the System folder 6 Restart the HX3 7 Disconnect from ActiveSync 8 When the OS finishes loading check the OS update version by selecting Start Settings Control Panel About Software tab...

Страница 58: ...t the input and output parameters volume sidetone and record gain for headphone software and microphone Mouse page 5 38 Set the double tap sensitivity for stylus taps on the touch screen Network and Dialup Options page 5 39 Set network driver properties and network access properties Network Capture page 5 40 Set network logging options Owner page 5 43 Set the mobile device owner details name phone...

Страница 59: ...additional languages are built into the OS Japanese Simplified Chinese Traditional Chinese Korean The above listed Asian languages are ordered separately and built in to the OS image Built in languages are added to registry entries and are available immediately upon startup Thai Hebrew Arabic and Cyrillic Russian languages are available in the English only default extended fonts Identifying Softwa...

Страница 60: ...ain battery again Note Frequent connection to an external power source if feasible is recommended to maintain backup battery charge status as the backup battery cannot be recharged by a dead or missing main battery Backup Battery Maintenance Discharge and recharge the backup battery twice a year Use the Charge or Discharge buttons to charge and dis charge the backup battery To Charge Tap the Charg...

Страница 61: ...es trusted by the HX3 mobile device user These values may change based on the type of network security resident in the client access point or the host system Tap the Import button to import a digital certificate file Tap the View button to view a highlighted digital certificate Tap the Remove button to remove highlighted certificate files Tap the button and follow the instructions in the Windows C...

Страница 62: ...e activates a utility that will set the clock using a network time server Device Management Start Settings Control Panel Device Management Allows a Device Management client the device equipped with a Microsoft Windows CE operating system to work with a Microsoft Systems Management Server Specify the server name or IP address of management server and check the check box if a secure connection is to...

Страница 63: ...tings Control Panel Dialing Set dialup properties for internal modems not supplied or supported on the HX3 Setting Default Location Work Area Code 425 Tone Dialing Enabled Country Region 1 Disable Call Waiting Disabled blank ...

Страница 64: ...ve the changes Saved changes take effect immediately Background There is very little change from general desktop PC Display Properties Background options Select an image from the dropdown list or tap the Browse button to select an image from another folder to display on the Desktop and then tap the OK button to save the change The change takes effect immediately Setting Default Background tab Imag...

Страница 65: ... if desired Tap the Delete but ton to delete schemes Tap the Apply button to apply the selected scheme to the display Backlight The backlight settings use the default timeouts and is synchronized to the User Idle setting in the Schemes tab in the Power control panel When the backlight timer expires the touch screen backlight is dimmed not turned off When both checkboxes are unchecked the backlight...

Страница 66: ...dows folder on the mobile device to the host PC 2 Edit the copy of GrabTime ini on the host PC Add the local time server s domain name to the beginning of the list of servers You can optionally delete the remainder of the list 3 Copy the modified GrabTime ini file to the My Device System folder on the mobile device The System GrabTime ini file takes precedence over the Windows GrabTime ini file Sy...

Страница 67: ... including the display of the valid IP address 3 After the IP address is obtained the message window is displayed for one second and then removed 4 Launch completes its normal task path unpacking any remaining CAB files and completing any remaining tasks 5 If an IP address is not obtained within the specified timeout period see below Launch completes its normal task path The default is unchecked d...

Страница 68: ...rams Note This panel shows the programs installed in RAM View the list of installed programs No user interaction is required or allowed In some OS versions this panel replaces Remove Programs Note Contact Customer Support page 14 1 if installed programs must be deleted ...

Страница 69: ...y map dropdown list Only one font at a time can be selected The fonts affect the screen display they do not affect any virtual touch screen key taps Languages Loads are available in the following languages in separate part numbers for each language Simplified Chinese Tra ditional Chinese Korean Japanese Tahoma font is on every unit and includes English default European French Spanish German Portug...

Страница 70: ...e page 5 31 Remap a Key to a Key to a Sequence of Unicode Values page 5 32 Remap a Key to Launch an Application page 5 32 Remap a Key to Run a Command page 5 32 Note KeyPad Control Panel options LaunchApp and RunCmd do not inter relate with similarly named options contained in other Control Panel applets Setting Default KeyMap Modifier Mode None Key White Remap to Up Arrow Edit String Field Exit S...

Страница 71: ...nicode character is displayed in the right text box 5 Click OK to save the result and close the control panel Remap a Key to a Key Sequence Up to 16 keys may be specified for the key sequence The sequence can consist of keys and Unicode values 1 Select the modifier key from the Modifier Mode options 2 Select the key to be remapped from the Key pulldown list 3 Select Key Sequence from the Remapped ...

Страница 72: ...ure the EXE radio button is selected 6 In the text box App1 4 corresponding to the number selected for Launch App1 4 enter the application to launch 7 If any parameters are needed for the application click on the OPT radio button This clears the text box though the application name is saved Enter the desired parameters in the appropriate text box 8 Click OK to save the result and close the control...

Страница 73: ... the cursor in the text box next to the App you wish to run e g App1 App2 2 Enable the EXE radio button if the application is an EXE file 3 Enter the name of the executable file 4 Enable the OPT radio button to add options or parameters for the executable file in the same text box Switching from EXE to OPT clears the text box but the information previously entered is stored allowing parameter entr...

Страница 74: ...e mobile device is silent The Run Cmd command is defined for use by system administrators These instructions call the ShellExecuteEx API which opens documents directly 1 Place the cursor in the text box next to the Cmd you wish to run e g Cmd1 Cmd2 2 Enable the file radio button and enter the name of the file 3 Enable the PARM radio button to add parameters for file exe execution in the same text ...

Страница 75: ...te Following image is a sample screen Note Your License Viewer control panel may show more tabs e g RFTerm depending on the number of software applications running on the HX3 that require a license Contact Customer Support page 14 1 for software updates and releases as they become available Software and driver version information is located in the About control panel Copyright information is locat...

Страница 76: ...d gain and sidetone for microphone input speaker and speaker output Headsets can be enabled disabled and selected using these panels Output panel Tap and hold the Output sliders and move them either left or right or click the left and right arrows to adjust Speaker volume decibel level Setting Default Output tab Master Volume 10 5 dB 6db Output Boost Headset only Disabled Sidetone 12 0 dB Input ta...

Страница 77: ...Determines the microphone and audio output source used Auto default Automatically switch between internal microphone speaker when no cable is attached and external microphone headset when cable is attached depending on presence of audio cable Internal Internal speaker and microphone are enabled regardless of presence of audio cable External External speaker and microphone are enabled regardless of...

Страница 78: ...e Note The HX3 does not have a touch screen If the host computer has a touch screen instructions using tap and stylus instead of click and mouse apply Note Use this option to set the double tap sensitivity for stylus taps on the HX3 touch screen ...

Страница 79: ...y and stop bits remain at 8 none and 1 respectively 7 Under the Call Options tab be sure to turn off Wait for dial tone since a direct connection will not have a dial tone Set the timeout parameter default is 5 seconds Tap OK 8 TCP IP Settings should not need to change from defaults Tap the Finish button to create the new connection 9 Close the Remote Networking window 10 To activate the new conne...

Страница 80: ...Netlog is a Windows CE utility that monitors network traffic Netlog creates a CAP file that can be read using Microsoft Windows Network Monitor or any compatible tool that supports CAP files NDISLog monitors the NDIS interface between the Summit radio and the NDIS driver This utility creates a TXT log file Setting Default Netlog tab Command options pkt_size in bytes 5000 cap_size in bytes 500000 c...

Страница 81: ...e Commands list and click the Run cmd button 2 Select stop from the Commands list and click the Run cmd button 3 Select options from the Commands list enter the new packet size in the Options list and click the Run cmd button Command Function options Specifies the option to perform See the table below for the option parameters and values load Loads and starts Netlog start Starts the Netlog process...

Страница 82: ...ram that supports TXT files Command file Specifies the name of the file to which NDISLog information is stored Save File Stores the file name Run cmd Performs the selected start or stop command Command Function start Starts logging the network traffic stop Stops logging network traffic ...

Страница 83: ... is used when logging into a remote network Setting Default Identification tab Name Blank Company Blank Address Blank Telephones Blank Display owner ID at power on Disabled Notes tab Notes Blank Display notes at power on Disabled Network ID tab User Name Blank Password Blank Domain Blank ...

Страница 84: ...ettings Control Panel option is selected the user will be required to enter the password before the Control Panel will open The screen saver password is the same as the power on password They are not set independently A screen saver password cannot be created without first enabling the Enable password protection at power on check box The screen saver password is not automatically enabled when the ...

Страница 85: ...t connections check box disables ActiveSync on the HX3 Tap the Change Connection button to change the direct connect setting Tap the drop down box to view a list of pre configured connection settings Note The HX3 only supports the USB connection Do not change the connection type or the ability to connect with the HX3 may be lost Setting Default Enable direct connection Enabled Connect using USB Cl...

Страница 86: ...e System Idle timer begins the countdown after the User Idle timer has expired and the Suspend timer begins the count down after the System Idle timer has expired When the User Idle timer is set to Never the power scheme timers never place the device in User Idle System Idle or Suspend modes even when the device is idle The Display Backlight setting is synchronized with the User Idle setting in th...

Страница 87: ...5 47 ...

Страница 88: ...3 user inter face language and the default input language Setting Default Region Locale English United States Number 123 456 789 00 123 456 789 00 neg Currency 123 456 789 00 pos 123 456 789 00 neg Time h mm ss tt tt AM or PM Date M d yy short dddd MMMM dd yyyy long Language User Interface English United States Input Language English United States US Installed English United States US ...

Страница 89: ...The Installed Programs panel does not allow any user interaction Select a program and tap Remove Follow the prompts on the screen to uninstall HX3 user installed only programs The change takes effect immediately Files stored in the My Documents folder are not removed using this option Note Do not remove installed programs using this option Contact Customer Support page 14 1 if installed programs m...

Страница 90: ...e cannot be changed by the user Total computer memory and the identification of the registered user is listed and cannot be changed by the user Memory sizes given do not include memory used up by the operating system For example a system with 128 MB may only report 99 MB memory since 29 MB is used by the operating system This is actual DRAM memory and does not include internal flash used for stora...

Страница 91: ...the amount of program memory Device Name Tab The device name and description can be changed by the user Enter the name and description using either the keypad or the Input Panel and tap OK to save the changes This information is used to identify the HX3 to other computers and devices Copyrights Tab This screen is presented for information only The Copyrights information cannot be changed by the us...

Страница 92: ...pt of data from the scanner triggers a good scan beep from a tethered scanner and then the rejection of scanned bar code data by the bar code processing causes a bad scan beep from the mobile device on the same data Good Scan and Bad Scan Sounds Good scan and bad scan sounds are stored in the Windows directory as SCANGOOD WAV and SCANBAD WAV These are unprotected WAV files and can be replaced by a...

Страница 93: ... Bluetooth devices are discovered paired connected and disconnected There may be audible or visual signals as paired devices re connect with the HX3 The default Bluetooth setting is On The HX3 cannot be discovered by other Bluetooth devices when the Computer is discoverable option is disabled unchecked on the Settings panel Setting Default Discovered Devices None Settings Turn off Bluetooth Enable...

Страница 94: ...ossible up to 32 8 ft 10 meters Line of Sight to the HX3 during the pairing process Assumption The System Administrator has Discovered and Paired targeted Bluetooth devices for the HX3 The HX3 operating system has been upgraded to the revision level required for Bluetooth client operation An application or API is available that will accept data from serial Bluetooth devices HID Human Interface Dev...

Страница 95: ... Bluetooth devices in the vicinity The Discovery process also queries for the unique identifier of each device discovered Stop Button Tap Stop at any time to end the Discover and Query for Unique Identifier functions Devices not paired are not shown after any reboot sequence When an active paired device enters Suspend Mode is turned Off or leaves the HX3 Bluetooth scanning range the Blue tooth con...

Страница 96: ... a red background indicates the device s Bluetooth connection is inactive An icon with a white background indicates the device is connected to the HX3 and the device s Bluetooth connection is active Double tap a device in the list to open the device properties menu The target device does not need to be active Clear Button Deletes all devices from the Device table that are not currently paired A di...

Страница 97: ...icate with the highlighted HID Human Interface Device This option is available when Filtered Mode is disabled unchecked Pair as PAN Device PANU to NAP Communicate with the highlighted PAN Personal Area Networking device This option is available when Filtered Mode is disabled unchecked Pair as DUN Device Communicate with the highlighted DUN Dial Up Networking device This option is available when Fi...

Страница 98: ... default even when the HX3 is viewed with LXEConnect The dialog pop ups may be enabled for viewing with a remote management tool such as LXE Connect However to preserve battery life the dialog pop ups should be turned off when the HX3 is not being viewed with a remote management utility These options can still be checked or unchecked whether Bluetooth connection is enabled or disabled Turn Off Blu...

Страница 99: ... default Determines whether the Bluetooth client discovers and displays all serial Blue tooth devices in the vicinity Filtered Mode is disabled unchecked or the discovery result displays Bluetooth scan ners and printers only Filtered Mode is enabled checked When Filtered Mode is disabled the HX3 can pair with up to four Bluetooth devices with a limit of one Bluetooth scanner one Bluetooth printer ...

Страница 100: ... paired Bluetooth devices has resumed Tap the ok button to remove the dialog box from the screen Report failure to reconnect This option is Disabled by default The default time delay is 30 minutes This value cannot be changed by the user There may be an audio or visual signal when a connection between a paired active device fails to re con nect A visual signal may be a dialog box placed on the dis...

Страница 101: ...table is cleared on boot The status of Auto Reconnect on Boot is ignored and the option is automatically disabled unchecked and dimmed OPP Setup Panel Use this screen to setup the HX3 for Object Push Protocol OPP Inbox This is an alphanumeric field displaying the currently selected Inbox The Inbox is the location where files pushed to the HX3 from a remote client are stored Use the browse button t...

Страница 102: ...mmed OPP Send Panel If LXEZ Pairing OPP is disabled no file names or OPP servers are displayed on this tab These areas are grayed out Sim ilarly the buttons on this tab are also inactive when LXEZ Pairing OPP is disabled Send Selected File From Outbox This area displays the file listing from the currently selected Outbox All files are shown The most recently pushed file is highlighted assuming tha...

Страница 103: ... Bluetooth module is designed to Discover and pair with nearby Blue tooth devices Prerequisite The Bluetooth devices have been setup to allow them to be Discovered and Connected Paired The System Administrator is familiar with the pairing function of the Bluetooth devices Bluetooth Devices Display Before Discovering Devices When Filtered Mode is enabled only LXE Bluetooth printers or Bluetooth sca...

Страница 104: ...er function at any time 4 The discovered devices are listed in the Bluetooth Devices window 5 Highlight a Bluetooth device in the Discovered window and double tap to open the device properties menu 6 Tap Pair as Scanner to set up the HX3 to receive scanner data 7 Tap Pair as Printer to set up the HX3 to send data to the printer 8 Tap Serial Device when Filtered mode is disabled to set up the HX3 t...

Страница 105: ... the HX3 may be in a powered cradle or cabled to AC DC power Important The bar code numbering examples in this segment are not real and should not be created or scanned with a Bluetooth scanner To open the LXEZ Pairing program tap Start Settings Control Panel Bluetooth or tap the Bluetooth icon on the desktop or tap the Bluetooth icon in the taskbar Locate the bar code label similar to the one sho...

Страница 106: ...luetooth mobile device the devices are currently paired HX3 without Label If the HX3 Bluetooth address bar code label does not exist follow these steps to create a unique Bluetooth address bar code for the HX3 First locate the HX3 Bluetooth address by tapping Start Settings Control Panel Bluetooth About tab Next create a Bluetooth address bar code label for the HX3 Free bar code creation software ...

Страница 107: ... available on the manufacturer s web site Contact Customer Support page 14 1 for Bluetooth product assistance If there is no beep or no LED flash from the Bluetooth managed printer the HX3 and the printer are currently paired Easy Pairing and Auto Reconnect The Bluetooth module can establish relationships with new devices after the user taps the Discover button It can auto reconnect to devices pre...

Страница 108: ...box LXEZ Pairing saves the new file as file001 jpg If the same file is pushed again it is saved as file002 jpg There are several scenarios based on configuration options on the OPP Setup tab Notifications enabled HX3 is Write Capable 1 The OPP client initiates a connection to the HX3 by selecting a file to push to the HX3 2 The HX3 user is notified that a File Push request has been issued from a r...

Страница 109: ...h LXEZ Pairing and External Application Because only one application can use the OPP service at a time external applications that wish to use OPP should disable LXEZ Pairing OPP before using the OPP service and restore LXEZ Pairing OPP upon completion using available API calls see the CE API Programming Guide for details These API calls are the equivalent of checking or unchecking the Disable LXEZ...

Страница 110: ...6 18 ...

Страница 111: ...5 Ring Scanner The BTRS module is configured by scanning the bar codes in the 8650 Bluetooth Ring Scanner User s Guide Return to Factory Default Settings When using any bar code reader to scan the Reset All or equivalent bar code with the HX3 s ring decoder the next step is to open the Scanner applet on the HX3 click the OK button and then close it This action will synchronize all scanner formats ...

Страница 112: ...aults to Bluetooth and Port 2 defaults to Ring when a Bluetooth enabled HX3 with ring scanner imager is powered On Output Default Disabled When Output is enabled data is received from the scanner and processed via the wedge but an applica tion can also open the WDG0 device and write data to it An example is when a printer is connected to the same COM port as the scanner via a switch Data can be wr...

Страница 113: ...etrieving the bar code data Man Single Scan mode is on The scanner is disabled after a scan and the user application must call LXEScannerSSReset to re enable the scanner See the CE API Programming Guide for more details This option is only supported on Symbol Motorola internal and BTRS scanners The scanner may require a firmware upgrade to support this feature Imager LED Illumination The default s...

Страница 114: ...d set the minimum and maximum size bar code to accept strip Code ID strip data from the beginning or end of a bar code or based on configurable Barcode Data add a prefix or suffix to a bar code before transmission Ctrl Char Mapping Define the operations the Wedge performs on control characters values less than 0x20 embedded in bar codes Custom Identifiers Defines an identifier that is at the begin...

Страница 115: ... the Symbology listing includes all Custom Code IDs Select this option to enable processing of bar codes with a custom Code ID Notes When Strip Code ID see Symbology panel is not enabled the code ID is sent as part of the bar code data to an application When Strip Code ID see Symbology panel is enabled the entire Code ID string is stripped i e treated as a Code ID UPC EAN Codes only The code id fo...

Страница 116: ...fy the cus tom Code ID in a user friendly manner Both Name and ID Code must be specified in order to add a custom Code ID to the Custom IDs list ID Code text box ID Code defines the data at the beginning of a bar code that acts as an identifier the actual Code ID Both Name and ID Code must be specified in order to add a custom Code ID to the Custom IDs list Buttons Add Entering data into both the ...

Страница 117: ...er Start of TeXt STX 0x02 in a bar code is con verted to the text STX Hat encoded text The hat encoded text is translated to the equivalent hex value Carriage Re turn M Value 0x0d in a bar code is converted to the value 0x0d Escaped hat en coded text The hat encoding to pass through to the application Horizontal Tab I Value 0x09 in a bar code is converted to the text I Hex encoded text The hex enc...

Страница 118: ...ame data Bar Code Symbology Raw Scanner Data Resulting Data EAN 128 C11234567890123 bbb1234567890xxx EAN 128 C111234567890123 bbb11234567890xxx EAN 128 C1123 rejected too short EAN 13 E01234567890987 ccc E04567890yyy EAN 13 E01231234567890987 ccc E0234567890yyy EAN 13 E01234 ccc E0yyy I2 5 I04444567890987654321 rejected too long I2 5 I04444567890123 ddd7890zzz I2 5 I0444 dddzzz I2 5 I022245622 ddd...

Страница 119: ...control code which has a keystroke equivalent enter tab escape backspace etc is output as a keystroke Any control code without a keystroke equivalent is dropped Character This is a drop down combo box that contains the control character name Refer to the Character drop down box for the list of control characters and their names When a character name is selected from the drop down box the default t...

Страница 120: ...figurable Barcode Data add a prefix or suffix to a bar code The Symbology drop down box contains all symbologies supported on the HX3 An asterisk appears in front of symbolo gies that have already been configured or have been modified from the default value Each time a Symbology is changed the settings are saved as soon as the OK button is clicked Settings are also saved when a new Symbology is se...

Страница 121: ...code data if the symbology is disabled the bar code is rejected Otherwise the other settings in the dialog are applied and the bar code is processed If the symbology is disabled all other fields on this dialog are grayed When there are no customized symbology settings and the Enable check box is unchecked while All is selected a warning message is displayed Click the Yes button or the No button Cl...

Страница 122: ...ed in the Enable Code ID field in the Barcode tab By default Code ID stripping is enabled for all symbologies meaning code IDs will be stripped unless specifically configured otherwise Bar Code Data Match List The Barcode Data panel is used to strip data that matches the entry in the Match list from the bar code Enter the data to be stripped in the text box and tap the Insert or Add button The ent...

Страница 123: ...owed The User Interface will not prevent it but results would not be as expected as only the first is used in parsing to match the string The question mark wildcard may be used to match any single character in the incoming data For example the data AB D will match ABCD ABcD or AB0D but not ABDE The Barcode Data is saved per symbology configured The Symbology selected in the Symbologies dialog defi...

Страница 124: ...ol symbology role can be created for the desired bar code ID Next a custom bar code symbology must be created using the same Code ID as the original AIM or Symbol ID rule and each rule would have unique length settings Example 2 For the purposes of this example the following sample bar code parameters will be used EAN 128 and Code 128 bar codes Some of the bar codes start with 00 and some start wi...

Страница 125: ... the AIM custom symbologies Refer to the previous section Bar Code Symbology Settings for instruction Click the Barcode Data button Click the Add button Add the data for the match codes Refer to the previous section Bar Code Data Match List page 7 12 for instruction Scan a bar code and examine the result ...

Страница 126: ...7 16 Hat Encoding ...

Страница 127: ...7 17 ...

Страница 128: ...7 18 ...

Страница 129: ...the Avalanche Enabler installation files loaded but not installed on the mobile device when it is shipped The installation files are located in the System folder on Windows devices Note Important If the user is NOT using Wavelink Avalanche to manage their mobile device s the Enabler should not be installed on the mobile device s Doing so results in unnecessary delays when booting the device The Av...

Страница 130: ...tween the Mobile Device Server PC and the HX3 Wirelessly via the HX3 2 4GHz radio and an access point After installing the Enabler on the HX3 the Enabler searches for a Mobile Device Server first by polling all available serial ports and then over the wireless network The Enabler running on the HX3 will attempt to access COM1 COM2 and COM3 Agent not found will be reported if the Mobile Device Serv...

Страница 131: ... should be about 45MB for a standard OS 55 MB for an Asian font OS 2 Use the Wireless Configuration Application WCA when you want to remotely manage the Summit client device This utility is downloaded and installed in addition to the Remote Management Utility The WCA is included when the Summit radio driver software is updated The WCA is automatically installed when the radio driver is updated If ...

Страница 132: ...ed in the Program Files RMU folder When VersionInfo EXE is opened a dialog box is presented to the HX3 user displaying Remote Management Utility RMU version Wireless Configuration Application WCA version VersionInfo displays the version for each utility only after that utility has been executed at least once User Interface The Enabler can be configured and controlled manually through the user inte...

Страница 133: ... initiate a manual connection to the Mobile Device Server The connection methods by default are wireless and COM connections Any updates available will be applied to the HX3 immediately upon a successful connection Scan Config The Scan Configuration feature is not supported The Scan Config option under the File menu allows the user to configure Enabler settings using a special bar code that can be...

Страница 134: ...ted by the user Taskbar page 8 12 Set options for Taskbar If the Taskbar tab is not present you may have an older version of the Enabler with the Startup Shutdown tab Execution page 8 13 Not available in this release Scan Config page 8 14 This option allows the user to configure Enabler settings using a special bar code that is created by the Avalanche MC Console Scan Config not currently supporte...

Страница 135: ... port connection to the Mobile Device Server before checking for a wireless connection to the Mobile Device Server Disable ActiveSync Disable ActiveSync connection with the Mobile Device Server Restrict Adapter Link Speed Default is disabled Minimum Link Speed dimmed When enabled the Enabler only allows a connection to the server if the detected link speed is greater than or equal to the specified...

Страница 136: ... Device Server when the device is connected to an external power source such as based on a docking event Contact Periodically Periodic Update Allows the administrator to configure the Enabler to contact the Mobile Device Server and query for updates at a regular interval beginning at a specific time Wakeup device if suspended If the time interval for periodic contact with the Mobile Device Server ...

Страница 137: ...ver Retransmit After Server Contact Specifies if the device sends statistics to the Mobile Device Server immediately following a connection to the server Restrict Bandwidth to User Idle Time When enabled periodic updates from the Mobile Device Server are postponed until the HX3 has been idle for the specified period of time The default is disabled Idle timeout Specify the length of time the device...

Страница 138: ...pt to connect to the Mobile Device Server and process any updates that are available Launch the Enabler application Shutdown Behavior of the monitor when the Enabler is exited The default is Monitor for Updates Monitor for Updates Attempt to connect to the Mobile Device Server and process any updates that are available Do not launch the Enabler application Exit Application Terminates the monitor r...

Страница 139: ... Warning Possible operation problems are displayed in addition to those above Info Operational information is displayed in addition to those above Debug The most detailed list is displayed Display The user interface for the Enabler can be configured to dynamically change based on the status of the HX3 connection with the Mobile Device Server At startup Default is Half Screen Options are Half scree...

Страница 140: ...talled on your device see the equivalent options on the Startup Shutdown page 8 21 tab The Display State options control the appearance of the taskbar while using the Enabler interface Normal taskbar is visible taskbar icons function normally Hidden taskbar is not displayed Locked taskbar is visible but most icons are hidden or for information only ...

Страница 141: ...p Auto Execute Selection An application that has been installed with the Avalanche Management system can be run automatically following each boot Select Auto Execute App The drop down box provides a list of applications that have been installed with the Avalanche Management System Delay before execution Time delay before launching Auto Execute application ...

Страница 142: ... use eXpress Config and eXpress Scan for this function eXpress Scan is included with the updated HX3 enablers Scan Config functionality is a standard option of the Wavelink Avalanche MC system but is not currently supported on the HX3 ...

Страница 143: ...on AppLock is not available for the HX3 Configure shortcuts to other applications on the HX3 Shortcuts are viewed and activated in the Programs panel This limits the user s access to certain applications when the Enabler is controlling the mobile device display ...

Страница 144: ...elow assumes the user has registered with Wavelink Disable SaaS No SaaS connection is used Scan Configure SaaS Scan bar codes printed from within the Avalanche Console to configure the Enabler for the SaaS connection Manually Configure SaaS Manually enter the SaaS connection information Enter the server address on the Connection tab and the customer ID in the Company text box ...

Страница 145: ...Summit clients Manage Wireless Settings should not be checked as configuration packages provide more radio configuration options Current Adapter Lists all network adapters currently installed on the HX3 Primary Adapter Indicates if the Enabler is to attempt to configure the primary adapter active only if there are multiple network adapters Icon on taskbar Places the Avalanche icon in the Avalanche...

Страница 146: ... Console and use only the network settings on the HX3 Properties Icon Selecting the Properties icon displays the Manual Settings Properties dialog applet From here the user can configure Network DNS and Wireless parameters using the displays shown below Note A reboot may be required after enabling or disabling these options ...

Страница 147: ...t is configured to manage network and wireless settings the Enabler will not apply the manage network and wireless settings to the adapter unless the global Manage wireless settings and Manage network settings options are enabled on the Adapters panel Until these options are enabled the network and wireless settings are controlled by the third party software associated with these settings ...

Страница 148: ...en the Windows Refresh button is tapped the signal strength signal quality and link speed are refreshed for the currently selected adapter It also searches for new adapters and may cause a slight delay to refresh the contents of the drop down menu Link speed indicates the speed at which the signal is being sent from the adapter to the HX3 Speed is dependent on signal strength ...

Страница 149: ...empt to connect to the Mobile Device Server and process any updates that are available Do not launch the Enabler application Monitor and launch Enabler Attempt to connect to the Mobile Device Server and process any updates that are available Launch the Enabler application Manage Taskbar Lock or Hide Note the dimmed options The Enabler can restrict user access to other applications when the user in...

Страница 150: ... Avalanche MC Console connected to that Mobile Device Server identifies the remote device and performs a sync This downloads any available packages available for the HX3 Using eXpress Scan If the HX3 has an eXpress Scan icon on the desktop eXpress Scan may be used for the initial configuration of the device If the eXpress Scan icon is not present on the desktop install the Enabler If the icon is s...

Страница 151: ... is displayed in the Data text box The password if any entered above is compared to the password entered when the bar codes were created 5 If the passwords match the bar code data is processed and the screen is updated to reflect the number of bar codes included in the set 6 If the passwords do not match an error message is displayed The current screen can be closed using the X box in the upper ri...

Страница 152: ... Remaining list and placed in the Scanned list Step 3 Process Completion After the last bar code is scanned the settings are automatically applied Once configured the HX3 is warmbooted Once connected to the wireless network and the Mobile Device Server any software updates and additional configuration data are downloaded ...

Страница 153: ...ent Utility using the Start button or tap the Summit Tray Icon if present The Main Tab page 9 3 provides information admin login and active profile selection Profile specific parameters are found on the Profile Tab page 9 5 The parameters on this tab can be set to unique values for each profile This tab was labeled Config in early versions of the SCU The Status Tab page 9 9 contains information on...

Страница 154: ...urity features of the radio it is recommended to use the Summit Client Utility to connect to your network Using the Wireless Zero Config Utility 1 Select ThirdPartyConfig in the Active Profile drop down list as the active profile 2 Warmboot the device The Summit Client Utility passes control to Wireless Zero Config and the WZC Wireless Information control panel Using the options in the Wireless Ze...

Страница 155: ... edited after the Admin login password has been entered and accepted When the profile named ThirdPartyConfig is chosen as the active profile the Summit Client Utility passes control to Windows Zero Config for configuration of all client and security settings for the network module The Disable Radio button can be used to disable the network card Once disabled the button label changes to Enable Radi...

Страница 156: ...o the profiles listed under Auto Profile The search continues until the SCU connects to and if necessary authenticates with one of the specified profiles or the Off button is clicked to turn off Auto Profile Note Do not include any profiles with an Ad Hoc Radio Mode in this listing Admin Login To login to Administrator mode tap the Admin Login button Once logged in the button label changes to Admi...

Страница 157: ...e 9 11 Enable disable the Summit tray icon in the taskbar Profile Tab Note Tap the Commit button to save changes before leaving this panel or the SCU If the panel is exited before tapping the Commit button changes are not saved When logged in as an Admin use the Profile tab to manage profiles When not logged in as an Admin the parameters can be viewed and cannot be changed The buttons on this tab ...

Страница 158: ...ting their SSIDs Tap the Refresh button to view an updated list of APs Each AP s SSID its received signal strength indication RSSI and whether or not data encryption is in use true or false Sort the list by tapping on the column headers If the scan finds more than one AP with the same SSID the list displays the AP with the strongest RSSI and the least security If you are logged in as an Admin tap ...

Страница 159: ... 50mW 30mW 20mW 10mW 5mW or 1mW Bit Rate Auto Setting the rate to Auto will allow the Access Point to automatically negotiate the bit rate with the client device Options are Auto 1 Mbit 2 5 5 6 9 11 12 18 24 36 48 or 54 Mbit Auth Type Open 802 11 authentication type used when associating with the Access Point Options are Open LEAP or Shared key EAP Type None Extensible Authentication Protocol EAP ...

Страница 160: ... Rates Full All A rates and all B and G rates with A rates preferred BGA Rates Full All B and G rates and all A rates with B and G rates preferred Ad Hoc when connecting to another client device instead of an AP Default BG Rates Full for 802 11b g radios BGA Rates Full for 802 11a b g radio BG radio only Previous SCU versions may have the default set as BG Rates Full Depending on the SCU version e...

Страница 161: ...omicroseconds one kilomicrosecond 1 024 microseconds DTIM interval A multiple of the beacon period that specifies how often the beacon contains a delivery traffic indication message DTIM The DTIM tells power saving devices a packet is waiting for them For example if DTIM 3 then every third beacon contains a DTIM Signal strength RSSI displayed in dBm and graphically Signal quality a measure of the ...

Страница 162: ...to the IP address specified in the text box to the right of this button Once the button is clicked the ping begins and the button label changes to Stop Ping Clicking the button ends the ping The ping also ends when any other button on this screen is clicked or the user browses away from the Diags tab The results of the ping are displayed in the Diagnostic Output box Diagnostics Also attempts to re...

Страница 163: ...am Trigger 65 dBm Roam Delta 5 dBm Roam Period BG 10 sec A 5 sec BG Channel Set Full DFS Channels Off Ad Hoc Channel 1 Aggressive Scan On CCX Features BG Off A Optimized WMM Off Auth Server Type 1 TTLS Inner Method Auto EAP PMK Caching Standard WAPI Off dimmed TX Diversity BG On A Main Only RX Diversity BG On Start on Main A Main Only Frag Threshold 2346 RTS Threshold 2347 LED Off Tray Icon On Hid...

Страница 164: ...s Point signal strength must exceed the current Access Point signal strength before roaming to the different Access Point is attempted Options are 5 dBm 10 15 20 25 30 35 dBm or Custom Roam delta dBm may vary by SCU revision Roam Period BG 10 sec A 5 sec The amount of time after association or a roam scan with no roam that the radio collects Received Signal Strength Indication RSSI scan data befor...

Страница 165: ... the default value Devices running all other OS cannot change the default value Auth Server Type 1 Specifies the type of authentication server Options are Type 1 ACS server and Type 2 non ACS server TTLS Inner Method Auto EAP Authentication method used within the secure tunnel created by EAP TTLS Options are AUTO EAP Any available EAP method MSCHAPV2 MSCHAP PAP CHAP EAP MSCHAPV2 PMK Caching Standa...

Страница 166: ...e questions about the antenna s installed in your HX3 Frag Thresh 2346 If the packet size in bytes exceeds the specified number of bytes set in the fragment threshold the packet is fragmented sent as several pieces instead of as one block Use a low setting in areas where communication is poor or where there is a great deal of wireless interference Options are Any number between 256 bytes and 2346 ...

Страница 167: ...ws certificates store Ensure the Windows folder path currently exists before assigning the path in this parameter See Certificates page 9 32 for instructions on obtaining CA and User Certificates Options are none For example when the valid certificate is stored as My Computer System MYCERTIFICATE CER enter System in the Certs Path text box as the Windows folder path Ping Payload 32 bytes Maximum a...

Страница 168: ... manual PAC provisioning input the PAC filename and password 11 Click the OK button then the Commit button 12 If changes are made to the stored credentials click Commit to save those changes before making any additional changes to the profile or global parameters 13 Verify the device is authenticated by reviewing the Status tab When the device is property configured the Status tab indicates the de...

Страница 169: ...2 If a user enters invalid credentials and clicks OK the device associates but does not authenticate The user is again prompted to enter credentials If the user clicks the Cancel button the device does not associate The user is not prompted again for credentials until the device is rebooted the radio is disabled then enabled the Reconnect button on the Diags Tab is clicked or the profile is modifi...

Страница 170: ...for Certs Path is System A different location may be specified by using the Certs Path global variable Note the location chosen for certificate storage should persist after a reboot 3 When completing the Credentials screen for the desired authentication do not check the Use MS store check box after checking the Validate server check box 4 Enter the certificate name in the CA Cert text box 5 Click ...

Страница 171: ...wing section determined by network security type and click the Commit button to save the changes IMPORTANT Remember to click the Commit button after making changes to ensure the changes are saved Many versions of the SCU display a reminder if the Commit button is not clicked before an attempt is made to close or browse away from the tab in focus if there are unsaved changes If changes are made to ...

Страница 172: ...t Auth Type to Open 12 Click the WEP keys PSKs button 13 Valid keys are 10 hexadecimal or 5 ASCII characters for 40 bit encryption or 26 hexadecimal or 13 ASCII characters for 128 bit encryption Enter the key s and click OK 14 Once configured click the Commit button 15 Ensure the correct Active Profile is selected on the Main tab and warmboot The SCU Main tab shows the device is associated after t...

Страница 173: ...P is configured for network EAP only set the Auth Type radio parameter to LEAP 19 See Sign On vs Stored Credentials page 9 16 for information on entering credentials 20 To use Stored Credentials click on the Credentials button No entries are necessary for Sign On Credentials as the user will be prompted for the Username and Password when connecting to the network 21 22 Enter the Domain Username if...

Страница 174: ...tials button No entries except the CA Certificate Filename are necessary for Sign On Credentials as the user will be prompted for the User Name and Password when connecting to the network For Stored Credentials User Password and the CA Certificate Filename must be entered 8 Enter these items as directed below 9 Enter the Domain Username if the Domain is required otherwise enter the Username 10 Ent...

Страница 175: ...lect the desired certificate and click Select You are returned to the Credentials screen If using the Certs Path option 1 Leave the Use MS store box unchecked 2 Enter the certificate filename in the CA Cert text box 3 Click OK then click Commit 4 The device should be authenticating the server certificate and using PEAP MSCHAP for the user authentication 5 Ensure the correct Active Profile is selec...

Страница 176: ...ntering credentials 7 Click the Credentials button No entries except the CA Certificate Filename are necessary for Sign On Credentials as the user will be prompted for the User Name and Password when connecting to the network 8 Enter these items as directed below 9 Enter the Domain Username if the Domain is required otherwise enter the Username 10 Enter the password 11 Leave the CA Certificate Fil...

Страница 177: ...ult is to use the Full Trusted Store 2 To select an individual certificate click on the Browse button 3 Uncheck the Use full trusted store check box 4 Select the desired certificate and click Select You are returned to the Credentials screen If using the Certs Path option 1 Leave the Use MS store box unchecked 2 Enter the certificate filename in the CA Cert text box 3 Click OK then click Commit 4 ...

Страница 178: ...nother encryption type select WPA CCKM WPA2 AES or WPA2 CCKM for encryption and complete other entries as detailed in this section 6 See Sign On vs Stored Credentials page 9 16 for information on entering credentials 7 To use Stored Credentials click on the Credentials button No entries are necessary for Sign On Credentials as the user will be prompted for the Username and Password when connecting...

Страница 179: ...ilename is autoP 00 pac For manual PAC provisioning the PAC filename and Password must be entered To use EAP FAST make sure the following profile options are used 1 Enter the SSID of the Access Point assigned to this profile 2 Set EAP Type to EAP FAST 3 Set Encryption to WPA TKIP 4 Set Auth Type to Open 5 To use another encryption type select WPA CCKM WPA2 AES or WPA2 CCKM for encryption and compl...

Страница 180: ...assword 12 To use Automatic PAC Provisioning no additional entries are required 13 To use manual PAC Provisioning Enter the PAC Filename and PAC Password The PAC file must be copied to the directory specified in the Certs Path global variable The PAC file must not be read only 14 Tap OK then click the Commit button 15 Ensure the correct Active Profile is selected on the Main tab and warmboot The S...

Страница 181: ...e Filename and the CA Certificate Filename are necessary for Sign On Credentials as the user will be prompted for the User Name when connecting to the network For Stored Credentials User Certificate Filename and the CA Certificate Filename must be entered 8 Enter these items as directed below 9 Enter the Domain Username if the Domain is required otherwise enter the Username 10 Select a user certif...

Страница 182: ...n individual certificate click on the Browse button 3 Uncheck the Use full trusted store check box 4 Select the desired certificate and click Select You are returned to the Credentials screen If using the Certs Path option 1 Leave the Use MS store box unchecked 2 Enter the certificate filename in the CA Cert text box 3 Click OK then click Commit The HX3 should be authenticating the server certific...

Страница 183: ...ion to WPA PSK or WPA2 PSK 4 Set Auth Type to Open 5 Click the WEP keys PSKs button 6 This value can be 64 hex characters or an 8 to 63 byte ASCII value Enter the key and click OK 7 Once configured click the Commit button 8 Ensure the correct Active Profile is selected on the Main tab and warmboot The SCU Main tab shows the device is associated after the radio connects to the network ...

Страница 184: ...are necessary for EAP TLS 1 See Generating a User Certificate page 9 36 and download the User Certificate and Private Key file to a host computer 2 Connect the HX3 to the host computer using ActiveSync and copy the certificate and private key file to the HX3 System folder 3 See Installing a User Certificate page 9 41 and install the User Certificate and Private Key file 4 After installation perfor...

Страница 185: ...9 33 3 Click the Download a CA certificate certificate chain or CRL link 4 Make sure the correct root CA certificate is selected in the list box ...

Страница 186: ... 6 To download the CA certificate click on the Download CA certificate link 7 Click the Save button and save the certificate Make sure to keep track of the name and location of the certificate 8 Install the certificate on the HX3 ...

Страница 187: ...folder or other path specified in the Summit Certs global parameter 1 Copy the certificate file to the HX3 Import the certificate by navigating to Start Control Panel Certificates 2 Tap the Import button 3 Make sure From a File is selected and tap OK 4 5 Using the explorer buttons browse to the location where you copied the certificate select the certificate desired and tap OK ...

Страница 188: ...avigate to the Certificate Authority To request the user certificate open a browser to http CA IP address certsrv Sign into the CA with the username and password of the person who will be logging into the mobile device 8 This process saves a user certificate and a separate private key file Windows CE equipped devices such as the HX3 require the private key to be saved as a separate file rather tha...

Страница 189: ...9 37 9 Click the Request a certificate link 10 Click on the advanced certificate request link ...

Страница 190: ...9 38 11 Click on the Create and submit a request to this CA link ...

Страница 191: ...tificate Template select User 13 Check the Mark keys as exportable and the Export keys to file check boxes 14 Type the full path on the local PC where the private key is to be copied Also specify the private key filename ...

Страница 192: ...ple USER CER 16 DO NOT check to use strong private key protection 17 Make any other desired changes and click the Submit button 18 If any script notifications occur click the Yes button to continue the certificate request 19 When prompted for the private key password Click None if you do not wish to use a password or Enter and confirm your desired password then click OK ...

Страница 193: ...ng this process 22 Be sure use the same name for the certificate file as was used for the private key file For example it the private key was saved as USER PVK then the certificate file created must be given the same name for example USER CER 23 Install the user certificate Installing a User Certificate 1 Copy the certificate and private key files to the HX3 2 Import the certificate by navigating ...

Страница 194: ...n list 4 Tap the Import button 5 Make sure From a File is selected and tap OK 6 Using the explorer buttons browse to the location where you copied the certificate 7 Select the certificate desired and tap OK 8 The certificate is now shown in the list ...

Страница 195: ...f the private key is not present import the private key 11 To import the private key tap OK to return to the Certificates screen 12 Tap import 13 Using the explorer buttons browse to the location where you copied the private key file change the Type pull down list to Private Keys select the certificate desired and tap OK Enter the password for the certificate if appropriate ...

Страница 196: ...separate private key file as shown earlier in this section If the certificate was not generated with a separate private key file generate a new certificate and follow the import process again Note Make sure the certificate and private key file have the same name for example USER CER for the certificate and USER PVK for the private key file If the file names are not the same rename the private key ...

Страница 197: ...a host computer running LXEConnect when a full keyboard is needed for example during system configuration To Get this Key Function Press These Keys in This Order Power Suspend Power Red key Volume Up Blue key White key Volume Down Blue key Green key Enter Yellow key Up Arrow White key Down Arrow Green key Blue Mode Toggle Blue key Diamond Key Blue key Yellow key ...

Страница 198: ...10 2 ...

Страница 199: ...eypad data entries can be mixed with ring scanner bar code data entries while the HX3 is docked in the cradle The HX3 can be either On or in Suspend Mode while in the cradle Power must be applied to the cradle before any battery bay or docking bay charging can commence Wireless host client communications can occur when the cradle is receiving external power and the HX3 is docked in a powered cradl...

Страница 200: ...tery charging bays 9 Insert a spare battery in the remaining battery charging bay at the back of the cradle if desired 10 The B1 and B2 LEDs illuminate as soon as a battery is inserted in a charging bay 11 Connect USB cables at the front of the cradle if desired 12 Press the Power button on the HX3 The cradle PWR LED illuminates The fully loaded cradle is ready for use Extreme ambient temperatures...

Страница 201: ...rging terminals in each charging bay Note When a battery pack is not in use lay the battery pack contact side up in a protected environment When feasible protect the battery from ESD and contamination Any dust or moisture that adheres to the tether connector can potentially cause damage upon cable re connection Standard Battery Extended Battery Battery Charge Contact Description Pin Power Positive...

Страница 202: ...cord set In both cases connect the external power supply 2 prong end to a source of power provided with maximum 15 Amp over cur rent protection 10 Amp for 230V circuits 1 Firmly press the cradle end L shaped 5mm barrel connector of the power cable into the power connector on the back of the cradle 2 Firmly press the C8 2 female end of the power cable into the two male connector pins on the power a...

Страница 203: ... source before HX3 battery charging can begin USB Cable The cradle provides 5V to the USB Host connector 0 5A to allow interfacing with an external USB keyboard or USB point ing device through the cradle USB Client connections do not receive power through the cradle The USB ports are located on the front of the desktop cradle Requires Cable Type USB A Host e g scanner USB B Client e g Activesync c...

Страница 204: ...wer capability The desktop cradle can not support tethered scanners Indicators The LEDs may flicker between green amber and red upon the cradle first receiving external power This is normal The cradle is performing a self check and upon completion the LEDs will return to their normal state see below Pin Signal 1 Not Connected 2 RXD 3 TXD 4 Not Connected 5 Ground 6 Not Connected 7 RTS 8 CTS 9 Not C...

Страница 205: ... HX3 in the charging bay and or HX3 is not properly seated in charging bay and or if this is the first time the HX3 has been inserted the HX3 is properly seated and has not been powered On Green HX3 is On is properly seated in the charging bay and is receiving external power through the cradle When B1 and or B2 LED is It means Off No battery or no AC power No spare battery in the battery bay s or ...

Страница 206: ...ain tethered when the HX3 is removed from the cradle 4 Reconnect the HX3 wearable device to the armband voice case or hip flip sliding the HX3 battery into the battery sleeve Note The 1mm hole in the Tethered Ring Scanner storage bay is used to guide the fastener screw when attaching the desktop cradle to a flat stable surface fasteners screwdrivers etc not supplied by Honeywell Docked HX3 Mode St...

Страница 207: ...erly into the charging pocket if the tether connector is inserted into the depression of the charging bay Each charging pocket can recharge either battery standard or extended The extended battery is noticeably thicker than the standard battery Make sure the battery terminals line up with the charging terminals in the charging bay Inserting a Tethered Battery into the Charging Bay Grasp the batter...

Страница 208: ...d re tighten as nec essary If the cradle becomes cracked or broken at any time it must be taken out of service and replaced Contact Customer Support page 14 1 for a replacement cradle There are no serviceable parts in the desktop cradle Do not attempt to open the unit Cleaning Do not use paper towels or harsh chemical based cleaning fluids since they may result in damage to the surfaces and or bat...

Страница 209: ...ped over or subjected to damage or stress Has enough clearance to allow easy access to the power port on the back of the device Is protected from rain dust direct sunlight or inclement weather This device is intended for indoor use only and requires an indoor AC power source The charger is not approved for use in Hazardous Locations This device cannot charge recharge coin cell batteries sealed ins...

Страница 210: ...t in the charger Do not dispose of Li Ion batteries into a fire Burning will generate hazardous vapors and may cause the battery to explode Failure to observe this warning may result in injury from inhalation of vapors or burns from flying debris Do not immerse Li Ion batteries in water or any other liquid If batteries are immersed contact Honeywell Do not disassemble or perform modifications to t...

Страница 211: ...ing Pocket 3 Battery Charge LED Indicator 4 Analyze Pocket 5 Analyze LED 6 Analyze Dome Switch 7 Analyze Progress LEDs 8 AC DC Power Connector 1 Battery Charging Pocket 2 Alignment Ribs 3 Battery Charging Contacts 4 Battery Charge Progress LED 90 80 70 50 ANALYZE A 1 2 3 4 5 6 7 8 ...

Страница 212: ...dapter illuminates when AC power is available 3 AC power is now being applied to the power adapter Setup Prerequisite The AC Adapter is assembled and receiving AC power Place the battery charger on a flat horizontal hard surface or fasten securely to a stable surface using the keyhole openings on the bottom of the battery charger Do not insert battery packs until the battery charger has finished p...

Страница 213: ...decreases the amount of time the battery pack can power a mobile device will decrease When a battery is placed in a charging pocket the battery charger begins charging the battery There is a slight delay while the charger evaluates the condition of the battery ambient temperature remaining charge etc before charging begins As with all batteries expect to see a reduction in the total number of oper...

Страница 214: ...harging contacts in line with the charging contacts in the charging pocket The alignment ribs on the standard and extended batteries line up and fit snugly with the rib notches in the charging pockets Both the standard battery pack and extended battery packs fit in all pockets If the battery will not align with the rib notches take the battery out turn it around and insert into the charging pocket...

Страница 215: ...on any charge pocket Continuous green means the battery pack charge is complete Battery is Ready YELLOW on any charge pocket Continuous yellow amber means the battery pack temperature is out of range The charging pocket is in standby mode while the pocket waits for the battery pack to warm up or cool down NO LIGHT on any charge pocket No light on a charge pocket means there is no battery pack inst...

Страница 216: ...ze Charge Discharge Charge process If the analyze dome switch is not pressed within 15 seconds the battery will be charged but not analyzed The Analyze progress LEDs indicate the battery capacity as a percent of the original value When all LEDs are off the battery capacity is less than 50 When the Analyze dome switch has been pressed the Analyze LED will illuminate Red to indicate that the battery...

Страница 217: ...rger is plugged into a live outlet battery pack is inserted but RED LED is OFF and no other LEDs are on or all LEDs are off New battery pack same result Contact Customer Support page 14 1 for replacement options When you first put a fully charged battery pack in the charging pocket the RED LED comes on indicating the battery pack is charging During the first few minutes the battery charger checks ...

Страница 218: ...best way to dispose of used batteries is to recycle them Battery recycling facilities recover the Nickel Lithium or Lead from old batteries to manufacture new batteries Use only mild detergent with a slightly damp cloth to clean the outside of the battery Do not use solvents or flammable cleaners Allow the case to dry fully before using again Do not allow cleaning agents of any kind to contact the...

Страница 219: ...12 11 There are no user serviceable parts in the Lithium Ion Battery Pack Contact Customer Support page 14 1 for battery disposal and replacement options ...

Страница 220: ...12 12 ...

Страница 221: ...harges from main battery during normal operation Memory operational for 24 hours when main battery is depleted Audio Microphone Connector Tethered Cable Audio Battery HX3 Cable External I O Ports Serial Port COM2 2 Tethered cable Ring scanner Max baud rate 230 4Kbps Main Battery Cradle Connection COM1 Asynchronous port Max baud rate 230 4Kbps Bluetooth Connection COM3 Max baud rate 921 6Kbps Dimen...

Страница 222: ...11g DSSS OFDM 5 0GHz IEEE 802 11a DSSS OFDM RF Data Rates 1 2 5 5 6 9 11 12 18 24 36 48 54 Mbps RF Power Level 64 mW 18dBm Channels FCC 1 11 36 40 44 48 149 153 157 161 ETSI 1 13 36 40 44 48 Operating Temperature Same as HX3 Operating Temperature Storage Temperature Same as HX3 Storage Temperature Connectivity TCP IP Ethernet ODI Diversity Yes Enhanced Data Rate Up to 3 0 Mbit s over the air Conne...

Страница 223: ...upply Input Frequency freq 47Hz 63Hz Function Minimum Maximum Note Operating 20 C 4 F 40 C 104 F Battery packs will only be charged when their internal temperature is between 10 C 50 F and 40 C 104 F Battery Pack Charging 10 C 50 F 40 C 104 F Battery packs will not begin charging when their internal temperature is outside this range Storage 20 C 4 F 70 C 160 F Unit is off Weight Battery charger 15...

Страница 224: ...h X CTRL X 1025 19h Y CTRL Y 1026 lAh Z CTRL Z 1027 lBh A CTRL 1028 lCh B CTRL 1029 lDh C CTRL 1030 lEh D CTRL 6 1031 lFh E CTRL 1032 20h Space Space 1033 21h A 1034 22h B 1035 23h C 1036 24h D 1037 25h E 1038 26h F 1039 27h G 1040 28h H 1041 29h I 1042 2Ah J 1043 2Bh K 1044 2Ch L 1045 2Dh 1046 2Eh 1047 2Fh 1048 30h 0 0 1049 31h 1 1 1050 32h 2 2 1051 33h 3 3 1052 34h 4 4 1053 35h 5 5 Scan Value He...

Страница 225: ...1070 46h F F 1071 47h G G 1072 48h H H 1073 49h I I 1074 4Ah J J 1075 4Bh K K 1076 4Ch L L 1077 4Dh M M 1078 4Eh N N 1079 4Fh O O 1080 50h P P 1081 51h Q Q 1082 52h R R 1083 53h S S 1084 54h T T 1085 55h U U 1086 56h V V 1087 57h W W 1088 58h X X 1089 59h Y Y 1090 5Ah Z Z 1091 5Bh K 1092 5Ch L 1093 5Dh M 1094 5Eh N 1095 5Fh O 1096 60h W Scan Value Hex Value Full ASCII Code 39 Encode Char Keystroke...

Страница 226: ...j 1107 6Bh K k 1108 6Ch L 1 1109 6Dh M m 1110 6Eh N n 1111 6Fh O o 1112 70h P p 1113 71h Q q 1114 72h R r 1115 73h S s 1116 74h T t 1117 75h U u 1118 76h V v 1119 77h W w 1120 78h X x 1121 79h Y y 1122 7Ah Z z 1123 7Bh P 1124 7Ch Q 1125 7Dh R 1126 7Eh S 1127 7Fh Undefined Scan Value Hex Value Full ASCII Code 39 Encode Char Keystroke ...

Страница 227: ...r party B excessive voltage or current supplied to or drawn from the interface connections C static electricity or electro static discharge D operation under conditions beyond the specified operating parameters or E repair or service of the product by anyone other than HII or its authorized representatives This warranty shall extend from the time of shipment for the duration published by HII for t...

Страница 228: ...teries are re charged using a HX2 labeled cradle and a HX2 labeled Battery Charger The duration of the limited warranty for the HX3 is 1 year The duration of the limited warranty for the HX3 Desktop Cradle is 1 year The duration of the limited warranty for the HX3 Battery Charger is 1 year The duration of the limited warranty for the HX3 2000mAh Li Ion and 4000mAh Li Ion Battery is 6 months The du...

Страница 229: ......

Страница 230: ... Honeywell Scanning Mobility 9680 Old Bailes Road Fort Mill SC 29707 www honeywellaidc com HX3 UG Rev A 2 15 ECN 2015 618 ...

Отзывы: