


5 - 31
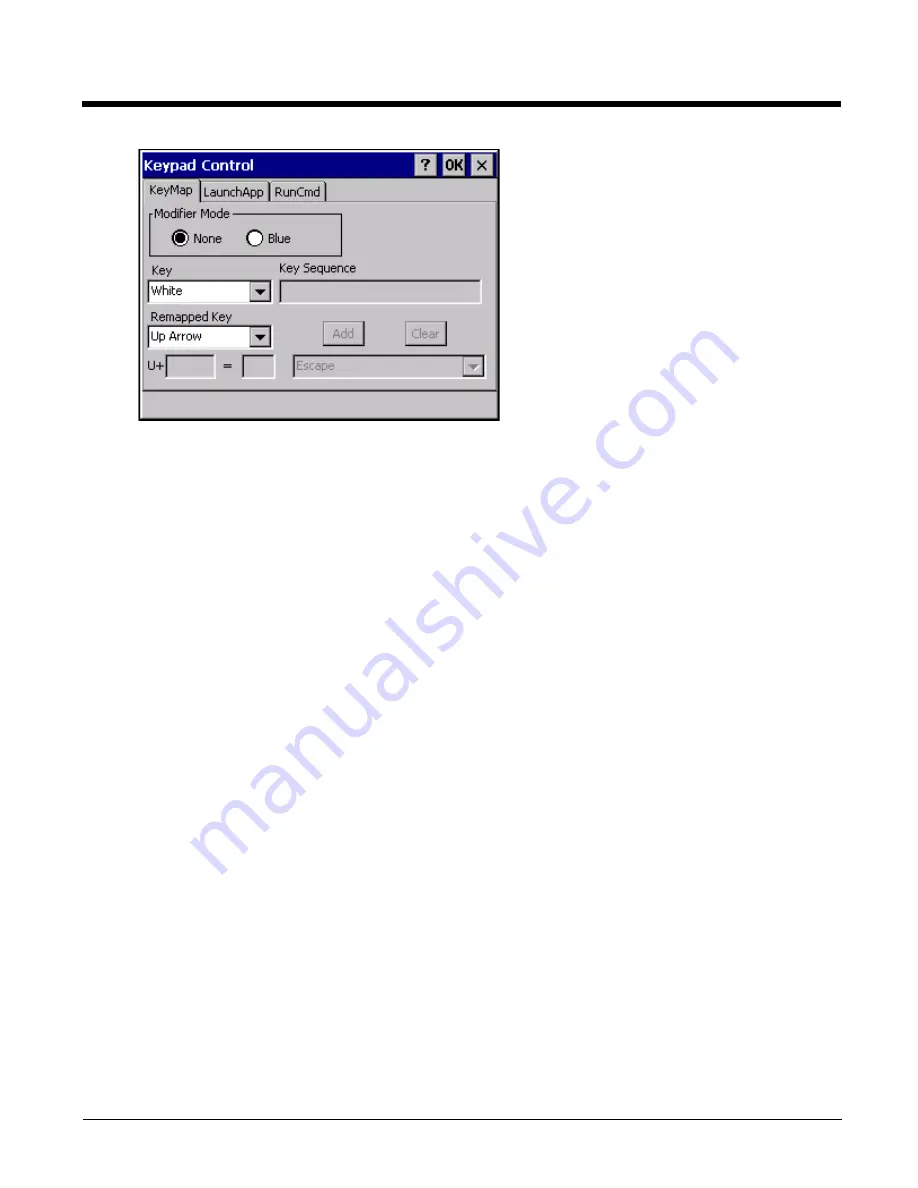
Assign settings by clicking radio buttons and selecting keys from the drop down boxes. Tap the OK button when fin-
ished. The changes take effect immediately.
Remap a Key to a Single Key
1.
Select the modifier key from the Modifier Mode options.
2.
Select the key to be remapped from the Key pulldown list.
3.
Select the value from the remapped key from the Remapped Key pulldown list.
4.
Click OK to save the result and close the control panel.
Remap a Key to a Key to a Unicode Value
1.
Select the modifier key from the Modifier Mode options.
2.
Select the key to be remapped from the Key pulldown list.
3.
Select Unicode from the Remapped Key pulldown list.
4.
There are two Unicode text boxes located on the lower part of this tab. Enter the Unicode value in the left text
box and the Unicode character is displayed in the right text box.
5.
Click OK to save the result and close the control panel.
Remap a Key to a Key Sequence
Up to 16 keys may be specified for the key sequence. The sequence can consist of keys and Unicode values.
1.
Select the modifier key from the Modifier Mode options.
2.
Select the key to be remapped from the Key pulldown list.
3.
Select Key Sequence from the Remapped Key pulldown list.
4.
Select the first key for the multiple key sequence from the pulldown list.
5.
Press the Add button to add the key to the multiple key sequence shown in the Key Sequence box.
6.
Repeat steps 4 and 5 until all keys desired have been added to the key sequence. If necessary, use the Clear
button to erase all entries in the Key Sequence box.
7.
Click OK to save the result and close the control panel.
Note: A key can only be used once in a multiple key sequence. For example, an F1 key added to a key sequence
means an F1 key cannot be used again in the same key sequence.
Содержание HX3
Страница 1: ...HX3 Wearable Computer User s Guide ...
Страница 36: ...3 4 ...
Страница 40: ...4 4 ...
Страница 87: ...5 47 ...
Страница 110: ...6 18 ...
Страница 126: ...7 16 Hat Encoding ...
Страница 127: ...7 17 ...
Страница 128: ...7 18 ...
Страница 189: ...9 37 9 Click the Request a certificate link 10 Click on the advanced certificate request link ...
Страница 190: ...9 38 11 Click on the Create and submit a request to this CA link ...
Страница 198: ...10 2 ...
Страница 220: ...12 12 ...
Страница 229: ......