


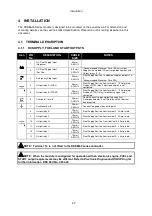


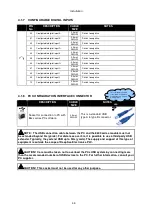


Specifications
32
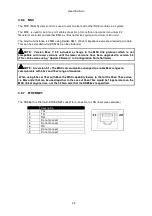
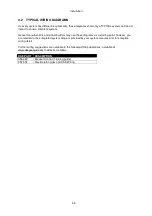
3.11.4 FIXING CLIPS
Supplied fixing clips hold the module into the panel fascia.
Withdraw the fixing clip screw (turn anticlockwise) until only the pointed end is protruding from the clip.
•
Insert the three ‘prongs’ of the fixing clip into the slots in the side of the 8600 series module
case.
•
Pull the fixing clip backwards (towards the back of the module) ensuring all three prongs of the
clip are inside their allotted slots.
•
Turn the fixing clip screws clockwise until they make contact with the panel fascia.
•
Turn the screws a little more to secure the module into the panel fascia. Take care not to over
tighten the fixing clip screws.
NOTE: In conditions of excessive vibration, mount the module on suitable anti-vibration
mountings.
Fixing clip fitted to
module
Fixing clip
Содержание DSE8610
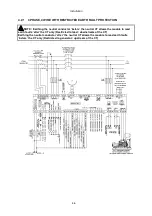
Страница 47: ...Installation 47 4 2 2 3 PHASE 4 WIRE WITHOUT EARTH FAULT PROTECTION...
Страница 51: ...Installation 51 4 3 2 SINGLE PHASE WITHOUT EARTH FAULT...
Страница 53: ...Installation 53 4 3 4 2 PHASE L1 L2 3 WIRE WITHOUT EARTH FAULT...
Страница 55: ...Installation 55 4 3 6 2 PHASE L1 L3 3 WIRE WITHOUT EARTH FAULT MEASURING...
Страница 100: ...Protections 100 8 8 1 EARTH FAULT TRIPPING CURVES NOTE DSE Factory setting is time multiplier K 0 4...
Страница 118: ...Intentionally Left Blank 118...


