MIL-3000FTX Series of FastPort Print Servers
1-3
1.5 First Time Users
1. Physically install FastPort to the network.
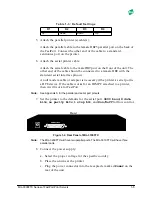
a. Connect the device to the printer(s) it will be servicing.
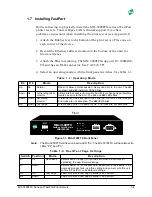
b. Print a test page by putting the DIP switches in “test page” mode.
2. Write down the FastPort twelve digit hardware address (MAC
address). The number is located on a label on the underside of the unit,
as well as on the test page just printed (for example,
00:40:c8:XX:XX:XX
).
3. Using the information in the hardware manual, set the DIP switches in
a normal printing mode and power up the unit.
4. Check FastPort’s LEDs to verify that the unit is functioning on the
network.
5. Locate the type of driver on the CD-ROM for your operating systems
where the installation will be performed (e.g., MS Windows, UNIX,
NetWare, or MAC).
6. Turn to the specific chapter in this document for the specific network
operating system and continue installation.
7. Configure FastPort to be managed by FastManage.
1.6
Installation Requirements
Before installing FastPort, make sure you have the following:
• A MIL-3000FTX series of FastPort print servers
• Use a switchable power supply. For the USA, set at 120 VAC
• Appropriate Ethernet cabling (CAT 5)
• Serial or parallel printer(s) with the proper cabling. FastPort is shipped
with a 3 ft. parallel port cable
• Four rubber feet to keep the print server from sliding. These are also
included in the packaging

