154
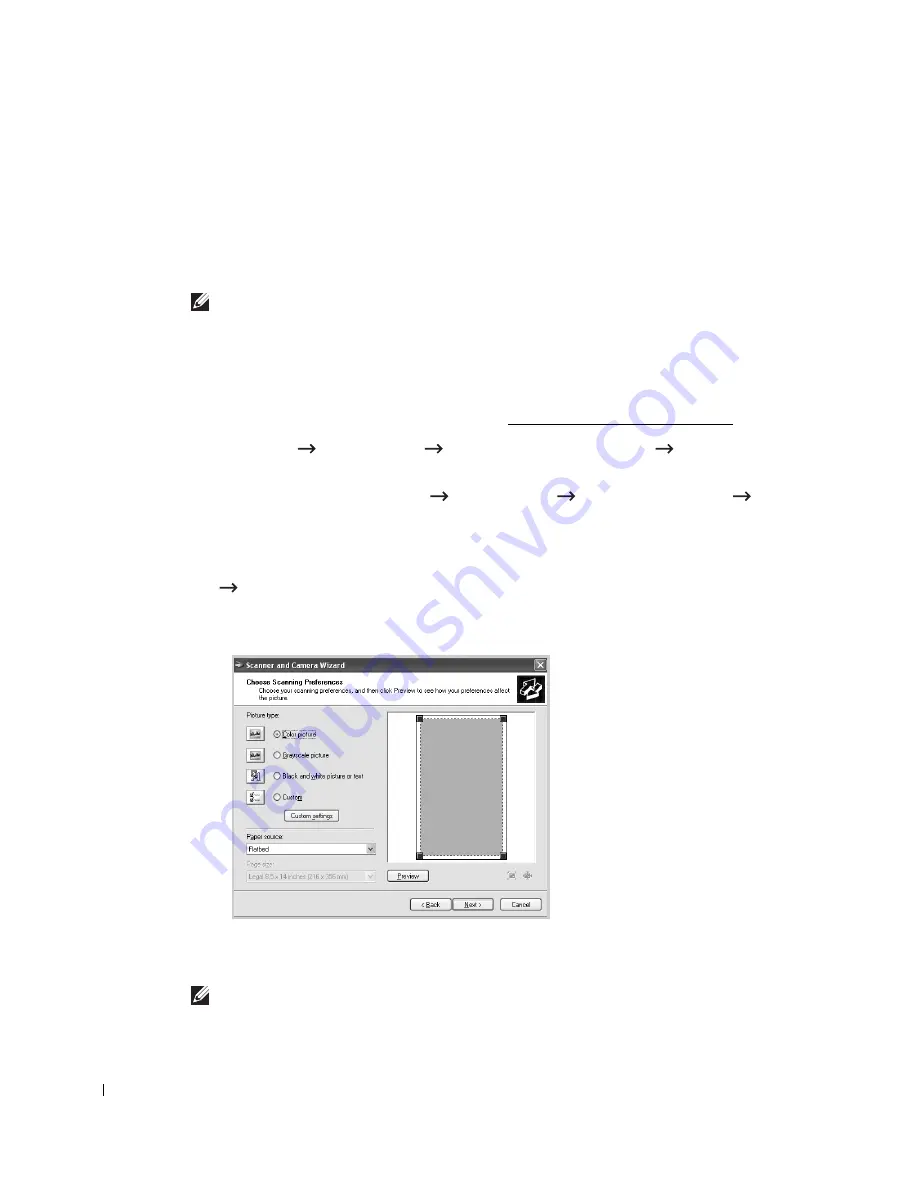
Scanning Using the Windows Image Acquisition (WIA) Driver
Your printer also supports the WIA driver for scanning images. WIA is one of the standard
components provided by Microsoft Windows XP/Server 2003/Server 2008/Vista/7 and works
with digital cameras and scanners. Unlike the TWAIN driver, the WIA driver enables you to
scan an image and easily manipulate those images without using additional software.
NOTE:
The WIA driver works only on Windows XP/Server 2003/Server 2008/Vista/7.
1
Load the document(s) face up with top edge in first into the DADF.
OR
Place a single document face down on the document glass.
For details about loading a document, see "Loading an Original Document".
2
Click
Start Control Panel Printers and Other Hardware Scanners and
Cameras
.
For Windows Vista, click
Start Control Panel Hardware and Sound Scanners
and Cameras
.
3
Double click your scanner icon. The Scanners and Camera Wizard launches.
For Windows 7, click right button of mouse on device driver icon in
Printers and Faxes
Start Scan
.
New Scan
application appears.
4
Choose your scanning preferences and click
Preview
to see how your preferences will
affect the picture.
5
Enter a picture name, and select a file format and destination to save the picture.
6
Follow the on-screen instructions to edit the picture after it is copied to your computer.
NOTE:
SmarThru Office
built-in OCR software can copy text from scanned documents to any text
editing, word processing, or spreadsheet program. The OCR process requires textual images
scanned at 150 to 600 dpi. 300 dpi or 600 dpi is recommended for graphics.
Содержание 2355 Mono Laser
Страница 1: ...Dell 2355dn Laser MFP User s Guide ...
Страница 17: ...16 ...
Страница 31: ...30 4 Close the front cover ...
Страница 72: ...71 5 Click Update Firmware ...
Страница 99: ...98 ...
Страница 127: ...126 ...
Страница 181: ...180 ...
Страница 213: ...212 ...
Страница 214: ...Macintosh Installing Software for Macintosh Setting Up the Printer Printing Scanning ...
Страница 230: ...229 8 Enter your printer s name location description and click Next 9 Click Finish to complete installation ...
Страница 251: ...250 5 Reinsert the toner cartridge and close the front cover 6 Plug in the power cord and power the printer on ...
Страница 260: ...Troubleshooting Clearing Jams in the DADF Clearing Jams in the Paper Tray Clearing LCD Error Messages Solving Problems ...


