120
3
Click
OK
and start printing.
Creating a Watermark
1
When you change the print settings from your software application, access the printer
properties.
2
Click the
Advanced
tab and click
Edit...
in the
Watermark
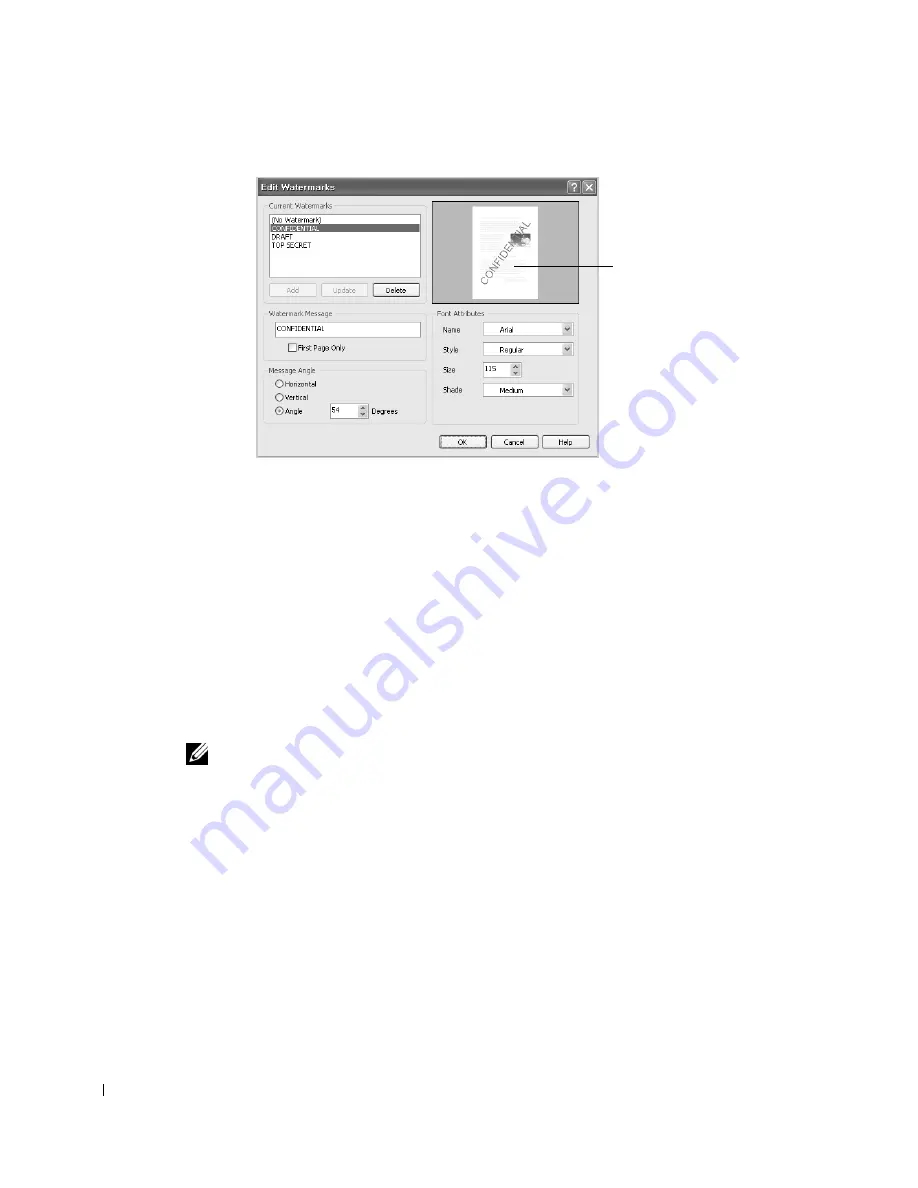
section. The Edit Watermarks
window appears.
3
Enter the text message you want to print in the
Watermark Message
box.
The message displays in the preview image window. The preview image is provided so
that you can see how the watermark will appear on the printed page.
When the
First Page Only
box is checked, the watermark is printed on the first page only.
NOTE:
You can enter up to 256 letters.
4
Select the watermark options.
You can select the font name, style and size and gray scale level from the
Font Attributes
section and set the angle of the watermark from the
Message Angle
section.
5
Click
Add
to add a new watermark to the list.
6
When you finish creating, click
OK
and start printing.
To stop printing the watermark, select
None
on the
Watermark
drop-down list.
Editing a Watermark
1
When you change the print settings from your software application, access the printer
properties.
2
Click the
Advanced
tab and click
Edit...
in the
Watermark
section. The
Edit Watermarks
window appears.
Preview image
Содержание 2355 Mono Laser
Страница 1: ...Dell 2355dn Laser MFP User s Guide ...
Страница 17: ...16 ...
Страница 31: ...30 4 Close the front cover ...
Страница 72: ...71 5 Click Update Firmware ...
Страница 99: ...98 ...
Страница 127: ...126 ...
Страница 181: ...180 ...
Страница 213: ...212 ...
Страница 214: ...Macintosh Installing Software for Macintosh Setting Up the Printer Printing Scanning ...
Страница 230: ...229 8 Enter your printer s name location description and click Next 9 Click Finish to complete installation ...
Страница 251: ...250 5 Reinsert the toner cartridge and close the front cover 6 Plug in the power cord and power the printer on ...
Страница 260: ...Troubleshooting Clearing Jams in the DADF Clearing Jams in the Paper Tray Clearing LCD Error Messages Solving Problems ...


