4.
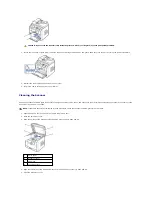
Remove a new memory DIMM from its antistatic package.
5.
Holding the memory DIMM by the edges, align the notches on the memory DIMM with the grooves at the top of the memory DIMM slot.
6.
Push the DIMM straight into the DIMM slot until it snaps into place. Make sure the latches fit over the notches located on either side of the DIMM.
7.
Replace the control board cover.
8.
Reconnect the power cord and printer cable, and turn the printer on.
Activating the added memory in the PS printer properties
After installing the memory DIMM, you need to select it in the printer properties of the PostScript printer driver so that you can use it:
1.
Make sure that the PostScript printer driver is installed on your computer. For details about installing the PS printer driver, see
"Installing Software in
Windows"
.
2.
Click the Windows
Start
menu.
3.
For Windows 98/Me/NT 4.0/2000, select Settings and then
Printers
.
For Windows XP/Server 2003, select
Printers and Faxes
.
For Windows Vista, click
Control Panel
Hardware and Sound
Printers
.
4.
Select the
Dell Laser MFP 1815 PS
printer.
5.
Right-click the printer icon and:
In Windows 98/Me, click
Properties
.
In Windows 2000/XP/Server 2003/Vista, click
Print Setup
or click
Properties
and then point to
Printing Preferences
.
In Windows NT 4.0, click
Document Default
.
6.
For Windows 98/Me, select
Device Options
.
For Windows NT 4.0/2000/XP/Server 2003/Vista, select
Device Settings
.
7.
Select the memory DIMM you installed from
Printer Memory
in the
Installable Option
section.
For Windows 98, select
Installable Option
VMOption
change setting for:VMOption
change memory
.
8.
Click
OK
.
Содержание 1815dn Multifunction Mono Laser Printer
Страница 41: ...Your PC begins to send the fax data and printer sends the fax ...
Страница 68: ......
Страница 77: ...6 Click OK ...
Страница 89: ......


