8-7
Firepower 7000 and 8000 Series Installation Guide
Chapter 8 Restoring a Firepower System Appliance to Factory Defaults
Using the Interactive Menu to Restore an Appliance
Note
Only reimage your appliances during a maintenance window. Reimaging resets appliances in bypass
mode to a non-bypass configuration and disrupts traffic on your network until you reconfigure bypass
mode. For more information, see
Traffic Flow During the Restore Process, page 8-1
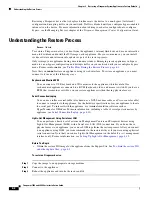
The menu displays the options listed in the following table.
Navigate the menu using your arrow keys. To select a menu option, use the up and down arrows. Use the
right and left arrow keys to toggle between the
OK
and
Cancel
buttons at the bottom of the page.
The menu presents two different kinds of options:
•
To select a numbered option, first highlight the correct option using the up and down arrows, then
press Enter while the
OK
button at the bottom of the page is highlighted.
•
To select a multiple-choice (radio button) option, first highlight the correct option using the up and
down keys, then press the space bar to mark that option with an
X
. To accept your selection, press
Enter while the
OK
button is highlighted.
In most cases, complete menu options
1
,
2
,
4
, and
5
, in order. Optionally, add menu option
3
to install
system software and intrusion rule updates during the restore process.
If you are restoring an appliance to a different major version from the version currently installed on the
appliance, a two-pass restore process is required. The first pass updates the operating system, and the
second pass installs the new version of the system software.
If this is your second pass, or if the restore utility automatically loaded the restore configuration you
want to use, you can start with menu option
4
Downloading the ISO and Update Files and Mounting the
. However, Cisco recommends you double-check the settings in the restore
configuration before proceeding.
Table 8-1
Restore Menu Options
Option
Description
For more information, see...
1 IP Configuration
Specify network information about the management
interface on the appliance you want to restore, so
that the appliance can communicate with the server
where you placed the ISO and any update files.
Identifying the Appliance’s Management
Interface, page 8-8
2 Choose the transport
protocol
Specify the location of the ISO image you will use
to restore the appliance, as well as any credentials
the appliance needs to download the file.
Specifying ISO Image Location and
Transport Method, page 8-9
3 Select Patches/Rule
Updates
Specify a system software and intrusion rules
update to be applied after the appliance is restored
to the base version in the ISO image.
Updating System Software and Intrusion
Rules During Restore, page 8-10
4 Download and Mount
ISO
Download the appropriate ISO image and any
system software or intrusion rule updates. Mount
the ISO image.
Downloading the ISO and Update Files
and Mounting the Image, page 8-11
5 Run the Install
Invoke the restore process.
Invoking the Restore Process, page 8-11
6 Save Configuration
7 Load Configuration
Save any set of restore configurations for later use,
or load a saved set.
Saving and Loading Restore
Configurations, page 8-13
8 Wipe Contents of Disk
Securely scrub the hard drive to ensure that its
contents can no longer be accessed.

