Configuration – 4
4–117
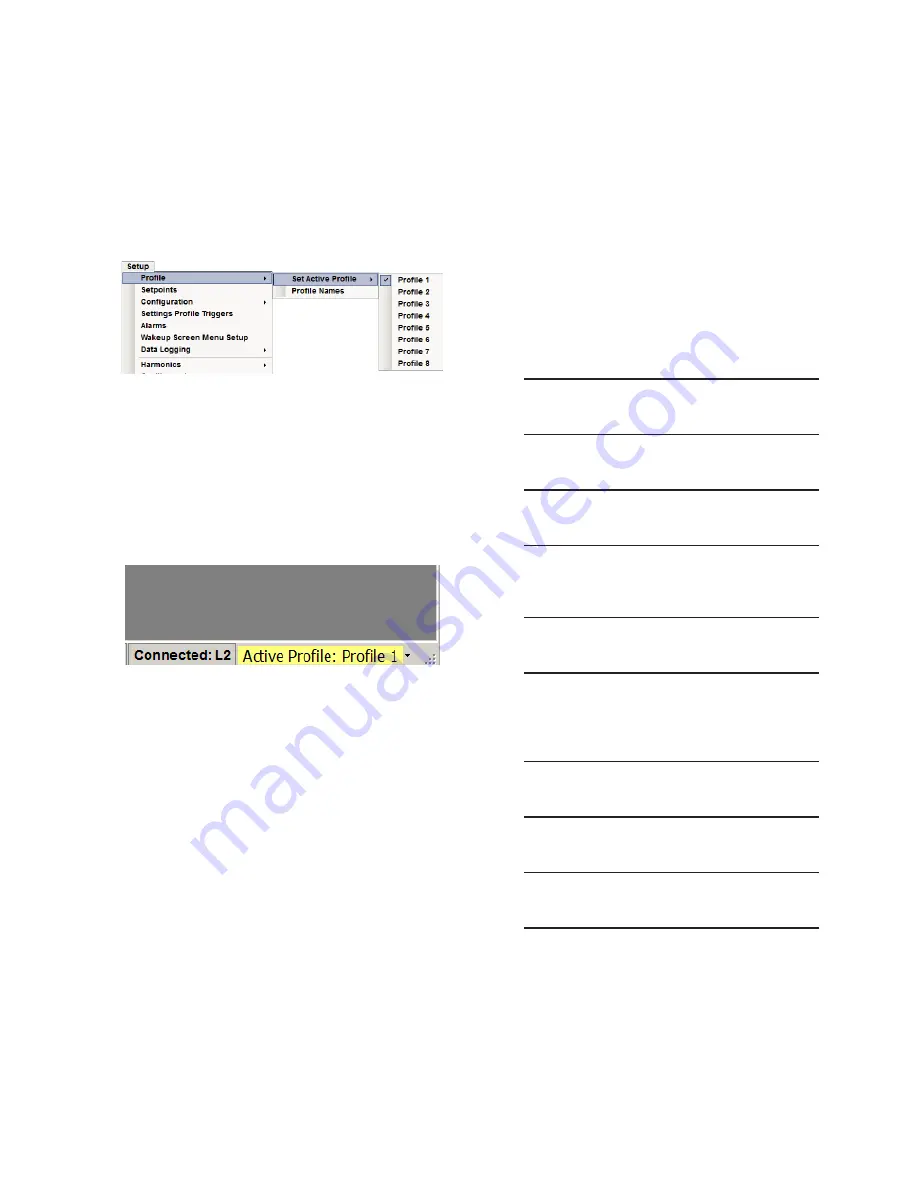
Setting the Active Setpoint Profile (CapTalk)
To select the Active Setpoint Profile perform the
following:
1.
Star t CapTalk
®
, then establish
communications with the target control.
2. Select
Setup/Set Active Profile from
the CapTalk toolbar.
▲
CAUTION
: The control will immediatly respond
to the new Active Setpoint Profile settings.
3. Select the desired profile to activate.
The Active Profile will be indicated in the
menu dropdown and the CapTalk Lower
Information Bar (Figure 4-59).
The Active Profile can also be selected from the
Lower Information Bar as well.
Figure 4-59 Select Active Profile From CapTalk
Main Screen Lower Information Bar
Editing Setpoint Profiles
Selecting a Setpoint Profile for Editing from
the HMI
When a setpoint Profile is selected for editing in the
HMI, each setting header in the Setpoints menu with
the exception of the "Profile Settings" header will
indicate on the right side of the top line the Setpoint
Profile that is being edited.
To select a Setpoint Profile for editing from the HMI
perform the following:
1.
Press the Up Arrow (SETP Hot Button)
pushbutton to awaken the unit. The
menu will advance to "SETPOINTS".
SETPOINTS
MNTR
CNFG
2.
Press the Down Arrow pushbutton once.
The unit will display the following:
Profile Settings
3.
Press the Down Arrow pushbutton
as necessary until "Profile to Edit" is
displayed.
Profile to Edit
x
4.
Press the "ENT" pushbutton. If Level
2 Access is not active or has been
previously input, the following will be
displayed. Go to Step 7.
Profile to Edit
x
C
5.
If Level Access is active, the Level
Access prompt will be displayed.
ENTER ACCESS CODE
_
Содержание M-6280A
Страница 1: ...Instruction Book M 6280A Digital Capacitor Bank Control ...
Страница 29: ...800 6280A SP 11MC1 03 13 2008 Beckwith Electric Co All Rights Reserved Printed in U S A 09 24 02 ...
Страница 33: ...This Page Left Intentionally Blank ...
Страница 53: ...xx M 6280A Instruction Book This Page Left Intentionally Blank ...
Страница 56: ...Introduction 1 1 3 Figure 1 1 Functional Diagram ...
Страница 59: ...1 6 M 6280A Instruction Book This Page Left Intentionally Blank ...
Страница 66: ...2 7 Operation 2 Figure 2 1 M 6280A Front Panel ...
Страница 137: ...3 14 M 6280A Instruction Book Figure 3 13 CapTalk Main Screen Connected Mode ...
Страница 152: ...3 29 CapTalk 3 Figure 3 36 Setpoints Auto Remote Control with Enabled Voltage Control Auto Adaptive Dialog Screen ...
Страница 153: ...3 30 M 6280A Instruction Book Figure 3 37 Setpoints Auto Remote Control with VAr Control Enabled Dialog Screen ...
Страница 172: ...3 49 CapTalk 3 Figure 3 67 CBEMA Settings Dialog Screen ...
Страница 179: ...3 56 M 6280A Instruction Book Figure 3 87 M 6280A DNP Configurator Dialog Screen ...
Страница 184: ...3 61 CapTalk 3 Figure 3 98 CapPlot Window with Data Logging Data Example ...
Страница 185: ...3 62 M 6280A Instruction Book Figure 3 99 CapPlot Window with Oscillograph Data Example ...
Страница 191: ...3 68 M 6280A Instruction Book This Page Left Intentionally Blank ...
Страница 311: ...M 6280A Instruction Book 4 120 Figure 4 61 Setpoints Dialog Screen Voltage Control Auto Adaptive Fixed ...
Страница 312: ...Configuration 4 4 121 Figure 4 62 Setpoints Dialog Screen Voltage Control Auto Adaptive Average ...
Страница 313: ...M 6280A Instruction Book 4 122 Figure 4 63 Setpoints Dialog Screen VAr Control ...
Страница 314: ...Configuration 4 4 123 Figure 4 64 Setpoints Dialog Screen Current Control ...
Страница 451: ...D 4 M 6280 Instruction Book This Page Left Intentionally Blank ...
Страница 461: ...This Page Left Intentionally Blank ...


