


M-6280A Instruction Book
4–90
NOTE
: When entering the Level 2 Access Code
the display will automatically advance
the cursor to the next digit when input
is momentarily paused.
7.
Enter a valid Level 2 Access Code, then
press the "ENT" pushbutton.
If a valid Level 2 Access Code was
entered, then the display will briefly flash
a confirmation screen and then display
the following:
Data Log Select
000000000011111
C
If not, re-enter a valid code.
NOTE
: The cursor will be positioned under the
far right hand position which corresponds
to VOLTAGE. The remaining Data Log
parameter selections are displayed by
moving the cursor to the left.
8.
Utilizing the arrow pushbuttons enter
a "1" for those Data Log parameters
to be activated and a "0" for those
that are to be disabled, then press the
"ENT" pushbutton. The following will be
displayed reflecting the selections that
were made.
Data Log Select
XXXXXXXXXXXX
9.
Press the Down Arrow as necessary
until the "Data Log Interval" screen is
displayed.
Data Log Interval
5
10.
Utilizing the arrow pushbuttons enter
the desired "Data Log Interval" (0 to
120 minutes in 1 minute increments),
then press the "ENT" pushbutton. The
following will be displayed reflecting the
Data Log Interval that was entered.
Data Log Interval
XXXXX
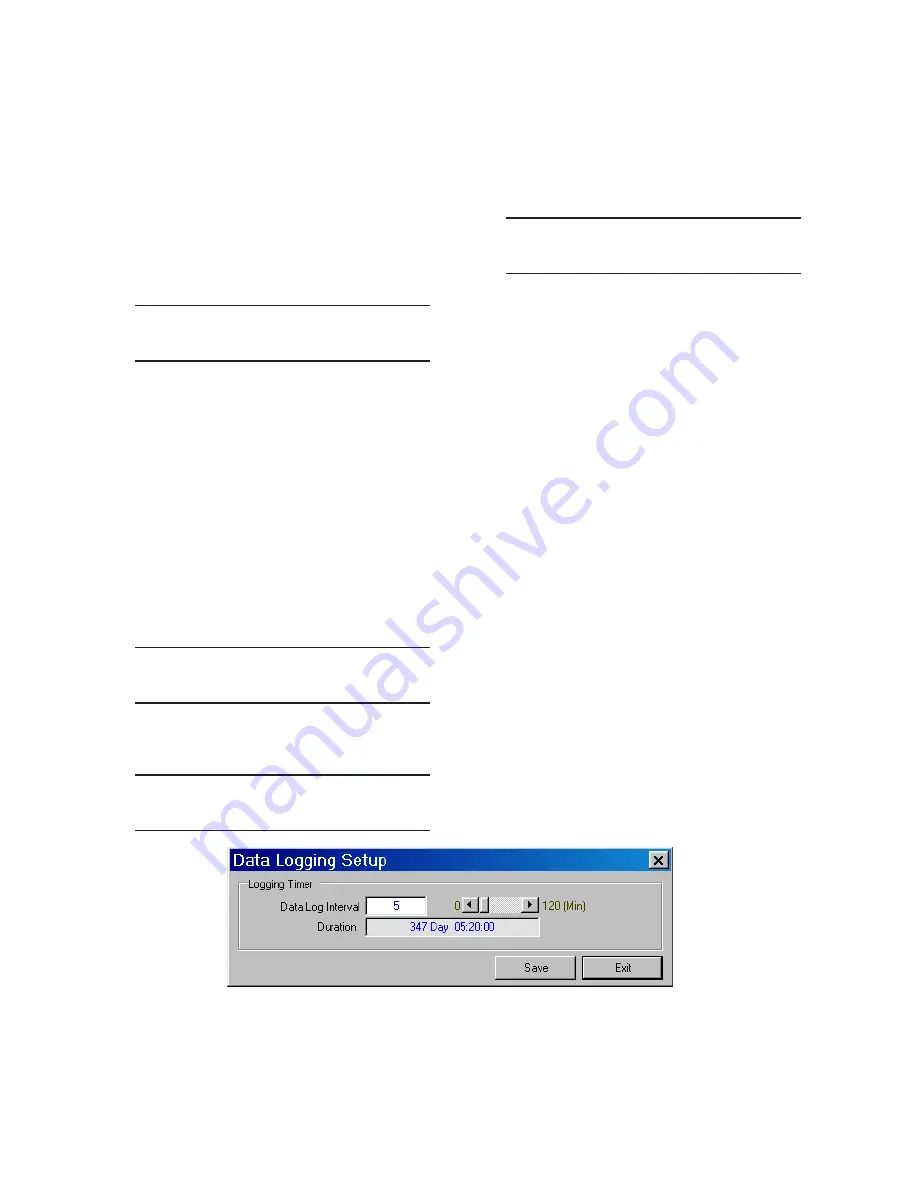
Data Logging Setup From CapTalk
®
To select the data log interval between logs from
CapTalk proceed as follows:
1. Select
Setup/Data Logging/Setup from
the CapTalk toolbar. CapTalk will display
the Data Logging Setup dialog screen
(Figure 4-46).
NOTE
: The Data Logging Setup dialog screen
contains a self calculating "Duration"
parameter that represents the number of
days and the specific time when the data
logging buffer will be full. The number
of parameters selected to log and the
Data Log Interval are considered in this
calculation.
2.
Enter a Data Log Interval (0 to 120
minutes).
3.
Select "Save". CapTalk will display a
"Confirm Writing to Device" confirmation
screen (Figure 4-2).
4.
Select "OK". CapTalk will display a
"Setpoints Successfully Written to
Control" confirmation screen (Figure
4-14).
Figure 4-46 Data Logging Setup Dialog Screen
Содержание M-6280A
Страница 1: ...Instruction Book M 6280A Digital Capacitor Bank Control ...
Страница 29: ...800 6280A SP 11MC1 03 13 2008 Beckwith Electric Co All Rights Reserved Printed in U S A 09 24 02 ...
Страница 33: ...This Page Left Intentionally Blank ...
Страница 53: ...xx M 6280A Instruction Book This Page Left Intentionally Blank ...
Страница 56: ...Introduction 1 1 3 Figure 1 1 Functional Diagram ...
Страница 59: ...1 6 M 6280A Instruction Book This Page Left Intentionally Blank ...
Страница 66: ...2 7 Operation 2 Figure 2 1 M 6280A Front Panel ...
Страница 137: ...3 14 M 6280A Instruction Book Figure 3 13 CapTalk Main Screen Connected Mode ...
Страница 152: ...3 29 CapTalk 3 Figure 3 36 Setpoints Auto Remote Control with Enabled Voltage Control Auto Adaptive Dialog Screen ...
Страница 153: ...3 30 M 6280A Instruction Book Figure 3 37 Setpoints Auto Remote Control with VAr Control Enabled Dialog Screen ...
Страница 172: ...3 49 CapTalk 3 Figure 3 67 CBEMA Settings Dialog Screen ...
Страница 179: ...3 56 M 6280A Instruction Book Figure 3 87 M 6280A DNP Configurator Dialog Screen ...
Страница 184: ...3 61 CapTalk 3 Figure 3 98 CapPlot Window with Data Logging Data Example ...
Страница 185: ...3 62 M 6280A Instruction Book Figure 3 99 CapPlot Window with Oscillograph Data Example ...
Страница 191: ...3 68 M 6280A Instruction Book This Page Left Intentionally Blank ...
Страница 311: ...M 6280A Instruction Book 4 120 Figure 4 61 Setpoints Dialog Screen Voltage Control Auto Adaptive Fixed ...
Страница 312: ...Configuration 4 4 121 Figure 4 62 Setpoints Dialog Screen Voltage Control Auto Adaptive Average ...
Страница 313: ...M 6280A Instruction Book 4 122 Figure 4 63 Setpoints Dialog Screen VAr Control ...
Страница 314: ...Configuration 4 4 123 Figure 4 64 Setpoints Dialog Screen Current Control ...
Страница 451: ...D 4 M 6280 Instruction Book This Page Left Intentionally Blank ...
Страница 461: ...This Page Left Intentionally Blank ...


