Epica-128 & Epica-256 Installation & Setup
B-7
Creating a New Virtual Matrix
6. From the Physical Matrix drop down list, select the matrix
(see “The Physical Matrix” on page B-5).
7. Click Assign Matrix.
8. Repeat Steps 4-7 for additional signals.
9. Click OK to finalize the settings and close the dialog box.
10. From the Virtual Matrix view, right click the new virtual matrix and select
Manage Connector Groupings.
The Manage Virtual Matrix Groupings dialog box opens.
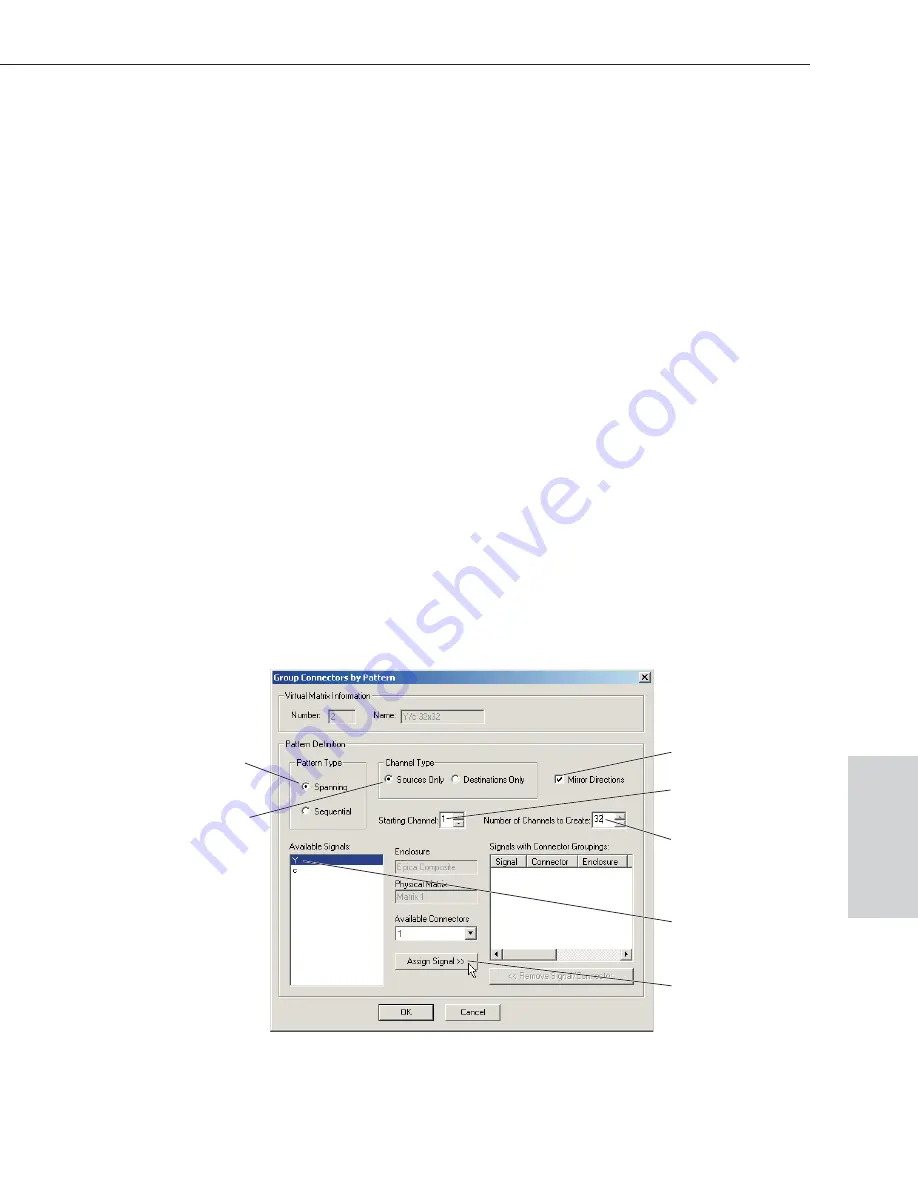
11. Under Select a Method, click Group by Pattern. (To group connectors
individually, see the Help file.)
12. Specify the following parameters:
ä
Under Pattern Type, select the pattern. (Spanning is the most common; for
an explanation of the spanning and sequential patterns, see page B-9.)
ä
Under Channel Type, select Sources Only.
ä
If the number of inputs equals the number of outputs, select Mirror
Directions to apply the settings to both inputs and outputs.
If the number is not equal, you will need to complete Step 18.
ä
In the Starting Channel field, enter the first channel number to be included.
ä
In the Number of Channels to Create field, enter the number of channels
needed for the first signal.
13. Select the first signal from the Available Signals list.
Select pattern
Select Sources
(or Destinations)
Select signal
Select Mirror Direction
Specify starting channel
Specify number of channels
Click Assign Signal
Advanced
Configuration


