8.5 Modifying a Configuration File
Modifying a configuration file with X
N
Connect involves entering information in
a field or in a series of dialog boxes. A brief look at the contents in the Help file
provides a quick overview of the possible modifications.
This section provides instructions for two common tasks: modifying channel
names and configuring local presets. For complete coverage of configuration
related tasks, see the X
N
Connect Help file.
Modifying Source & Destination Channel Names
If the system has a graphic remote control panel (such as a CP-20A or CP-10)
or is using APWeb software for control, the names for the source and destination
channels displayed on the LCD or in the XBar can be customized. The custom
names (labels) can be up to 23 characters and cannot contain the following
characters: ‘ “ \ = ? < >.
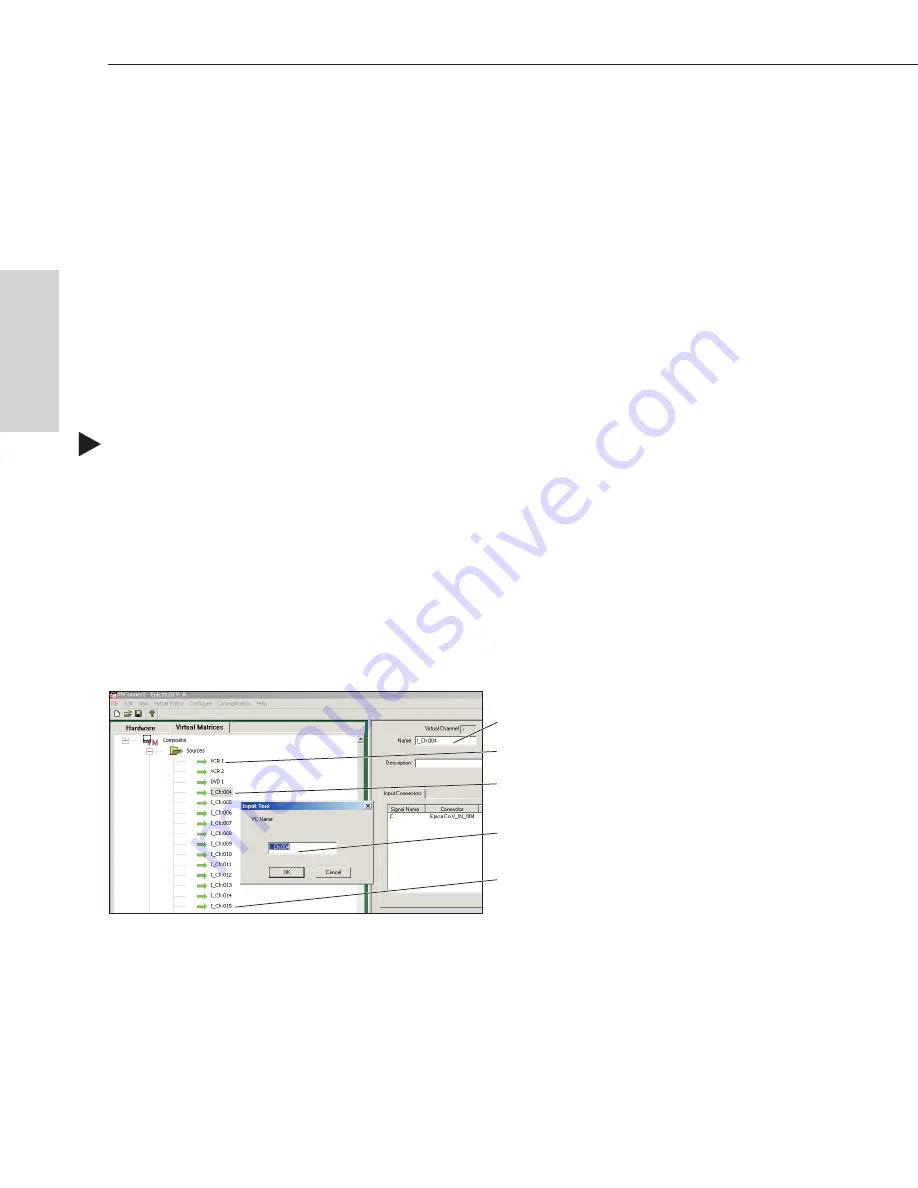
To customize the channel names:
1. In the Virtual Matrices view, click the “+” to the left of the Virtual Matrix.
2. Click the “+” to the left of the Sources or Destinations folder.
3. Right-click the channel you want to rename and select Change Name from
the shortcut menu.
4. Enter the new name in the Input Text dialog box and click OK.
The new channel name appears in the Name field.
Note:
If a channel is in more than one VM, you must repeat Step 4 for the
channel in all of the VMs.
5. Customize additional channels by repeating Steps 3 and 4.
When finished, load the configuration file onto the system (see page 8-9). If
channel names are the only modifications that have been made to the file, use the
“Configure System Namespace” option (found under Configure \ Configure
Special – Virtual Matrix).
8-6
Epica-128 & Epica-256 Installation & Setup
Managing Configuration Files
Configuration
F
iles
Name field
Customized channel name
Default channel name
Enter custom channel name
Selected channel


