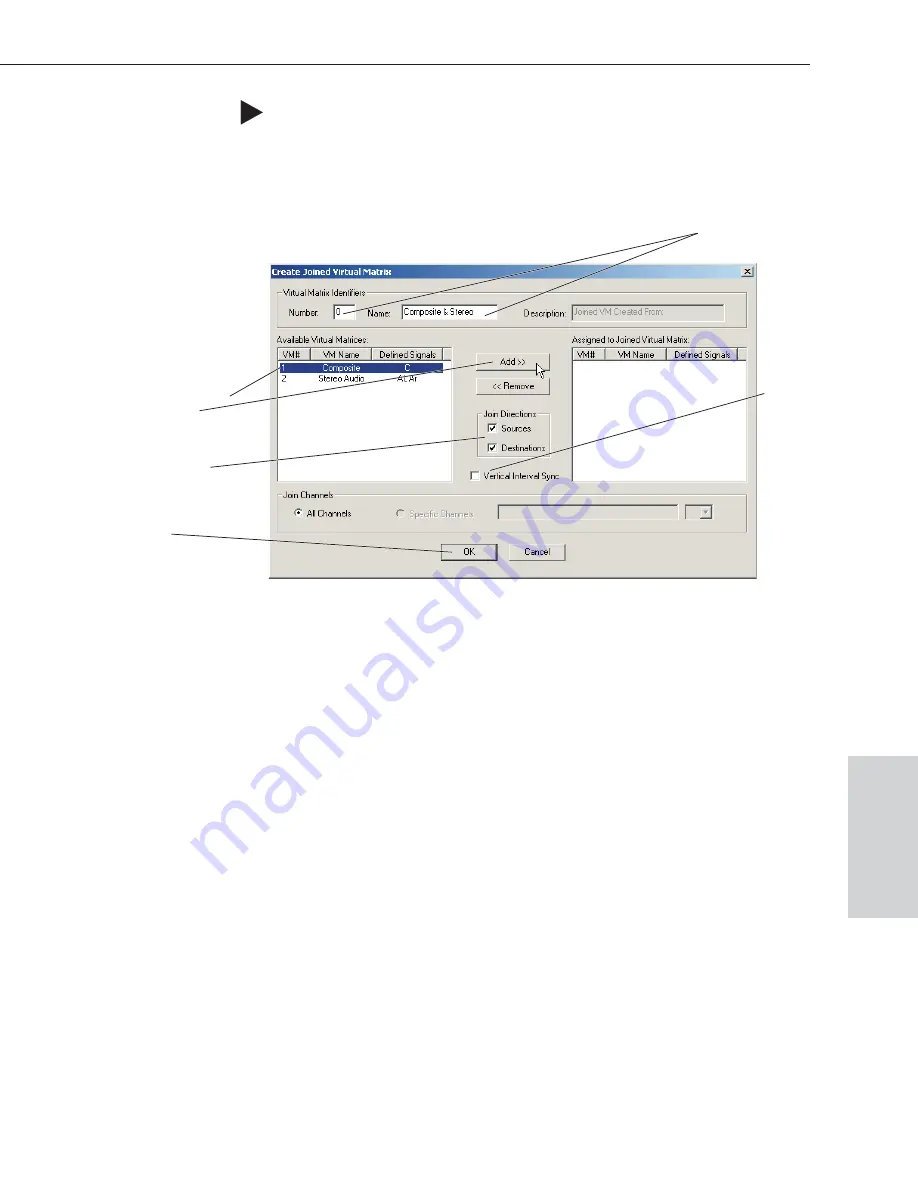
To create a joined virtual matrix:
1. From the Virtual Matrix menu, select Join Virtual Matrices.
2. Select the first VM to be joined and click Add.
3. Select the second VM to be joined and click Add.
Repeat for any additional VMs.
4. Optional – Under Virtual Matrix Identifiers, change the number and name.
5. Check the Source and Destination check boxes so that both are joined in the
new VM.
6. Click OK.
The file is ready to be loaded onto the system, see page 8-9.
B.2 Creating Virtual Matrix Breakaways
Breakaway virtual matrices can be created from an existing virtual matrix,
allowing signals to be switched independently. The most common reason for
creating virtual matrix breakaways is to configure a system so that video and
audio signals can be switched separately.
The information in the dialog boxes for this section is based on the following
scenario. The original system was configured to switch composite and stereo
signals together on Virtual Matrix 0, and now they need to be switched
independently. Two additional virtual matrices, VM1 (for composite) and VM2
(for stereo audio), are created to allow the video and audio to switch
independently (breakaway).
Note:
For additional information on creating breakaways, see the X
N
Connect
Help file. To access the Help file topic for an open dialog box, press the F1 key.
Epica-128 & Epica-256 Installation & Setup
B-3
Creating Virtual Matrix Breakaways
For systems with
VI Sync, check to
enable sync
Select the first VM
and click Add
Select Sources
and/or Destinations
Click OK
Repeat for the next VM
The VM’s default number and
default name can be changed
Advanced
Configuration


