7-4
<7. Trouble Shooting>
IM 80J01A01-01E
7.2
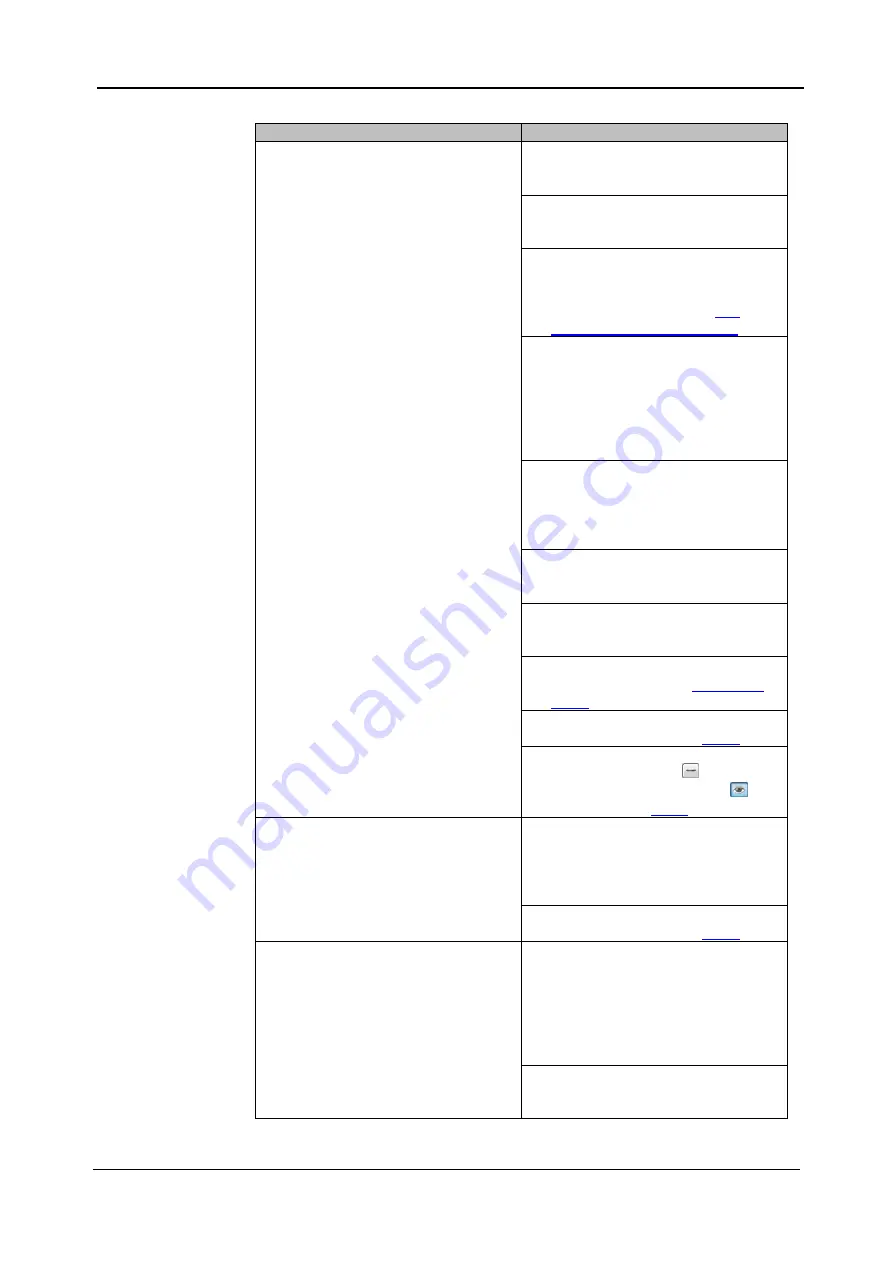
Trouble Shooting during Imaging
Problem
Probable Cause / Corrective Action
The image cannot be acquired. / The
acquired image is dark.
It might be that the exposure time is
short.
⇒
Set it longer.
It might be that the laser intensity is
low.
⇒
Set it higher.
It might be that the imaging camera is
not recognized.
⇒
Restart the whole system
properly. Please refer to
It might be that the microplate is not
set in precisely.
⇒
Set it so the
“A1” well locates on
the left rear position from the front
of CQ1 Main Unit.
⇒
Set it so that 4 corners set on
stage precisely.
It might be that the slideglass(es) are
(is) not set in proper direction.
⇒
Set it(them) in proper direction(s).
⇒
Set slide glass to move over to left
side of sample holder.
It might be that the door of CQ Main
Unit opens.
⇒
Close it.
It might be that the key switch of
Utility Box is OFF.
⇒
Turn the key switch ON.
⇒
Confirm ONLINE and Laser: ON in
status panel (refer to
⇒
Confirm that contrast setting is
proper. (Refer to page
It might be that viewer status is
turned to undisplayed (
).
⇒
Turn it to displayed status (
).
(Refer to page
Image become bright suddenly
Confirm whether the check box
“Laser Enhancement” of “Imaging”
window is checked or not.
⇒
If checked, laser power can
increase suddenly.
⇒
Confirm that contrast setting is
proper. (Refer to page
The laser autofocus does not operate
properly.
It might be that there are scratches /
dusts on the bottom surface of
sample.
⇒
Clean the surface and remove
dusts and water on it.
⇒
Use the sample without scratches
on the bottom surface.
Sample vessel might tilt
⇒
Remove sample vessel once and
set it again carefully.
Summary of Contents for CQ1
Page 2: ...This document corresponds to the following versions of software Measurement software R1 04 ...
Page 8: ...vi IM 80J01A01 01E Right Side of Utility Box Aperture label ...
Page 24: ......
Page 34: ......
Page 48: ......
Page 177: ... 5 Functions of CQ1 Software 5 81 IM 80J01A01 01E Drag tab to move the window ...
Page 236: ......
Page 238: ......
Page 252: ...7 14 7 Trouble Shooting IM 80J01A01 01E Set sub cover and tighten 2 screws ...
Page 256: ......
Page 266: ......


