Yealink IP Phones Auto Provisioning Guide
66
7.
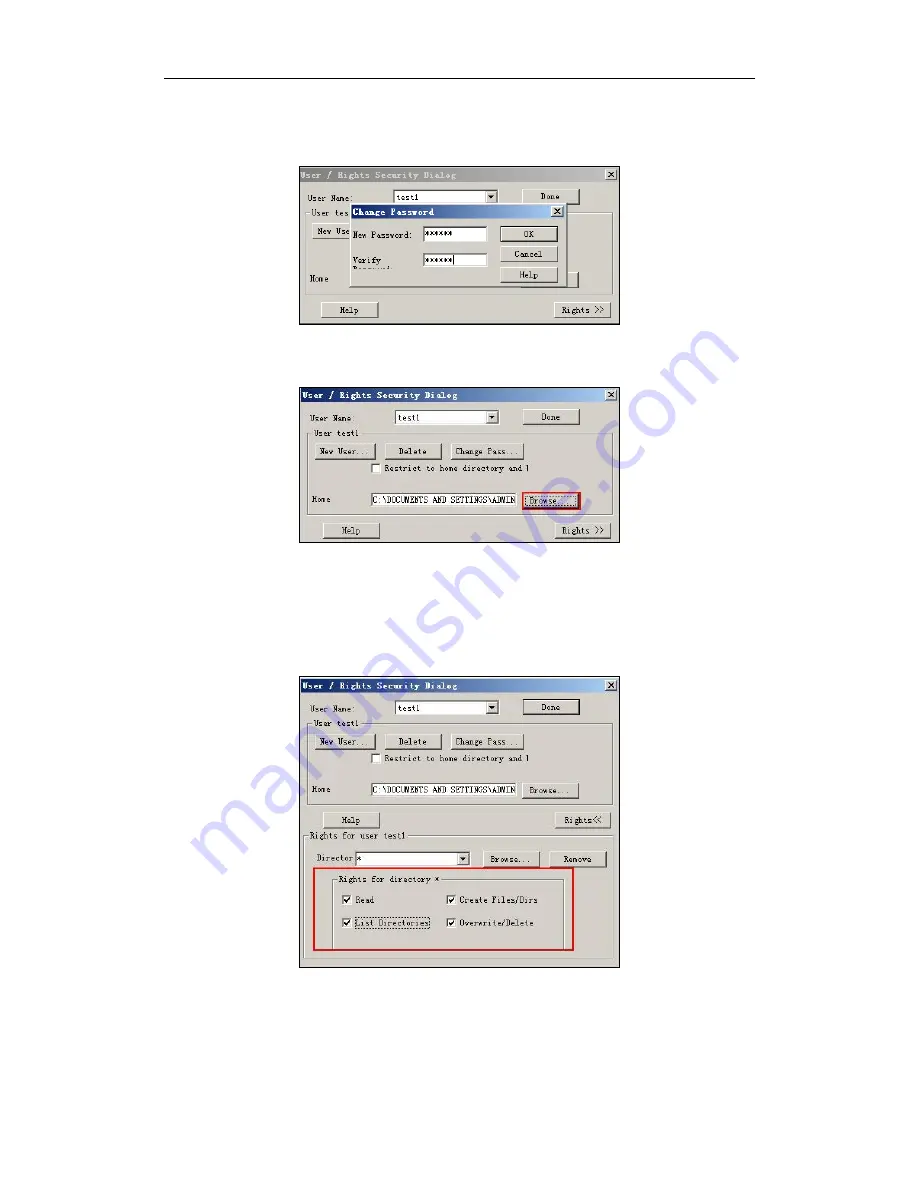
Enter the password of the user (e.g., test1) created above in the New Password
and Verify Password fields respectively, and then click OK.
8.
Click Browse to locate the FTP root directory from your local system.
9.
Click Rights>> and assign the desired permission for the user (e.g., test1) created
above.
10.
Check the check boxes of Read, Create Files/Dirs, List Directories and
Overwrite/Delete to make sure the FTP user has the read and write permission.
11.
Click Done to save the settings and finish the configurations.
The server URL “ftp://username:password@IP/” (Here “IP” means the IP address of the
provisioning server, “username” and “password” are the authentication for FTP
download. For example, “ftp://test1:[email protected]/”) is where the IP phone
Summary of Contents for SIP-T23
Page 1: ...Table of Contents i...
Page 2: ...Yealink IP Phones Auto Provisioning Guide ii...
Page 6: ...Yealink IP Phones Auto Provisioning Guide 2...
Page 62: ...Yealink IP Phones Auto Provisioning Guide 58...
Page 66: ...Yealink IP Phones Auto Provisioning Guide 62...
Page 315: ...Appendix 311 SIP T23 P G 7 Left 8 Right 9 OK 10 Cancel 14 TRAN X Phone Model...


