Setting Up Your System
131
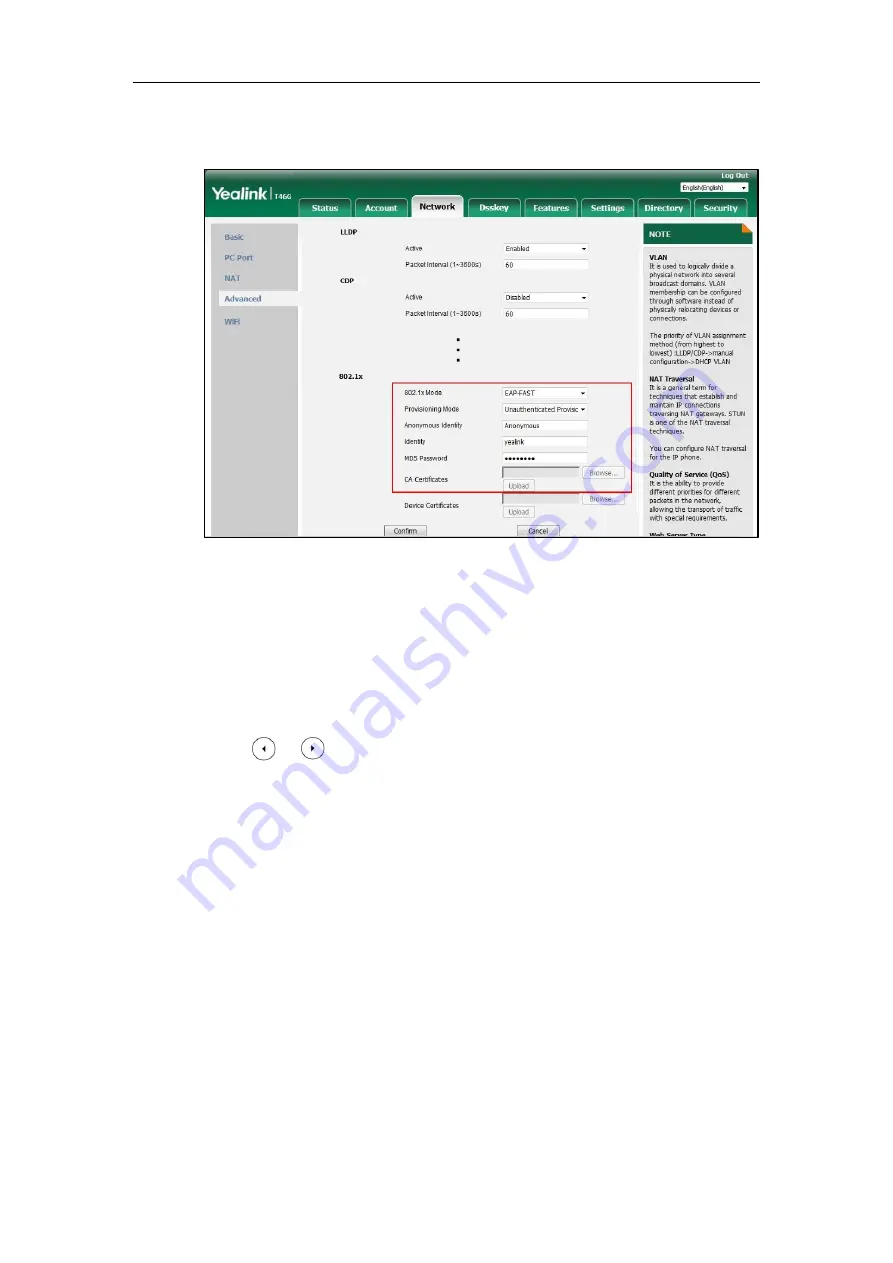
The CA certificate needs to be uploaded only when
Authenticated
Provisioning
mode is selected from the
Provisioning Mode
field.
6)
Click
Upload
to upload the certificate.
3.
Click
Confirm
to accept the change.
A dialog box pops up to prompt that settings will take effect after a reboot.
4.
Click
OK
to reboot the phone.
To configure the 802.1X authentication via phone user interface:
1.
Press
Menu
->
Advanced
(default password: admin)
->
Network
->
802.1x
.
2.
Press or , or the
Switch
soft key to select the desired value from the
802.1x
Mode
field.
a)
If you select
EAP-MD5
:
1)
Enter the user name for authentication in the
Identity
field.
2)
Enter the password for authentication in the
MD5 Password
field.
b)
If you select
EAP-TLS
:
1)
Enter the user name for authentication in the
Identity
field.
2)
Leave the
MD5 Password
field blank.
c)
If you select
EAP-PEAP/MSCHAPv2
:
1)
Enter the user name for authentication in the
Identity
field.
2)
Enter the password for authentication in the
MD5 Password
field.
d)
If you select
EAP-TTLS/EAP-MSCHAPv2
:
1)
Enter the user name for authentication in the
Identity
field.
2)
Enter the password for authentication in the
MD5 Password
field.
Summary of Contents for CP860 SERIES
Page 1: ...63 ...
Page 51: ...Getting Started 25 For SIP T46G S Desk Mount Method Wall Mount Method Optional ...
Page 53: ...Getting Started 27 For SIP T42S T41S Desk Mount Method Wall Mount Method Optional ...
Page 55: ...Getting Started 29 For SIP T23P T23G Desk Mount Method Wall Mount Method Optional ...
Page 70: ...Administrator s Guide for SIP T2 Series T19 P E2 T4 Series T5 Series CP860 CP920 IP Phones 44 ...


