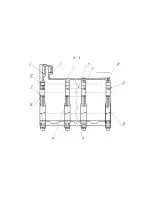
N
um
be
r of
the
d
ef
ect
L
oc
at
ion o
f
th
e p
ic
tu
re
Possible defect
Way for defect detection
and means of control
Dimension and parameter, mm
Conclusion
nominal
maximum allowable
without repair
for repair
5
Б
В
Thread stripping no more
than one thread:
М8х1-6h
М10-3H6Н
Inspection. Inside gauge
НИ100-160-1
See the table
3
-
-
-
To calibrate the
thread
To install threaded
insert
Table 3 – Categorical repair dimensions of the upper block cover
Number
of the defect
Dimensions according to the working drawing
Repair dimensions of the thread, mm
1
2
М8х1.25Cп
М10х1.25
Cп
Technical requirements for the repaired assembly unit
Number of the defect
1
1 positional tolerance for the threaded holes B – 0.2 mm radius
----------------------------------------------------------- 5
Summary of Contents for ???-236
Page 25: ...26...
Page 26: ...27 2...
Page 40: ......
Page 41: ......
Page 53: ......
Page 56: ......
Page 59: ......
Page 64: ...236 238 1003014 3 236 238 1003014 4 236 238 1003014...
Page 65: ......
Page 70: ......
Page 73: ......
Page 81: ......
Page 85: ......
Page 92: ......
Page 95: ......
Page 101: ......
Page 113: ......
Page 119: ......
Page 122: ......
Page 125: ......
Page 128: ......
Page 142: ......
Page 144: ......
Page 150: ......
Page 155: ......
Page 158: ......
Page 160: ......
Page 165: ......
Page 193: ...N u M a r Method defect detection and Dimension and parameter mm...
Page 201: ...4 Thread stripping M16 1 5 6H no more than two threads Inspection To calibrate the thread...


