Pattern Playback
MOTIF XF Reference Manual
174
V
oice mode
Song mode
P
a
tter
n mode
Mixing mode
Mast
er mode
Utility mode
F
ile mode
P
erf
or
mance
mode
Sampling
mode 1
Sampling
mode 2
R
e
fe
rence
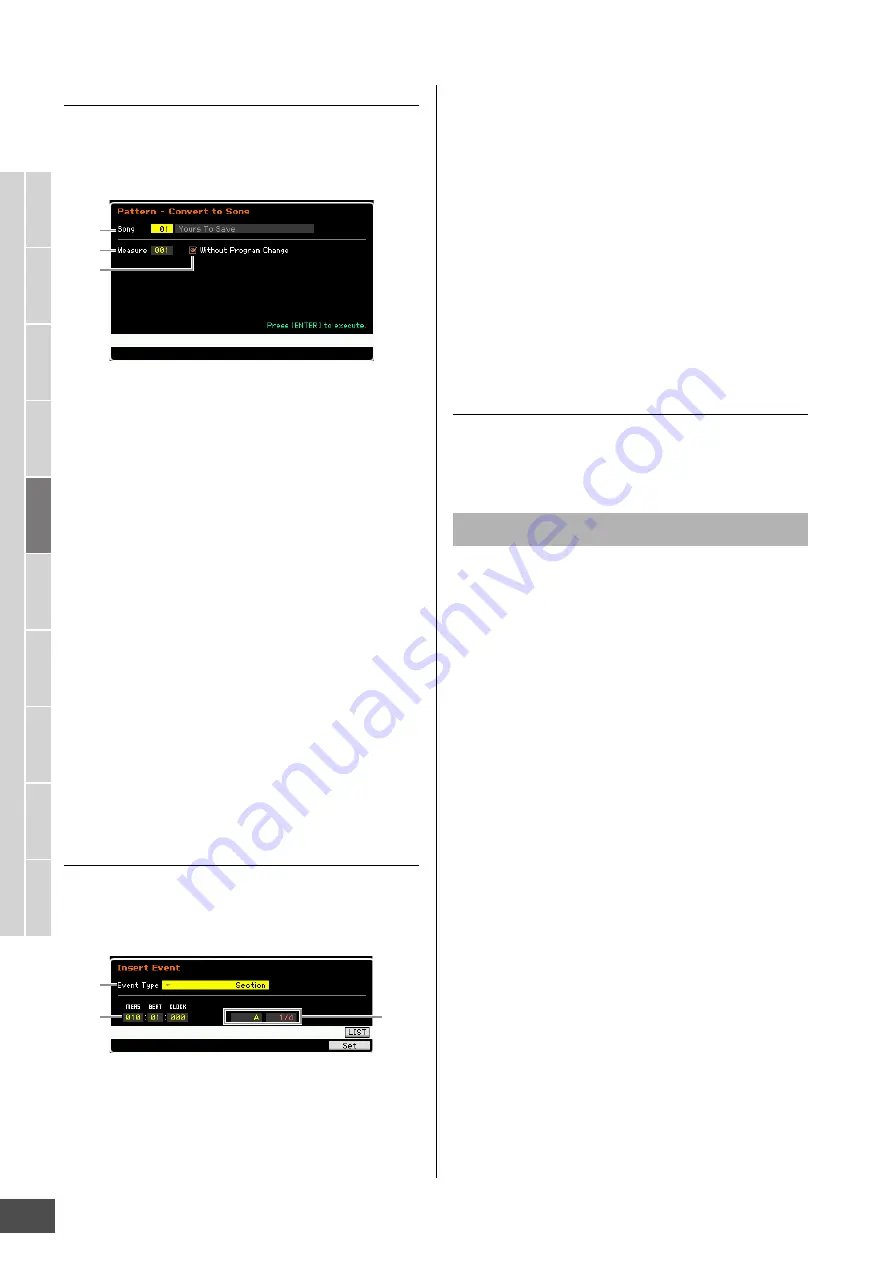
[SF3] Song (Convert to Song)
Converts the current Pattern chain to MIDI sequence data
and copies the data to a specified Song. This function is
useful for quickly creating backing and accompaniment
parts for Song data.
1
Destination Song
Determines the destination Song by specifying the number
(01 – 64). The name of the selected Song is displayed.
2
Destination Location (Top Measure)
Determines the beginning measure number of the
destination.
Settings:
001 – 999
3
Without Program Change
When this box is checkmarked, the settings of the Mixing
and Tempo are copied to the destination Song (
1
). The
Tempo value is copied to the top measure (
2
) of the
destination Song. When the checkmark is removed, the
Voice settings in each Phrase are also copied to the top
measure (
2
) of the destination Song as Program Change
events.
NOTICE
This Job operation overwrites any data previously existing in the
destination Song and the Undo/Redo (page 182) Job cannot be
used after executing this Job. Important data should always be
saved to a USB storage device connected to the USB TO DEVICE
terminal or to a computer connected to the same network as the
MOTIF XF (page 241).
[SF4] Insert
From this display, you can insert a new event to the Pattern
Chain. After setting the following parameters, press the
[F6] Set button or [ENTER] button to actually insert the
event.
1
Event Type
Determines the event type to be inserted.
Settings:
Time Signature, Section, end, Tempo Change, Track Mute
end
Indicates the end position of the Pattern Chain.
2
Inserting location
Specifies the location at which the new event will be
inserted.
Settings:
MEAS (Measure):
001 – 999
BEAT:
01 – 16 (depends on the meter)
CLOCK:
000 – 479 (depends on the meter)
3
Value of the selected event type
Enters the value of the event to be inserted. The values
available differ depending on the selected Event Type (
1
).
Settings:
Time Signature:
1/16 – 16/16, 1/8 – 16/8, 1/4 – 8/4
Section:
A – P, end (end of the data)
Tempo Change:
005.0 – 300.0
Track Mute:
m
(mute on), blank (mute off)
[SF5] Delete
Deletes the currently selected event. This button is not
available when the cursor is located at the Time Signature
event, Tempo Change or top/bottom of the data.
1
Select a Pattern on the Chain Play display.
This step is necessary because each Pattern has its
own dedicated Pattern Chain data.
2
Press the [EDIT] button to call up the Chain
Edit display.
3
Edit the already-recorded events.
Move the cursor to each of parameters, then set the
value by using the data dial, [INC/YES] and [DEC/NO]
buttons. To make it easier to find desired parameters,
use the View Filter display called up via the [SF1]
button. You can use the Copy function called up via the
[SF2] button to copy the events from a specified range
to another range.
If you wish to delete the event, move the cursor to the
event to be deleted then press the [SF5] button.
If you wish to insert a new event, press the [SF4] button
to call up the Insert display. From this display, you can
input the events one by one.
4
Convert the created Pattern Chain data to a
Song.
By using the Convert To Song display called up via the
[SF3] button, you can convert the created Pattern Chain
data to MIDI sequence data and copy the converted
data to a specified Song. This function is useful for
quickly creating backing and accompaniment parts for
Song data.
1
2
3
1
2
3
Pattern Chain Edit Procedure


