Editing MIDI Events (Song Edit)
MOTIF XF Reference Manual
152
V
oice mode
Song mode
P
a
tter
n mode
Mixing mode
Mast
er mode
Utility mode
F
ile mode
P
erf
or
mance
mode
Sampling
mode 1
Sampling
mode 2
R
e
fe
rence
When TR is set to “scn” (Scene):
Scene Memory
Track Mute
When TR is set to “tmp” (Tempo):
Tempo Change
5
[F3] ViewFilter
Calls up the View Filter setting display (below).
6
[F4] Track Sel (Track Select)
You can switch between the display for tracks 1 – 16, the
Scene track, and the Tempo track by pressing this button.
When any one of tracks 1 – 16 is selected, you can select a
different track number by pressing the appropriate Number
button [1] – [16].
7
[F5] Insert
Calls up the Insert Event window (page 151).
8
[F6] Delete
Deletes the currently selected event. This button is not
available when the cursor is located at the top or bottom of
the Song data.
9
[SF6] NUM
This menu appears when the cursor is located on MEAS
(measure), BEAT, CLOCK, GATE (gate time) or VEL
(velocity). When the [SF6] NUM button is pressed in this
status, each digit (1 – 9, 0) is assigned to the [SF1] – [SF5]
and [F1] – [F5] buttons, allowing you to input a number
directly by using these buttons. For details, see page 36.
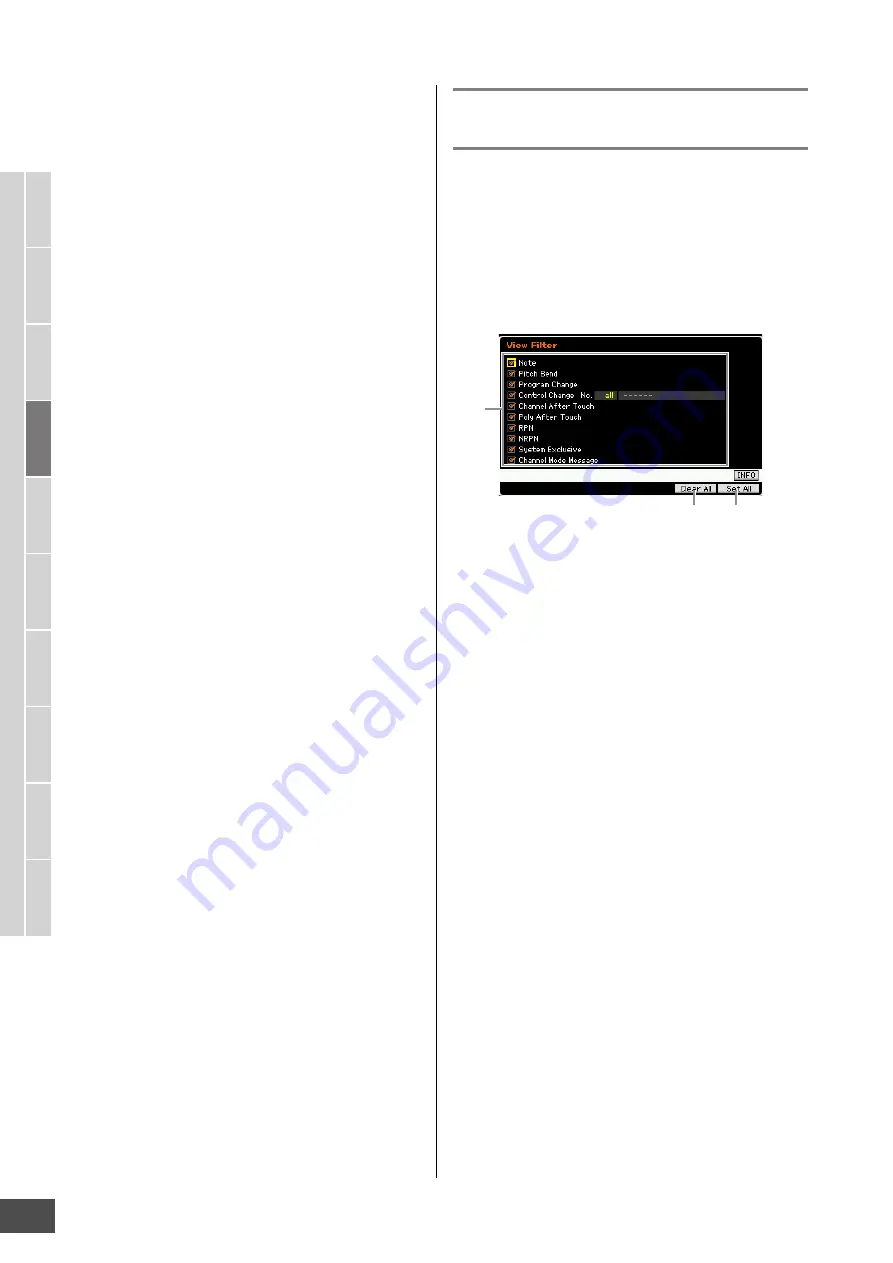
Changing the MIDI event view—[F3]
View Filter
MIDI song data generally has a large amount of recorded
events, and the Event List window may be overcrowded
with them. Since it may be difficult to find a specific event,
you can use the View Filter function to help narrow down
your search. This conveniently lets you specify which
classes of events will be displayed and which will not,
making it much easier and faster to find desired events.
From the Event List display, call up the View Filter display
by pressing the [F3] View Filter button.
1
Event types
Only the event which the checkbox is marked will be
shown on the Event List display.
Settings:
Note, Pitch Bend, Program Change, Control Change*,
Channel After Touch, Poly After Touch, RPN, NRPN, System
Exclusive, Channel Mode Message
* You can specify the Control Number (0 – 119, all).
2
[F5] Clear All
Pressing this button removes the checkmarks of all events.
If you wish to indicate specific events, it is a good idea to
press the [F5] button to first remove the checkmarks of all
events, then enter the checkmarks of your desired events.
3
[F6] Set All
Pressing this button enters the checkmarks for all events,
letting you view all recorded events.
1
2
3


