


CL3/CL1
136
1.
Service Check
This section describes the contents of the test program for CL
service check and shows examples of executing screen.
On the examples of executing screen, only the item being
checked is shown. (There are gray-out items on the actual
display.
If jigs required for some checking items are not available, clear
the check box for the subject checking item before executing
check.
1)
Object to be checked
CL itself
2) PC
DOS/V PC: 1 unit (with P-200MHz or more, Windows
2000,Windows
XP,
Windows
7, Ethernet port)
* Download the program to be used from the YSISS Home
Page.
3) Test
Jig
MY16-EX check jig
: 3 pcs.
Rio3224-D
: 1 pc.
(Not necessary if not executing the SLOT check.)
D-SUB DA-15 MALE JIGU by return
: 1 pc.
4) Cables
XLR (AES/EBU) MALE
↔
FEMALE : 2 pc.
BNC (Word Clock)
: 1 pc.
LAN (UTP CAT.5 (e))
: 3 pc.
(For connectors of 2 LAN cables of the 3 above, use RJ-
45 connectors which are applicable to EtherCom CAT5e
made by Neutrik Co., )
MIDI
: 1 pc.
5) Others
USB memory
: 1 pc.
Tester (to measure the voltage of LAMP) : 1 pc.
MBCL
: 1 pc.
6) Connection
Refer to the test connection diagram on page 137.
7) PC
settings
• Setting Ethernet
(For Win XP, set in the order of Control panel
→
Network connection
→
Local area connection
→
Property
→
TCP/IP property.)
Check IP Address and Subnet Mask in the Network
setting of the CL SETUP screen. Set IP Address that is
not identical with CL IP Address in the same subnet. Set
Subnet Mask and Default Gate Way that are identical
with those of CL.
• DME-IN Network Driver setting
(Control Panel
→
DME-N Network Driver)
Device No.
1
Device Name
(optional)
Device ID
1
TCP-KEEPALIVE on
For IP Address and Protect No., check IP Address and
MAC Address in the SETUP screen of CL and input them.
• How to start checking
1)
How to start CL
While pressing USER DEFINED KEYS 1, 2 and 3 of CL,
turn on the power and enter the test program from the PC
application.
* When checking the FADER, execute calibration in
advance according to the “FADER CALIBRATION”
procedure on page 170 until there is no fader which is judged
as NG.
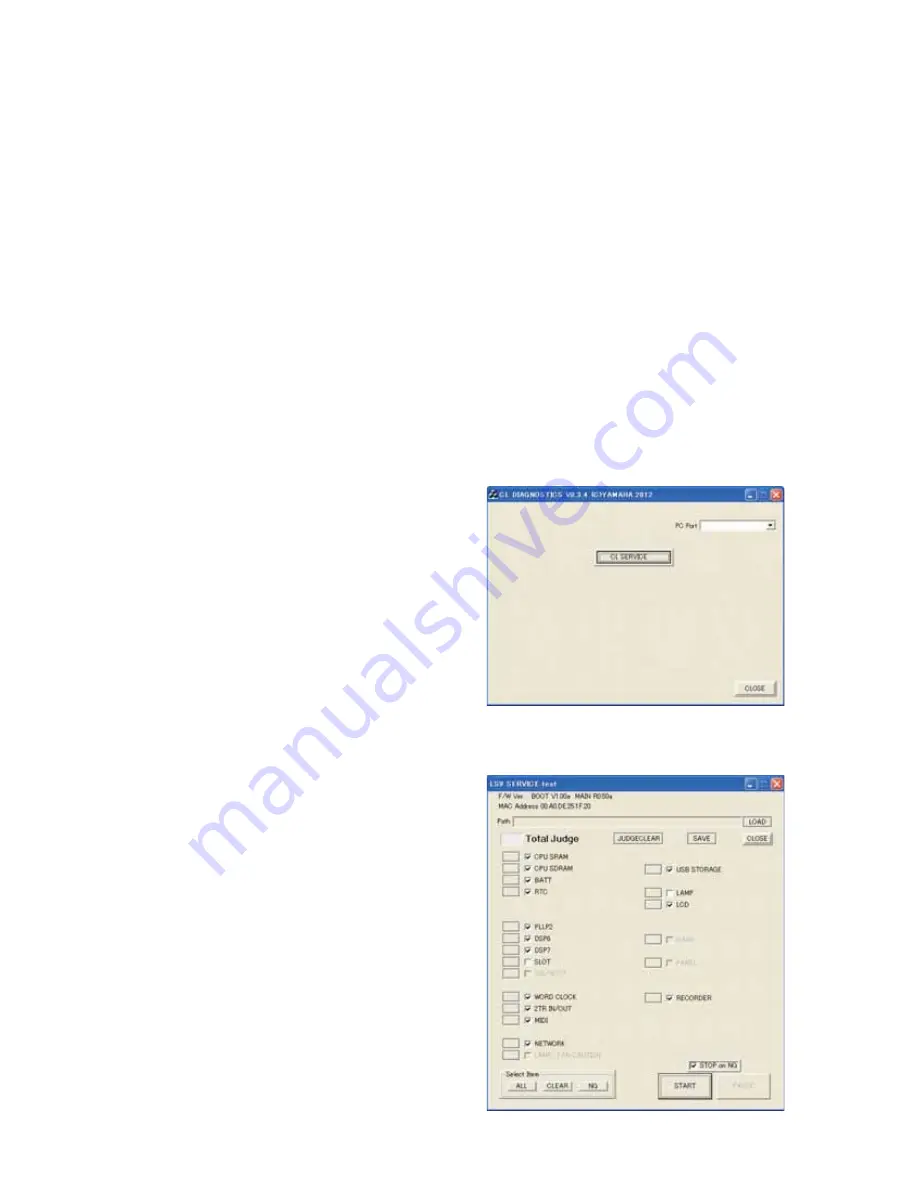
2)
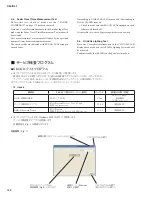
How to start PC application
Start CLTest_service.exe through Windows, and the start-
up screen as shown below will appear.
Click the
[CL SERVICE]
button on the start-up screen,
and the general check screen (CL SERVICE test window)
will appear.
Summary of Contents for CL3
Page 7: ...7 CL3 CL1 DIMENSIONS CL3 CL1 648 15 201 130 299 667 839 15 201 130 299 667 Unit mm...
Page 95: ...95 CL3 CL1 CPU Circuit Board Pattern side to DSP CN101 2NA WY67750 1...
Page 101: ...101 CL3 CL1 DNTU Circuit Board Pattern side Scale 80 100 2NA WZ20390 5...
Page 102: ...CL3 CL1 102 2NA WY63530 FX Circuit Board WR 63 1 Component side Scale 95 100...
Page 103: ...103 CL3 CL1 2NA WY63530 FX Circuit Board Pattern side Scale 95 100...
Page 105: ...105 CL3 CL1 HAAD Circuit Board Pattern side Scale 90 100 2NA WY64340 2...
Page 107: ...107 CL3 CL1 2NA WY63490 Component side JK Circuit Board WR 63 1...
Page 109: ...109 CL3 CL1 Component side TBPHN Circuit Board WR 06 1 WR 63 1 2NA WY64360 1...
Page 110: ...CL3 CL1 110 Component side PN8 Circuit Board to FD8 CN902 or FD8CN CN902 2NA WY53120 2...
Page 118: ...CL3 CL1 118 Component side PNENL Circuit Board to PN8 CN001 2NA WY53130 1...
Page 160: ...CL3 CL1 160 1 18 LCD Test LCD LCD 1 3 2 9 5 OK NG 1 2 H 3 O X O 4 BOX 5x4...
Page 382: ...7 MBCL CIRCUIT BOARDS A A A A 2NA WY53200 1 MB Circuit Board Component side...
Page 383: ...MBCL 8 MB Circuit Board DSUB PH CONNECTOR ASSEMBLY B B B B 2NA WY53200 1 Pattern side...


