


57
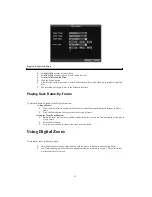
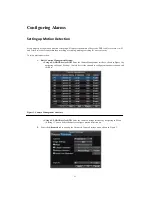
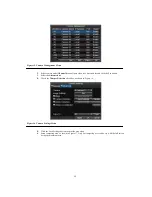
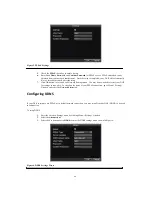
Figure 13. Camera Settings Menu
5.
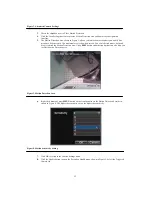
Click the Handle button to enter the Exception Handle menu, shown in Figure 14.
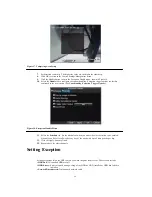
6.
Select the
Handle
tab to configure exceptions handling. Exception trigger options are further
explained in the next section (See
Understanding Exception Trigger Options
).
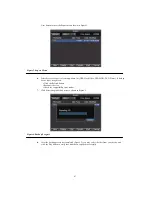
Figure 14. Exception Handle Menu
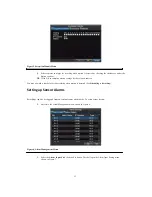
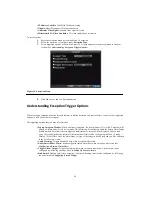
7.
Select the
Schedule
tab. Set the schedule of when you want video loss detection to be enabled.
Schedule can be set for all week or any day of the week with up to 8 time periods per day.
8.
Click the Apply button to finish.
9.
Repeat above for other channels.
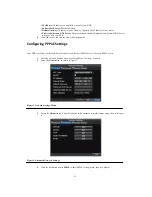
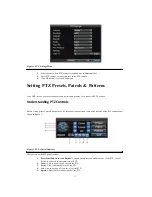
Detecting Video Tampering
Video tampering (i.e. moving camera to a different position) can also be detected and set to trigger an action on your
DVR. To setup video tempering detection:
1.
Enter Camera Management/Settings menu (Figure 15) by clicking Menu > Setting > Camera.
Summary of Contents for XL-HDVR series
Page 1: ...XL HDVR Series USER S MANUAL...
Page 2: ...2...
Page 7: ...7 C H A P T E R 1 Introduction...
Page 17: ...17 C H A P T E R 2 Getting Started...
Page 23: ...23 5 Click the Apply button to save the setting...
Page 24: ...24 C H A P T E R 3 Live Preview...
Page 30: ...30 C H A P T E R 4 Record Settings...
Page 39: ...39 C H A P T E R 5 Playback...
Page 44: ...44 Figure 7 Digital Zoom Area Selection...
Page 45: ...45 C H A P T E R 6 Backup...
Page 50: ...50 C H A P T E R 7 Alarm Settings...
Page 61: ...61 C H A P T E R 8 Network Settings...
Page 69: ...69 C H A P T E R 9 PTZ Controls...
Page 76: ...76 C H A P T E R 1 0 Camera Management...
Page 83: ...83 C H A P T E R 1 1 HDD Management...
Page 89: ...89 C H A P T E R 1 2 DVR Management...
Page 101: ...101 C H A P T E R 1 2 Appendix...


