background image

Feeding Devices

Bypass (Tray 5)

The Bypass Tray, also called Tray 5, is part of the base system configuration. The
mounting location for the Bypass tray varies when optional feeding devices are added
to the machine configuration:

• If the system configuration includes either the 1-Tray HCF (Letter-size / A4) or the

1-Tray OHCF (Tray 6), then the Bypass (Tray 5) is installed above the feeding device.

• If the system configuration includes one 2-Tray OHCF (Trays 6 and 7), then the

Bypass Tray is installed on top of it.

• If the system configuration includes a second, chained OHCF (Trays 8 and 9), then

the Bypass Tray is installed on top of the second OHCF (Trays 8 and 9).

The Bypass Tray accommodates a weight range of 52 to 300 gsm and media size of
3.86 x 5.75 inches (98 x 146 mm) to 13 x 19.2 inches (330.2 x 488 mm). The Bypass
Tray holds a maximum of 280 sheets of 20 lb. / 75 gsm plain paper. The Bypass Tray
accepts envelopes, postcards and transparencies.

High Capacity Feeder (HCF), 1 Tray

The 1-tray High Capacity Feeder (HCF), also known as Tray 6, provides a 2,000-sheet,
letter-size (8.5 x 11 in. / A4) paper source.

Note

Only letter-size (8.5 x 11 in.) / A4 paper, Long Edge Feed (LEF) can be used in this tray.

1- or 2-Tray Oversized High Capacity Feeder (OHCF / Trays 6 and 7)

The Oversized High Capacity Feeder (OHCF) is available in a 1-tray or 2-tray option.
The OHCF feeds a variety of stock sizes, including standard and oversized stock up to
13 x 19.2 in./330.2 x 488 mm and weighing between 52 gsm and 350 gsm. Each tray
holds 2,000 sheets.

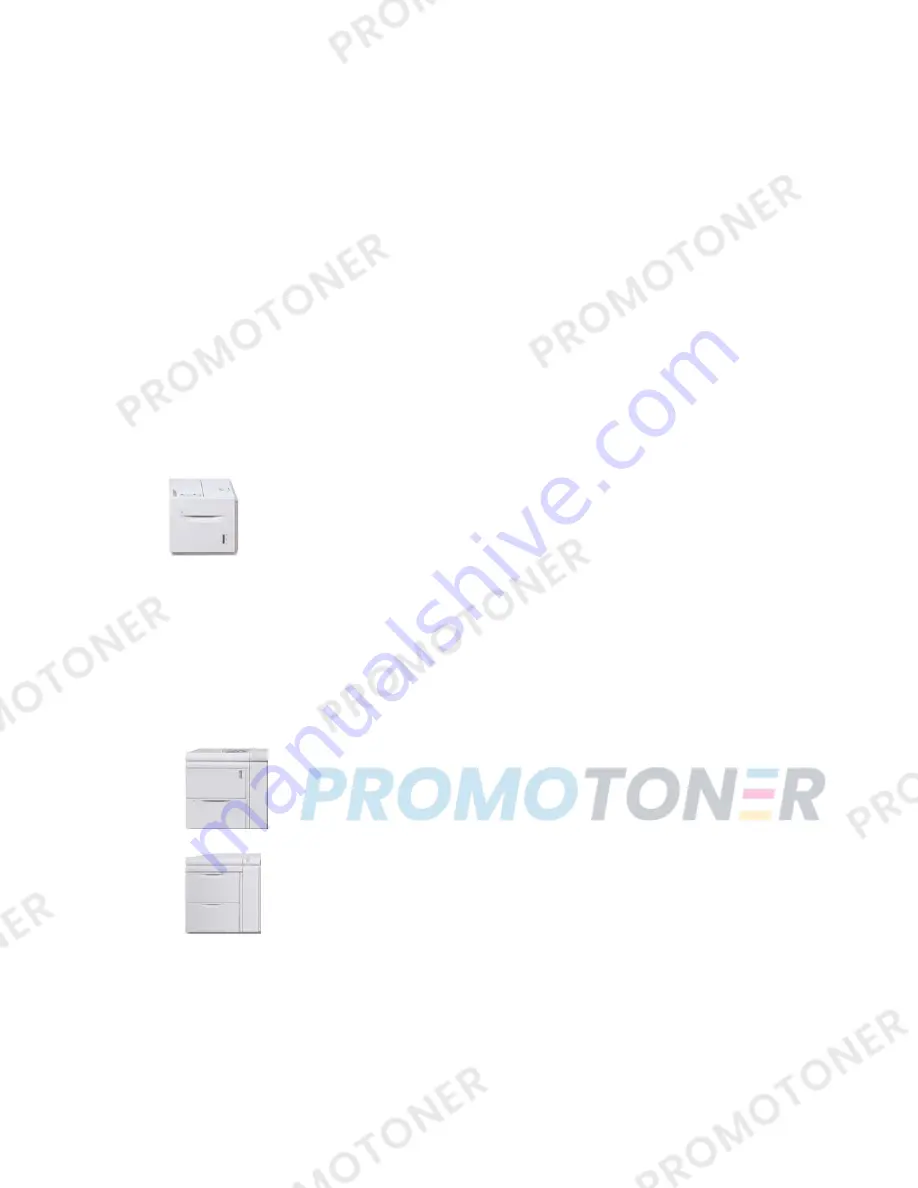
• 1-tray OHCF (with storage cabinet above the tray; shown with Bypass Tray installed)

• 2-tray OHCF (shown with Bypass Tray installed)

1-9

Xerox

®

Versant

®

80 Press

User Guide

Product Overview

Summary of Contents for Versant 80 Press

Page 1: ...Xerox Versant 80 Press User Guide System Software Version 80 20 84 Book Version 3 1 November 2015 ...

Page 2: ...Adobe PostScript Interpreter the Adobe page description language and other Adobe products Fiery and EFI are trademarks or registered trademarks of Electronics For Imaging Inc GBC and AdvancedPunch are trademarks or registered trademarks of General Binding Corporation Microsoft Windows Windows XP Windows Vista Internet Explorer and Word are registered trademarks of Microsoft Corporation in the Unit...

Page 3: ... 7 Sleep Mode 1 7 Exiting Energy Power Saver Mode 1 7 Power On Off 1 7 The Power Switches 1 7 Power On Off the Press 1 8 Power On the Press 1 8 Power Off the Press 1 8 Feeding and Finishing Devices 1 8 Feeding Devices 1 9 Finishing Devices 1 10 Optional Performance Package 1 14 2 Where to Find Help 2 1 Help on the Xerox Web Site 2 1 Print Server Customer Documentation 2 1 3 Paper and Media 3 1 Ove...

Page 4: ...igh Capacity Feeder OHCF Trays 6 and 7 3 12 Loading Transparencies in the Oversized High Capacity Feeder OHCF Trays 6 and 7 3 13 Loading Pre Drilled Stock into the Oversized High Capacity Feeder OHCF Trays 6 and 7 3 14 Loading Media in the OHCF Trays 8 and 9 3 15 Postcard Bracket 3 15 Using the Postcard Bracket 3 15 Skew Adjustment Levers Trays 8 and 9 3 17 Loading Paper in the OHCF Trays 8 and 9 ...

Page 5: ...4 11 Color Balance 4 11 Color Shift 4 12 Layout Adjustment Feature 4 12 Layout Adjustment Feature Overview 4 12 Selecting Layout Adjustment Options 4 12 Book Copying 4 13 2 Sided Book Copying 4 14 Original Size 4 14 Edge Erase 4 14 Image Shift 4 15 Image Rotation 4 15 Invert Image 4 16 Original Orientation 4 16 Output Format Feature 4 16 Output Format Feature Overview 4 16 Selecting Output Format ...

Page 6: ...Stopping a Scan Job 5 3 Scan Options 5 4 Scan Options Overview 5 4 Basic Scan Options 5 4 Advanced Settings 5 5 Layout Adjustment 5 7 E mail Options 5 8 Filing Options 5 10 Resolving a File Name Conflict 5 12 E mail 5 13 E mail Overview 5 13 E mail Components 5 13 Scanning to an E mail Address 5 14 Network Scanning 5 15 Network Scanning Overview 5 15 Network Scanning Components 5 15 Network Scanni...

Page 7: ...or Devices WSD Feature 5 23 Using the Store to WSD Feature 5 23 Starting a Scan Job from a Network Computer 5 24 Starting a Scan Job from This Device 5 24 6 Send from Folder Folder File Management 6 1 Send from Folder Folder File Management Overview 6 1 File Options 6 1 Managing Folders and Scanned Files 6 3 How to Configure Start a Job Flow 6 4 Configuring Starting a Job Flow 6 4 Using Send from ...

Page 8: ...anging Icons for a Stored Program 8 6 Running a Stored Program 8 6 Using a Stored Program while Build Job is Running 8 6 9 Web Applications 9 1 Web Applications Overview 9 1 Accessing Web Applications 9 1 10 Job Status 10 1 Job Status Overview 10 1 Job Status Area 10 1 Active Jobs Tab 10 1 Completed Jobs Tab 10 2 11 Machine Status 11 1 Machine Status Overview 11 1 Device Information Tab 11 1 Fault...

Page 9: ...ows 13 4 Cleaning the Fuser Assembly 13 5 Procedures for Replacing Consumables 13 6 Replacing Consumable Supplies 13 6 Ordering Supplies 13 6 Checking the Status of Consumables 13 7 Replacing a Dry Ink Toner Cartridge 13 8 Replacing the Dry Ink Toner Waste Bottle 13 9 Replacing a Drum Cartridge 13 10 Replacing the Suction Filter 13 12 14 Press Problem Solving 14 1 Locating the Press Serial Number ...

Page 10: ...7 Document Jams Under the Document Feeder Belt 14 39 Press Paper Jams 14 40 Paper Jams Inside the Press 14 40 Paper Jams in Trays 1 3 14 41 Paper Jams in the Bypass Tray 5 14 42 Paper Jams in the Standalone Bypass Tray 5 14 42 Paper Jams When the Bypass is Installed on Trays 6 and 7 14 42 Paper Jams When the Bypass is Installed on Trays 8 and 9 14 43 Fuser Hints and Tips 14 45 Extending Fuser Life...

Page 11: ...ng the OHCF Bypass Tray Feed Rolls Trays 6 and 7 17 2 Replacing the OHCF Feed Rolls Trays 6 and 7 17 3 OHCF Problem Solving Trays 6 and 7 17 6 Fault Codes Oversized High Capacity Feeder Trays 6 and or 7 17 6 OHCF Jam Clearance Trays 6 and 7 17 8 Clearing OHCF Jams Trays 6 and 7 17 8 Paper Jams When the Bypass is Installed on Trays 6 and 7 17 8 Paper Jams Inside the OHCF Trays 6 and 7 17 9 OHCF Pap...

Page 12: ... Finisher Components 19 2 BR Finisher Maintenance 19 2 Consumable Supplies for the BR Finisher 19 2 Replacing Staples in the Main Stapler Unit 19 3 Replacing Staples in the Booklet Maker 19 3 Emptying the Hole Punch Waste Container 19 4 Problem Solving for the BR Finisher 19 5 Fault Codes Business Ready BR Finisher and Optional Booklet Maker 19 5 Clearing Jams in the BR Finisher at Position 3a 19 ...

Page 13: ... the GBC AdvancedPunch 21 2 Punch Dies 21 3 GBC AdvancedPunch Procedures 21 4 Changing the Punch Die 21 4 Pre Punch Job Checkpoints 21 5 Loading Tab Stock with the GBC AdvancedPunch 21 6 GBC AdvancedPunch Maintenance 21 6 Emptying the Punch Container 21 6 GBC AdvancedPunch Problem Solving 21 7 Fault Codes GBC AdvancedPunch 21 7 GBC AdvancedPunch General Problems 21 7 GBC AdvancedPunch Jam Clearanc...

Page 14: ...Die Set 22 17 Adding Pins to a Die Set 22 18 Changing the Die Stop Position 22 19 AdvancedPunch Pro Maintenance 22 20 Ordering Supplies for the AdvancedPunch Pro 22 20 Cleaning the Exterior of the AdvancedPunch Pro 22 21 Emptying the Punch Container 22 21 Die Set Maintenance 22 22 Lubricating Die Set Pins without a Felt Pad 22 22 Lubricating Die Set Pins with a Felt Pad 22 22 AdvancedPunch Pro Pro...

Page 15: ...plies 24 6 Replacing the Basic Staple Cartridge 24 6 Replacing the Booklet Staple Cartridge 24 7 Replacing the Staple Waste Container 24 8 Emptying the Punch Waste Container 24 10 Finisher Problem Solving 24 11 Problem Solving Information 24 11 Fault Codes Standard Finisher Booklet Maker Finisher 24 11 Jam Clearance in the Finisher 24 13 Paper Jams in the Post Process Inserter Tray T1 24 13 Paper ...

Page 16: ...ure 25 4 Square Fold Options 25 5 Trimmer Feature 25 5 Trimmer Options 25 6 Trim Guidelines 25 6 Square Fold Trimming Procedures 25 8 Selecting the Square Fold Trimming Options for Network Print Jobs 25 8 Selecting the Square Fold Trimming Options for Copy Jobs 25 8 Hints and Tips 25 9 Printing Full Page Images on Booklets 25 9 Follow These Tips 25 10 Problem Solving 25 10 Fault Codes SquareFold T...

Page 17: ...rd Finisher Plus Problem Solving 26 5 Fault Codes Standard Finisher Plus 26 5 Paper Jam Procedures for the Finisher Module 26 7 Paper Jams in the Finisher Module 26 7 Paper Jams in Areas 4b and 4c 26 8 Paper Jams in the Finishing Transport 26 8 Paper Jams in Area 1 26 8 Paper Jams in Area 2 26 9 Paper Jams in Area 3 26 10 Paper Jams in Area 4 26 11 Standard Finisher Plus Specifications 26 12 Finis...

Page 18: ...Xerox Versant 80 Press xvi User Guide Table of Contents ...

Page 19: ...nting on 8 5 x 11 inch A4 paper Base Configuration The system base system configuration consists of the following components 1 Bypass Tray Other optional feeding devices are available 2 Color Press 3 Offset Catch Tray Other optional finishing devices are available 4 Print Server not shown Choice of one of three print servers is available 1 1 Xerox Versant 80 Press User Guide ...

Page 20: ...om by searching for the press and selecting the Support link Press Components Press Components 1 Bypass Tray The Bypass Tray is also called Tray 5 or Multisheet Inserter the tray accommodates all types of stock in various sizes and weight ranges Note The mounting location for the Bypass tray varies when optional feeding devices are added to the machine configuration 2 User Interface UI The User In...

Page 21: ...us Customer Replaceable Units CRUs 8 Dry Ink Toner Cover Open this cover to access and replace the dry ink toner cartridges Locating the Press Serial Number The press serial number can be accessed from either the press User Interface or from the serial number plate which is located on the inside frame of Tray 1 1 Press the Machine Status button on the User Interface 2 From the Machine Status scree...

Page 22: ...achine Status button Use to access the Tools feature check the press configuration the software version the press billing meters and counter information and to access and print job history or error reports 6 Log In Out button Use to log in and out of Administrator mode or Authentication mode with user ID and password 7 Energy Power Saver button Use this button if the press has been inactive and th...

Page 23: ...ncels the previous entry made on the numeric keypad 13 Language button Use to select a different language for the touch screen options 14 Help button Displays the Help System this feature may not be available in all marketplaces Features Logon There are two logon levels Guest Operator This is the default logon user You are automatically logged on as Guest Administrator This logon level is required...

Page 24: ...ure allows the press to enter a reduced power consumption mode when all print jobs have completed and there are no jobs currently processing There are two energy saving modes Low Power and Sleep By default the press automatically enters the Low Power mode after 1 minute of inactivity After 1 minute of inactivity the press then enters Sleep mode These time intervals for both modes can be changed by...

Page 25: ...ure is canceled Exiting Energy Power Saver Mode The press exits Energy Power Saver mode by doing one of the following Pressing the Power Energy Saver button on the press UI Receiving print data for an incoming job to be printed or Programming and performing a copy or scan job Power On Off The Power Switches There are three power switches involved with the press The Breaker switch located at the re...

Page 26: ...check You can set features for a job during this time and the printing process will start automatically when the press is ready Power Off the Press Important Always power off the Power Switch first and then power off the Main Power Switch 1 Press the Power On Off button on the top of the press to Off Wait until the lights on UI stop blinking as this allows the fuser to begin cooling 2 Switch Off t...

Page 27: ... inches 98 x 146 mm to 13 x 19 2 inches 330 2 x 488 mm The Bypass Tray holds a maximum of 280 sheets of 20 lb 75 gsm plain paper The Bypass Tray accepts envelopes postcards and transparencies High Capacity Feeder HCF 1 Tray The 1 tray High Capacity Feeder HCF also known as Tray 6 provides a 2 000 sheet letter size 8 5 x 11 in A4 paper source Note Only letter size 8 5 x 11 in A4 paper Long Edge Fee...

Page 28: ...oated and uncoated stock Important The second chained OHCF Trays 8 and 9 can be added only to a system which includes a 2 Tray OHCF Trays 6 and 7 Finishing Devices Optional Cooling Fan Kit for the Offset Catch Tray OCT When attached to the OCT the Cooling Fan prevents blocking sticking together of the printed copied output The OCT Cooling Fan can be adjusted for the following paper weights 1 OFF f...

Page 29: ...ions the Interface Cooling Module also provides the added feature of cooling the printed media as it passes through the paper path by using additional fans and associated duct work The module is also equipped with an internal spectrophotometer Important The Interface Cooling Module is required with many of the finishing devices this depends on the system configuration and which finishing devices a...

Page 30: ...rface Module Interface Cooling Module GBC AdvancedPunch The GBC AdvancedPunch may be attached to a variety of optional finishing accessories It provides another level of finishing by allowing you to punch holes in 8 5 x 11 in A4 documents that support a variety of binding styles Punch types include 19 hole to a maximum of 32 hole for 8 5 x 11 in media A4 media supports punch types 21 hole to a max...

Page 31: ...ound later in this guide Information can also be found on the customer documentation CD that came with the accessory or it can be downloaded from www xerox com High Capacity Stacker HCS The High Capacity Stacker HCS is an optional finishing device that provides production stacking and offsetting capabilities of up to 5 000 sheets to a cart in the Stacker Tray Cart Shorter runs of up to 500 sheets ...

Page 32: ...itecture DFA devices are also available for your press Information on these DFA devices can be obtained by contacting your Xerox sales representative Optional Performance Package Important The Performance Package must be ordered prior to initial installation of the system It is not possible to upgrade an existing press with the Performance Package after the system has been ordered and installed Th...

Page 33: ... are automated in that they eliminate the need for an operator to manually scan target sheets using an external spectrophotometer The operator must initiate the procedure at the print server but all target sheets are then generated and scanned automatically and all measurements calculations and corrections are performed automatically Inline Spectrophotometer ILS The Inline Spectrophotometer ILS is...

Page 34: ...Business Ready Finisher with Booklet Maker or the Offset Catch Tray then the Performance Package option is not available for the configuration 4 When the Performance Package is ordered the Interface Cooling Module must be used The package cannot be used with the Interface Module 5 Finishing options enabled by the Interface Cooling Module include these finishers and their options High Capacity Stac...

Page 35: ...before calling for support The press serial number is shown on the Device Information tab Machine Status Device Information Print Server Customer Documentation The FreeFlow Print Server features are documented in the Online Help system from the Help menu shown on the main print server window Additional FreeFlow Print Server user documentation can be found at www xerox com The EFI Print Server Help...

Page 36: ...Xerox Versant 80 Press 2 2 User Guide Where to Find Help ...

Page 37: ... a full tray containing the same size paper orientation and stock type Refer to the System Administrator Guide for how to enable this feature and prioritize the order of trays to search on and use Loading Media in Trays 1 2 and 3 Information About Loading Media in Trays 1 2 and 3 Trays 1 2 and 3 are identical Each tray has a capacity of 550 sheets of 20 lb 75 gsm paper Stock can be Long Edge Feed ...

Page 38: ... the UI You can view and set stock attributes and verify trays are assigned with the correct stock 8 From the Paper Tray settings Tray Properties window choose one of the following No changes were made to the paper tray select Confirm to close the window Changes were made to the paper tray go to the next step 9 Select the Change Settings button a Make the desired selections for Paper Type Paper We...

Page 39: ... Gently push in the tray until it comes to a stop 6 If the Paper Tray settings Tray Properties window displays on the UI confirm the correct tray to which it is printing and other information including size type precut tab and if necessary paper curl and or alignment option 7 Select Confirm or OK to save the information and close the Paper Tray settings Tray Properties window Loading Transparencie...

Page 40: ...s 1 2 and 3 Pre drilled paper is defined as having two or more holes along one edge for use in ring binders and notebooks To prevent jams or damage make sure that any plugs pieces cut out of the paper to create the holes do not remain in the stack 1 Select the appropriate paper stock for your print job 2 Pull out the tray slowly until it stops 3 Open the ream of paper with the seam side facing up ...

Page 41: ...ips when using the Bypass Tray 5 Verify the stock loaded in the tray with the Paper Tray settings Tray Properties window on the UI Load a maximum of 280 sheets of 20 lb 75 gsm paper Do not load mixed size paper into the Bypass Tray Do not load materials above the MAX line as indicated on the tray Loading Paper in the Bypass Tray 5 Note The following prodecure shows the Bypass Tray 5 located on top...

Page 42: ...e inserting into the tray 4 Insert the tab stock into the tray so the straight edge of the stock is in the feed direction lead edge and the tabs are to the left trail edge 5 Continue to insert the tab stock into the tray until it stops 6 Adjust the paper guides so that they touch the edges of the stack 7 If the Paper Tray settings Tray Properties window displays on the UI confirm the correct tray ...

Page 43: ...OK to save the information and close the Paper Tray settings Tray Properties window Loading Envelopes in the Bypass Tray 5 Note It is recommended that you print envelopes from the Bypass Tray 5 only Optional Trays 6 and 7 OHCF can be used if the Postcard Bracket is mounted and the stack height is limited to no more than 200 envelopes When setting up your print job follow the steps below to define ...

Page 44: ...nd construction of the envelopes Try another envelope brand if problems occur Loading Paper in the 1 Tray High Capacity Feeder HCF Tray 6 Tips about the 1 tray HCF Tray 6 This tray accommodates only 8 5 x 11 in A4 Long Edge Feed LEF stock Stock weights between 18 lb 64gsm bond to 80 lb 220 gsm cover may be used in this tray It holds a maximum of 2000 sheets of 20lb 75 gsm paper Stock must be loade...

Page 45: ...e window Loading Media in the 1 or 2 Tray Oversized High Capacity Feeder OHCF Trays 6 and or 7 Note Each feeder tray has a stock loading label When loading media into the tray refer to the labels on the inside panel of the feeder tray for the correct orientation of that stock type Note It is recommended that you use the Bypass Tray Tray 5 to feed envelopes However if you use Trays 6 and or 7 C5 an...

Page 46: ... 1 Slowly open one of the paper trays until it stops and remove the paper 2 Move the paper guides out to their largest position 3 Open the front cover of the OHCF 4 Remove the Postcard bracket from inside the OHCF front cover 5 Install the Postcard bracket so that it sits on the locating pins on the upper frame and in the grooves on the bottom of the tray 6 Tighten the thumb screw so it locks the ...

Page 47: ...media type Changing the levers may cause more skew problems when running certain media types such as coated label transparency and film Use the following procedure to set the skew adjustment levers 1 Pull out the tray slowly until it stops The Tray Properties Settings automatically display at the press User Interface UI 2 From the Tray Properties window verify that the correct paper information is...

Page 48: ...ay 6 Adjust the paper guides by pressing in the guide release and carefully moving the Edge Guide until it lightly touches the edge of the material in the tray Do not load materials above the MAX line located on the rear Edge Guide 7 Gently push in the tray until it comes to a stop The Paper Tray settings Tray Properties window displays on the UI You can view and set stock attributes and verify tr...

Page 49: ... a stop The Paper Tray settings Tray Properties window displays on the UG 7 From the Paper Tray settings Tray Properties window confirm the correct tray to which it is printing and other information including size 9 x 11 inches type precut tab and if necessary paper curl and or alignment option 8 Select Confirm or OK to save the information and close the Paper Tray settings Tray Properties window ...

Page 50: ...slowly until it stops 3 Open the ream of paper with the seam side facing up 4 Fan the sheets before loading them into the tray 5 Load and register the paper against the right side of the tray for LEF direction 6 Load and register the paper against the right side of the tray as depicted below for SEF direction 7 Adjust the paper guides by pressing in the guide release and carefully moving the Edge ...

Page 51: ...d with the OHCF from manufacturing The Postcard bracket allows you to print on smaller size media without requiring post processing cutting or sorting The Postcard bracket specifically accommodates 4 x 6 in 101 6 x 152 4 mm SEF media Using the Postcard Bracket Use the following procedure for installing and using the Postcard Bracket when printing on smaller media 4 x 6 in 101 6 x 152 4 mm With the...

Page 52: ...the thumb screw so it locks the Postcard Bracket in place 7 Load the postcard stock and adjust the paper guides against the stock 8 Close the paper tray and confirm the new settings at the print server 9 Run your print job 10 Upon completion of your print job remove the postcard stock and the Postcard Bracket from the tray 11 Store the Postcard Bracket inside the OHCF front cover area Xerox Versan...

Page 53: ...rint server verify that the correct paper information is being used including size type weight and paper curl or alignment option for the tray Select OK and close the Tray Properties window 3 At the tray slide the rear skew adjustment lever to the right 4 Gently push in the tray until it comes to a stop 5 Run your print job The paper is fed accurately without skew and the printed output is satisfa...

Page 54: ...displays on the print server You can view and set stock attributes and verify trays are assigned with the correct stock The Stock Library Manager is available from the print server only and not at the press 8 From the Tray Properties window enter or verify the correct paper information including size type weight and if necessary paper curl and or alignment option Select the stock and assign the st...

Page 55: ...Edge Guide until it lightly touches the edge of the stock in the tray Do not load materials above the MAX line located on the rear Edge Guide 6 Gently push in the tray until it comes to a stop The Paper Tray Properties window displays from the Stock Library Manager on the print server The Stock Library Manager is available from the print server only and not at the press 7 From the Tray Properties ...

Page 56: ...tock information for transparencies such as size type weight are selected 8 Select OK to save the information and close the Tray Properties window Loading Pre drilled Stock into the OHCF Trays 8 and 9 1 Select the appropriate paper stock for your print job 2 Pull out the tray slowly until it stops 3 Open the ream of paper with the seam side facing up 4 Fan the sheets before loading them into the t...

Page 57: ...ion and close the Tray Properties window Loading Post Process Media in Optional Finishing Devices Refer to the specific chapter for information on loading post process media in the optional finishing devices For loading tabs into the GBC AdvancedPunch refer to Loading Tab Stock with the GBC AdvancedPunch For loading paper or tabs into the Post Processor Inserter Tray T1 for the Standard Finisher B...

Page 58: ...Xerox Versant 80 Press 3 22 User Guide Paper and Media ...

Page 59: ...cuments must be aligned in the document handler Remove any staples and paper clips from the documents before loading them in the document feeder Document Glass Use the Document Glass for scanning and copying various types documents such as bound originals books odd size documents or poor quality originals Documents should be placed face down on the glass and aligned with the tip of the registratio...

Page 60: ...at the documents are loaded correctly 3 Press the Home button on the press UI 4 Select Copy on the Home window 5 Select the desired Copy features options Paper Supply Reduce Enlarge Output Color 2 Sided Copying Original Type Lighten Darken The features displayed on the main Copy window vary depending on how it is configured by the administrator 6 Enter the quantity 7 Press Start Basic Copying with...

Page 61: ...ob Prior to physically attaching the DFA device to the machine device profiles are created The profiles represent the characteristics of your finishing device Refer to the third party customer documentation for information on setting the profile values for the specific DFA device attached to the machine A profile for the job can be selected from either the print server the print driver on your com...

Page 62: ...tput Color Copy Output 2 Sided Copying Original Type Darken Lighten Reduce Enlarge Reduce Enlarge R E The reduce enlarge R E feature provides a variety of reduction and enlargement options to adjust the size of the output image Originals can be enlarged or reduced from 25 400 Various automatic and preset selections are available to help you choose the most common reductions or enlargements while a...

Page 63: ... image so that it will fit onto your chosen paper If this option is selected you must also select a specific paper tray Independent X Y This option allows you to specify different height and width ratios to scale the height and width independently Auto X Y ensures copies are made with the height and width ratios set automatically to match the paper size Auto Center This option allows you to specif...

Page 64: ...cted from the original and replaced by the target area color The rest of the colors are replaced by the non target area color that you select Single Color This option allows you to copy in one of the preset or custom colors More This options allow you to customize the color for the copied output Copy Output Important Copy Output options vary depending on the finishing devices attached to your mach...

Page 65: ...ns include Head to Head and Head to Toe Head to Head This option is sometimes called Top to Top For your original documents select this option when all the pages of your original documents have the same orientation For copy output select this option to copy print the reverse side of a page so that the finished document opens like a book Head to Toe This option is sometimes called Top to Bottom For...

Page 66: ...r original contains only text or line art The result is sharper edges for the text and line art Photo This option is specifically designed to copy photographs or magazine pictures without any text or line drawings This option prevents faint reproduction of colors Map Use this option for making copies of documents that have text on colored backgrounds such as maps Darken Lighten Note The Darken Lig...

Page 67: ... the Home button on the press UI 3 Select Copy on the Home window 4 Select the Image Quality tab 5 From the Image Quality window select the desire options Original Type Image Options Image Enhancement Color Effects Color Balance Color Shift 6 Select the Copy tab 7 Select the desired Copy options including Paper Supply Reduce Enlarge 2 Sided Copying 8 Select any other desired Copy features options ...

Page 68: ...colors Map Use this option for making copies of documents that have text on colored backgrounds such as maps Image Options Use the Image Options feature to make adjustments to the following options Lighten Darken This option provides manual control to adjust the lightness or darkness of the scanned images Select the Down scroll button to darken the scanned image from light originals such as pencil...

Page 69: ...s balanced image tones on your output Options include Lively This option uses the highest color saturation to produce rich vivid output colors The option increases the color saturation of the most vivid setting in order to produce fresher images Bright This option produces images that have a brighter appearance and enhanced contrast Warm This option produces a soft image on the output and adding a...

Page 70: ... toward the magenta hue the blue colors shift toward the cyan hue and the green colors shift toward the yellow hue Again all colors between these original colors also shift in the same direction Layout Adjustment Feature Layout Adjustment Feature Overview The Layout Adjustment feature includes the following options Book Copying 2 Sided Book Copying Original Size Edge Erase Image Shift Image Rotati...

Page 71: ... books can be placed on the document glass to make 1 sided or 2 sided copies The bound original should be placed face down and registered to the rear left corner of the document glass Align the top of the bound original against the rear edge of the document glass Book Copying options include Both Pages Copies both pages in page order Left Page Only Copies the left page only Right Page Only Copies ...

Page 72: ...n be detected automatically include all standard sizes Manual Size Input This option allows you to select a standard paper size from the options shown or to input a non standard custom size When you have selected the size of your document you can use the auto reduce enlarge or the auto paper supply features Mixed Size Originals With this option the machine automatically detects the size of each do...

Page 73: ... a specified edge 0 2 0 in 0 50 8 mm Left Right or Top Bottom of the output Presets With this option you choose pre programmed shift amounts that were previously created and saved by the system administrator Image Rotation If the orientation of the paper loaded in the selected paper tray differs from that of the document that is scanned the Image Rotation option automatically rotates the document ...

Page 74: ...orientation of your original document when it is placed in the document feeder or on the document glass The orientation must be specified in order to identify the top of the document set This information is used by the system to make a decision about how to accurately place images on paper when using features such as Image Shift Edge Erase Multiple Up Repeat Image Annotation and Booklet Creation O...

Page 75: ... Face Up Down Output ID Card Copying Transparency Options Folding optional 6 Select the Copy tab 7 Select the desired Copy options including Paper Supply Reduce Enlarge Darken Lighten 8 Select any other desired Copy features options such as Image Quality Layout Adjustment Output Format 9 Enter the quantity 10 Press Start on the UI Booklet Creation Booklet Creation allows you to create multi page b...

Page 76: ...opies in half and piles them up to form a booklet The Light Production C Finisher with Booklet Maker allows you to specify the number of sheets within the range of 1 50 sheets in one sheet increments Output Offset This option is available only when specific optional finishers are attached such as the Standard Finisher or Booklet Maker Finisher Auto Image Positioning This option adjusts the image p...

Page 77: ... option for a front cover only back cover only or select options for both front and back covers Off Blank Cover Uses blank sheets of paper as the cover Print on Side 1 Print on Side 2 Print on Both Paper Supply Select the tray or trays from which front and or back cover media is supplied If Blank Covers is selected enter the number of blank sheets that will be used for the covers Note If Blank Cov...

Page 78: ...the output copies Select one of eight existing stamped messages to be printed on the first page or all pages of your copied sets Stored comments include Confidential Urgent and Draft You can also create new or edit existing comments These can also be stored to the machine memory You can also change the position and appearance of the comment using the Position and Font Size buttons Date This option...

Page 79: ...eature is useful if you want to track the copies coming from a certain machine Watermark Effect This option allows you choose an embossed or outline style for the watermark text you print Tab Margin Shift The Tab Margin Shift option allows you to copy images from a document onto tabbed stock You have the option to copy the entire original document onto the tabbed stock or you can choose to copy on...

Page 80: ... on how your system administrator configures the machine ID Card Copy Whether needing to copy insurance cards a driver s license or any other form of identification the ID Card Copying feature offers a simple and efficient way to save time Information on both sides of an ID card can be copied onto one side of a sheet of paper into the paper or bypass tray 1 Open the document feeder and place the I...

Page 81: ...g the transparencies Separator Tray Separator and Handout Tray Handout Tray This option varies depending on the selected transparency option Select the desired tray that contains the separator and or handout stock Folding optional Note This feature is available only if the appropriate optional finishing device is attached to your press Review the following information before using the Folding opti...

Page 82: ... Overview Job Assembly includes the following features Build Job Sample Job Combine Original Sets Delete Outside Delete Inside Build Job This feature allows you to change and save settings individually for each document page or stack You can then make copies of documents with different settings as one job 1 Split the hard copy document into sections for individual programming 2 On the Home window ...

Page 83: ...xamining a sample set You can choose to continue or cancel the job after confirmation To print a sample of the job perform the following 1 Press the Home button on the press UI 2 Select Copy on the Home window 3 Select Job Assembly Sample Job 4 Select Sample Job On 5 Select Save 6 Load the documents in either the document feeder or on the document glass 7 Program the job with the Copy desired feat...

Page 84: ... only when Collated is selected in the Copy Output window 7 Load your documents into the document feeder or individually place them on the document glass 8 Program the job with the desired Copy features options 9 10 Enter the quantity 11 Press Start 12 When you are finished scanning all the documents select Last Original to complete the job 13 Retrieve the copies from the output area Delete Outsid...

Page 85: ... the Y1 box and use the numeric keypad on the control panel to enter the value for Y1 b Select the Y2 box and use the numeric keypad on the control panel to enter the value for Y2 c Select the X1 box and use the numeric keypad on the control panel to enter the value for X1 d Select the X2 box and use the numeric keypad on the control panel to enter the value for X2 Clear a deletion area by selecti...

Page 86: ...Xerox Versant 80 Press 4 28 User Guide Copy ...

Page 87: ...document and sends the scanned data to a network computer via the FTP or SMB protocol Store to Folder Scans a document and saves the scanned data in a folder on the machine Store to USB Scans a document and saves the scanned data to a USB memory device This is an optional feature Store Send Link Send to Folder Scans a document and sends an e mail notifying the user of two URLs one is for the locat...

Page 88: ...to be scanned the perform the following substeps a Select Next Original place the original to be scanned and select the Start button b Continue until you are scanning the last original select Last Original then select the Start button 7 Select Job Status on the UI to view the status of the scanned job 8 Retrieve the original documents either from the Document Feeder or Document Glass Previewing Sc...

Page 89: ...e select Start Canceling a Scan Job 1 Either select Stop on the UI touch screen or press the Stop button on the UI control panel 2 On the UI control panel press Cancel to end scanning or Start to restart the scan 3 Press the Job Status button on the UI 4 Select the job to cancel and then press Stop Note When a scan is canceled scan data already stored to the mailbox is deleted Stopping a Scan Job ...

Page 90: ...t type in Original Type Grayscale Scans a document in grayscale Adds shades to monochrome creating intermediate tones that change gradually Suited to documents containing gradations that cannot be reproduced with monochrome 2 color tone 2 Sided Scanning 2 Sided Scanning options include 1 Sided Select this option to scan only one side of the document 2 Sided Select this option when both sides of th...

Page 91: ... is best used for faster processing but may result in excessively large file sizes Use this setting to apply the minimal amount of image processing and compression Advanced Settings The options for Advanced Settings are shown on the second tab of the selected scan method these options include the following Image Options The Image Options include Lighten Darken This option provides manual control t...

Page 92: ...e documents and photos 300 dpi This setting produces a higher output quality and larger file size Use this setting for sharper scanning of office documents and photos 400 dpi This setting produces medium output quality and the largest file size Use this setting for high quality printing this setting is suitable for fine lines and small fonts than have been enlarged and for documents with low image...

Page 93: ...f the scanned pages All standard sizes are automatically detected Manual Size Input This option allows you to select a standard paper size from the options shown or to input a non standard custom size Mixed Size Originals With this option the machine automatically detects the size of each document Edge Erase This option erases images around the border margins of a document All Edges This option er...

Page 94: ...right page only Top Page Only Scans the top page only Bottom Page Only Scan the bottom page only Binding Edge Erase This option erases or deletes the shadow that is caused by the center binding of the bound original Reduce Enlarge Use this option to select a reduction or enlargement value for the scanned document E mail Options E mail Options is the fourth tab of the E mail scan method and options...

Page 95: ...able for your machine Additional File Format options Depending on the selected file format the following sub options also are available Compression Method Allows you to select a compression method for the scanned data MRC High Compression Allows you to save PDF and XPS files with high compression Searchable Text Allows you to select whether to perform character recognition in PDF files PDF Securit...

Page 96: ...lt setting for grayscale color pages Flate This option saves the image data at a higher compression rate than JPEG Flate is lossless and does not remove data during the compression process PDF Security options The following PDF Security options are available when selecting E mail Options File Format PDF PDF Security Password Encryption Algorithm Choose one of three encryption methods 128 bit RC4 E...

Page 97: ...ong term preservation TIFF Saves scanned data in TIFF format JPEG Saves scanned data in JPEG format This option is selectable when either Color or Grayscale is selected for Color Scanning TIFF JPEG Auto Select Automatically selects JPEG or TIFF The file format is determined for each page JPEG for full color and grayscale pages and TIFF for monochrome pages XPS XML Paper Specification Saves multipl...

Page 98: ... and decompression than the arithmetic coding Use this option if high quality compression results do not matter and you want to use less page memory For grayscale or color images pages select one of the following options JPEG This is the default setting for grayscale color pages Flate This option saves the image data at a higher compression rate than JPEG Flate is lossless and does not remove data...

Page 99: ...cal address list Note The address book displays only entries that were previously added by the system administrator A maximum of 2 000 addresses may be stored in the address book Add Me and From fields By default these fields are not available for use The system administrator must change the settings for these fields before they can be used When these fields are available for use enter the sender ...

Page 100: ... 2 Select one of the choices from the pull down menu such as List all public entries 3 Select the desired recipient 4 Select one of the fields To Cc or Bcc 5 If sending to multiple recipients repeat the previous sub steps until finished 6 Select Close 5 If applicable perform the following Select From and add the sender e mail address To send a copy of the email to the sender select Add Me Edit or ...

Page 101: ...tem Administration Guide for detailed information Network Scanning Components Job templates On the Network Scanning tab this is a list of available job templates Select the desired template to use for your network scanning job If a template is not listed contact your system administrator DEFAULT This is the default job template When a new template is created from CentreWare Internet Services it is...

Page 102: ...cuments either in the document feeder or on the document glass 6 Select Preview a From the drop down menu specify the view size by selecting Whole Page or Enlarge View and set Current Page b After the confirmation select Close to close the preview screen 7 Select the desired scan options 8 Press Start to begin scanning 9 Retrieve the original documents from either the Document Feeder or the Docume...

Page 103: ... the Home button 3 Select Scan to PC 4 Select the desired Transfer Protocol 5 Select Save 6 Choose the Save in destination where the data will be stored Address Book for instructions refer to Using the Address Book to Specify a Scan to PC Destination Browse the network for a destination PC for instructions refer to Browsing the Network for a Scan to PC Destination Use the UI screen keyboard for in...

Page 104: ...he UI Keyboard 1 From the main Scan to PC tab window select inside the Server field The UI screen keyboard is displayed 2 Enter information to identify the server using the keyboard For the Server name enter a server name or IP address When the save location is in the DFS namespace on Windows enter a domain name or server name Up to 64 characters are allowed 3 Select Save 4 Select inside the Share...

Page 105: ... to scan documents and save the scanned data in a folder of the machine Folder Select a folder to save the scanned data in Select the up arrow to return to the previous screen or the down arrow to move to the next screen Go to Use the numeric keypad to enter a 3 digit folder number The folder then appears at the top of the list File List Select a folder and then select this button to display the F...

Page 106: ... with multiple slots is used only one particular slot is available When a USB memory device is inserted into the USB memory slot during the Energy Saver mode the UI touch screen does not light After exiting the Energy Saver mode by pressing the Energy Saver button insert the USB memory device again or select Store to USB on the Home window Before removing the USB memory device make sure that a win...

Page 107: ... Store and Send Link Send to Folder Overview Tip This feature may not be available in all marketplaces Note The Store Send Link feature is also referred to as the Send to Folder feature If an authenticated user scans a document the press temporarily saves the scanned data and automatically obtains the user s e mail address that was registered in advance The press then sends an e mail notifying the...

Page 108: ...ss If you want to avoid these restrictions use the Scan to PC or E mail service For more information refer to the System Administration Guide You can customize the layout of the features displayed on the Store and Send Link feature For more information refer to System Administration Guide Storing and Sending a Link Sending to Folder 1 Press the Log In Out button on the UI or select the login infor...

Page 109: ...xample using the Paint application and selecting the option From Scanner or Camera This Device Select this option to start a scan job from the press UI and then forward the scanned data to a network computer When this option is selected a list of available computers is displayed from this list select the computer that will receive the scanned data When This Device is selected a List of Components ...

Page 110: ...ot displayed select Change and then select the press 8 Select the Profile list and then select Document 9 Select the desired scan options 10 Select Scan After the documents are scanned the scanned data is forwarded to the specified computer 11 The press UI displays a Remove Your Original message a Remove your original documents from the press Document Feeder or Documennt Glass b Select OK on the p...

Page 111: ...destination 2 Press the Start button The scanned date will be forwarded to the specified destination 3 Retrieve the original documents from either the Document Feeder or the Document Glass 4 Check the forwarded data on the destination computer 5 25 Xerox Versant 80 Press User Guide Scan ...

Page 112: ...Xerox Versant 80 Press 5 26 User Guide Scan ...

Page 113: ...s Print the files Rescan the files Send the files in an email Retrieve the email with the file attachment from a network computer Delete the files Create automatic routine tasks Register create private folders and or shared folders File Options The following options are available Refresh Displays the updated information List Lists the files stored in the folder with their stored dates and pages Th...

Page 114: ...ile with the image rotated or enlarged No Rotation Allows you to select an angle to preview the image from Right 90 degrees Left 90 degrees and 180 degrees You can rotate or enlarge the image of the file in a folder in preview but cannot save the file with the image rotated or enlarged Change File Name Allows you to change the file name Use the displayed keyboard to enter a new name Current Page A...

Page 115: ...uding stapling hole punching and which finishing tray to deliver the printed output File Details Displays a preview image of the selected file Print Quantity Select the number of print sets Print Prints the selected file Managing Folders and Scanned Files 1 From the UI press the Clear All button 2 Press the Home button 3 Select Send from Folder 4 Select a folder 5 Select a file from the folder lis...

Page 116: ...e Change Link option include the following Refresh Displays the updated file information Create Displays the Create New Job Flow Sheet window Edit Delete Displays the Details window Search by Name Searches for job flows that partially match the entry The machine searches through job flow names that were registered upon each job flow creation The entry can be up to 128 characters Search by Keyword ...

Page 117: ...flows that fully match the entry are searched The machine searches through keywords that were registered upon each job flow creation Sheet Filtering Displays the Sheet Filtering window Sheet Filtering allows you to filter the job flow sheets that are displayed Displayed job flow sheets may vary depending on the Authentication feature Sheet Filtering Options Sheet Filter options include the followi...

Page 118: ...ed job flow sheet b Select Job Flow Settings c Select Create Change Link d Select any option If Sheet Filtering is selected select the desired filtering conditions and then select Save e From the Link Job Flow Sheet to Folder window select Save 8 Select Start to run the job flow Xerox Versant 80 Press 6 6 User Guide Send from Folder Folder File Management ...

Page 119: ... on the documents files stored in the folder To automatically start a job flow you must create a link with a folder and a job flow sheet in advance Files are automatically processed with the job flow sheet when they are stored in the linked folder Acceptable Features to Register You can register the following features Forward Multiple forwarding recipients can be configured for each forwarding met...

Page 120: ...registered upon each job flow creation The entry can be up to 128 characters Search by Keyword Searches for job flows that fully match the entry The machine searches through keywords that were registered upon each job flow creation The entry can be up to 12 characters You can select from preset keywords if they have been registered in the System Administration mode Select by Keyword Displays the S...

Page 121: ...lude Edit Delete and Copy Sheet Filtering Options Sheet Filter options include the following Owner System Administrator If this box is checked the only Job Flow Sheets available to the System Administrator are displayed Non System Administrator If this box is checked Job Flow Sheets displayed do not include those available to the System Administrator No Filtering When both the System Administrator...

Page 122: ...aximum 18 single byte characters Server Maximum 64 single byte characters Save in Maximum 128 single byte characters User Name Maximum 97 single byte characters Password Maximum 32 single byte characters Transfer via SMB 1 Transfer via SMB 2 Options The additional settings available with the Transfer via SMB 1 Transfer via SMB 2 option include the following Address Book File Format Resend Attempts...

Page 123: ...ious step for other line items such as Description until all desired information is entered and saved 7 If Send as E mail is used ensure all the required information is entered for it including recipient s name and e mail address 8 If desired select Print to set options to print the linked Job Flow Sheet Select Off to disable this feature 9 Select Save to keep your settings To activate the Save op...

Page 124: ...reate Change Link 8 Select the Job Flow Sheet that you want to link and then select Save 9 At the Link Job Flow to Folder window choose one of the following Auto Start Select this option if you want the Job Flow Sheet to be automatically executed when a new document is saved to the folder If you do not select Auto Start you will need to press the Start button on the UI to execute the linked Job Fl...

Page 125: ...l button 2 Press the Home button 3 Select Job Flow Sheets and if enabled by the System Administrator select OK 4 Select a listed Job Flow 5 Select Change Settings 6 Select the group to change from the Group of Items 7 Select an item in the group that will be changed 8 Select the options you want to change and make changes as instructed 9 Close any open windows to keep your changes 7 7 Xerox Versan...

Page 126: ...Xerox Versant 80 Press 7 8 User Guide Job Flow ...

Page 127: ...int reports In addition while Build Job is running a stored program can be used for the remaining document stacks This negates the need to program and select the options for the remaining documents stacks in the Build Job process Stored Programming Options Stored Programming includes the following options Store Use this option to create and save a job as a stored program Store Build Job Use this o...

Page 128: ...ay System Settings Job Flow Sheets Network Scanning Address Book and the Browse feature for the Scan to PC cannot be used with Stored Programming There are situations where a stored program will become invalid Changing the default values of the Watermark feature when it is used in a stored program Changing the password to the folder used in the stored program after it is stored Trying to use a sto...

Page 129: ... mail addresses for the E mail service such as the pop up menu Keyboard Remove and Edit which are displayed by selecting Recipient s or From The Energy Saver button An unsaved job program will be canceled during the following activities When the Interrupt button is pressed If the Auto Clear feature causes a time out If a pop up window occurs such as a paper jam Stored Programming Procedures Creati...

Page 130: ...egments as one complete job Store Build Job allows you to program scan and store individual job segments of a large or complex job and recall the stored program at point of need when using Build Job Therefore while Build Job is running a stored program can be used for the remaining document stacks which then negates the need to program and select the options for the remaining documents stacks in t...

Page 131: ...he Machine Status button on the press UI 2 Select the Tools tab 3 Select Setup Calibration Setup Stored Programming 4 Select Delete 5 Select the stored program number you want to delete A message displays on the UI asking you to confirm whether or not you want to delete the selected stored settings 6 Select Delete to confirm stored programming deletion 7 Select Close to exit Stored Programming Not...

Page 132: ... that the original documents are loaded in either the Document Feeder or on the Document Glass 7 Select Start to run the stored program Using a Stored Program while Build Job is Running Tip This procedure is used only when Build Job is running While Build Job is running a stored program can be used for the remaining document stacks which then negates the need to program and select the options for ...

Page 133: ...7 Select Start to run the stored program 8 7 Xerox Versant 80 Press User Guide Stored Programming ...

Page 134: ...Xerox Versant 80 Press 8 8 User Guide Stored Programming ...

Page 135: ...web application on the press UI Store scanned documents directly in a web application folder on the press Print a file that is stored on a remote server Note The web applications that can be displayed are those which are compatible with the press You cannot access internet websites on the press UI Accessing Web Applications 1 Press the Home button on the UI 2 Select Web Applications 3 Select an ac...

Page 136: ...Xerox Versant 80 Press 9 2 User Guide Web Applications ...

Page 137: ...stem 2 Select the Completed Jobs tab to view a list of all jobs that have printed successfully 3 Select the Group Parent Jobs checkbox to list and display the jobs according to a parent child relationship hierarchy Active Jobs Tab 1 Press the Job Status button on the UI 2 Select the Active Jobs tab 3 From the displayed list select the applicable job to view Use the up or down buttons to navigate t...

Page 138: ...on on the UI 2 Select the Completed Jobs tab A list of the completed or deleted jobs display Use the scroll bar to navigate the list 3 To check the details of a job select the job from the displayed list 4 From this Status window select one of the following to print a history of this job a To print the job details select Print this Job Report button b To print the history of parent child jobs sele...

Page 139: ...llows you to print reports and view details that apply to billing impressions Device Serial Number The Device Serial Number is displayed under the General Information area on the Device Information tab Use this number when calling Xerox for technical information or assistance Current System Software The version of the system software that is currently installed on the press is displayed under the ...

Page 140: ...ble in System Administrator mode only Auditron Report Meter Report available in System Administrator mode only Maintenance Assistant Select the Maintenance Assistant button to send the Xerox Remote Print Services diagnostic information on the press to Xerox Support Others From the Device Information Others window select the Overwrite Hard Disk button this feature is a standard data security functi...

Page 141: ...illing Impressions Information The Billing Information screen allows you to view the total number of impressions prints recorded by the press including a category of the number of color prints only black prints only and large media prints It also displays specific usage counter information The counters display the impression amount for all printed jobs All meters that may be used for billing purpo...

Page 142: ...ers drop down list you can select the desired counter to view Impression Counters Sheet Counters Images Sent Counters All Usage Counters Impression Counters This view displays the total impression amount In other words impression is the image on one side of one sheet of media This counter shows the total impression amount for color and black only impressions Total Impressions This number represent...

Page 143: ...steps and assigning them to a specified Stored Programming option Stored programs save frequently used features and job settings which can be accessed using a shortcut button Stored Programming not only remembers feature settings but it can record a series of operations This enables the user to record the hierarchy of displayed screens for each step For example Stored Programming can record the fo...

Page 144: ...ncluding oversized counts all impressions equally A4 Impression Mode Counts large impressions on media such as A3 and 11 x 17 inches media that is larger than 8 5 x 14 inches as their A4 equivalent To view the current Billing Impression Mode press the Machine Status button on the UI then select Tools Billing Impression Mode Changing the Paper Tray Attributes 1 Press the Machine Status button on th...

Page 145: ...e jobs sent to the queue 4 Submit the job file from the print server to the networked press for printing How to Submit a Print Job There are several ways in which to submit your job for printing From your computer workstation PC or Mac using print drivers such as PostScript and Printer Command Language PCL you can submit a document file to the print server queue From the print server you would the...

Page 146: ... to send the job to the print server queue Printing from the FreeFlow Print Server From your computer you can submit your document files select Print to a directory on the print server through the use of installed print drivers You could also copy the document files onto a USB flash drive or CD DVD and then connect those devices to the print server for importing 1 If you copied the file onto a sto...

Page 147: ...fferent orientations the single straight collated tab stock or the single reverse collated tab stock When programming tab jobs and loading tab stock consider the following Precut tabs can only print 1 sided There are specific job settings that you need to define such as tab order sequence number of bank sets stock weight paper size and insertion before or after body pages Refer to your print serve...

Page 148: ...Otherwise you can set up your job to insert preprinted tabs into your document Use one tray for the body pages another tray for the preprinted tab stock and another tray for cover or back pages While you can print tab stock from any of the paper trays on the system Trays 1 2 3 5 6 or 7 Trays 6 and 7 should be used for best results If you plan to apply staple or punch finishing use Trays 5 6 or 7 o...

Page 149: ...epellent on the press as doing so may discolor deform or crack covers If a moistened cloth is used wipe afterwards with a dry lint free cloth Cleaning the press with an excessive amount of water may cause the press to malfunction and or damage documents during printing Cleaning the Exterior 1 Wipe the exterior with a soft cloth moistened with water If dirt is difficult to remove try gently wiping ...

Page 150: ...gently wiping with a soft cloth moistened with a small amount of neutral detergent Caution Do not press heavily on the document glass to avoid damaging the glass surface 3 Cleaning the second side scanning lens assembly a The second side scanning lens assembly is located along the left side of the document cover The assembly consists of the mirrored glass strip a metal strip a white plastic strip ...

Page 151: ...lass surface Note If dirt is difficult to remove try gently wiping with a soft cloth moistened with a small amount of neutral detergent 4 Once the second side scanning assembly is clean return the document cover to its original position and ensure that the lever is locked in place If you touch the document cover with your bare hands wipe it clean before closing the document feeder 5 Gently close t...

Page 152: ... wipe down the catch pan 3 Continue following the instructions on how to insert the new cartridge Cleaning the ROS Windows Unfused dry ink toner collects on the 4 color ROS window areas located just above the Drum Cartridge Drawer within the press Contaminated ROS windows can cause a white streak defect on your printed output Perform this procedure to clean the ROS window of the affected color whe...

Page 153: ...ing from the Transfer roll area instead of the fuser 1 Press the Machine Status button on the UI 2 Select the Tools tab 3 Select Setup Calibration Clean Fuser Assembly 4 From the screen that displays specify the paper tray to use and the number of blank sheets to print for the Clean with Paper method of removing the unfused dry ink toner 5 From Paper Supply select the paper tray to use Note Any ty...

Page 154: ...e the used CRU according to the disposal instructions supplied with the new CRU Ordering Supplies Xerox supplies paper and throughput material can be ordered from the web site www xerox com and clicking on the Supplies link For any item that is not orderable from the web site contact your Xerox Service Representative Note The cleaning pads used with the ROS Window cleaning wand are not orderable C...

Page 155: ...h Business Ready BR Finisher with Booklet Maker Staple Cartridge 5 000 each refill for a total of 15 000 3 refills per carton Staple Refills for the Business Ready Finisher and Business Ready Finisher with Booklet Maker Checking the Status of Consumables When a consumable is reaching the time it needs to be replaced a message is displayed on the press UI This indicates when it is time to order and...

Page 156: ...w status 1 Open the Dry Ink Toner cover located just above the press front door 2 Lay paper on the floor before removing the cartridge This will allow any excess dry ink toner to fall on the paper 3 Grasp the handle of the dry ink toner cartridge matching the color indicated in the message 4 Remove the dry ink toner cartridge by slowly and gently pulling it straight out While pulling out hold the ...

Page 157: ...ess This will prevent any dry ink toner from spilling out of the bottle Note After you replace the Dry Ink Toner Waste Bottle the system automatically resets the usage counter to zero 0 for this CRU component Check the Consumables Supply screen to verify the reset 1 Ensure that the press is stopped not running any jobs 2 Open the front door of the press 3 Open the Dry Ink Toner Waste Bottle Door 4...

Page 158: ...o 0 Check the Consumables screen for the reset and new status Caution Do not leave the Drum Cartridge Drawer open for more than one minute Exposing the drum cartridges to direct sunlight or strong light from indoor fluorescent lighting for more than one minute may cause image quality defects Caution Replace drum cartridges while the press is powered ON 1 Ensure that the press is stopped and is not...

Page 159: ...if the film is present 6 Grab the Release Handle and pull the Drum Drawer straight out 7 Remove the old drum cartridge by holding the finger rings provided at the both ends of the drum cartridge and gently lifting up Caution Drums are light sensitive Do not leave the Drum Cartridge Drawer open for more than one minute when replacing cartridges Exposing the drum cartridges to direct sunlight or str...

Page 160: ...g Replacing the Suction Filter You will need the T10 Torx driver tool for this procedure After you replace the filter you will need to contact the system administrator who will log into administrator mode and reset the counter to zero 0 for this CRU Caution Make sure the press is powered off before performing this procedure 1 At the back of the press locate the Suction filter cover on the lower pa...

Page 161: ...e following steps to reset the counter to zero 0 which indicates a new filter has been installed a At the UI press the Machine Status button b From the screen that displays select the Tools tab c Select System Settings Common Service Settings Maintenance d Use the up down arrow buttons to access the next Maintenance screens e Select the Technical Key Operator icon The Technical Key Operator featur...

Page 162: ...Xerox Versant 80 Press 13 14 User Guide Press Maintenance ...

Page 163: ...ide frame of the press near the Paper Tray 1 drawer a At the press fully open Tray 1 b At the left of the tray on the press frame locate the plate with the serial number SER Calling for Service 1 Record any displayed fault codes 2 Record the press serial number a Select the Machine Status button at the press UI b From the Machine Status screen select the Device Information tab to view the serial n...

Page 164: ...h voltage component can cause electric shocks When opening the panels and covers that are screwed shut to install or detach optional accessories be sure to follow instructions in the User Guide Do not try to alter the press configuration or modify any parts Doing so might cause press malfunction or fire General Problems This section contains a problem solving table to help you resolve some basic p...

Page 165: ...ot work press the power button on the press to power down the print engine Wait 30 seconds and press the power button again to reboot the system If the Power Saver button is on lit the press is in the Power Saver mode Press the Power Saver button on the UI to cancel the Power Saver mode Open Paper Tray 1 The serial number is located on the left frame near Tray 1 There is no power to the press and ...

Page 166: ...job begins printing once the system completes its adjustments Other information to remember includes From a cold start power on or power saver system takes less than 5 minutes to start printing From standby mode system usually takes less than 1 minute to start printing The press is taking longer than one minute before printing the next job Check the application or print driver settings on whether ...

Page 167: ... and the bottom of the stack in the paper tray Fan all four edges of the paper in the selected paper tray Replace the paper in the selected paper tray with paper from a new package Remove any partially fed paper from the trays Make sure to remove any torn pieces of paper still remaining inside the press Ensure the paper you are using had been stored properly Multiple sheets feed from the paper tra...

Page 168: ...s coated or uncoated The humidity conditions at the press You can sometimes minimize curl problems by flipping the paper over in the tray If excessive curl is still present use a heavier paper To ensure continuous production empty the output device when the output approaches the maximum amount that the device can hold refer to the specifications for that output device for output limit amount An at...

Page 169: ...pes of media paper can tolerate more heat than transparencies Deformed transparencies Check paper curl and that the paper tray guides are locked into position against the paper Note Mixed media sizes may not stack well Output is not stacked cor rectly Select the option on the press touch screen Check that there are staples in the staple cartridge Check that the Punch Scrap Container is not full Fr...

Page 170: ...contact the Customer Support Center The back side of the printed output contains dry ink toner spots or blotches residual and unfused dry ink toner Perform Initial Actions especially the Clean Fuser Assembly routine and Density Uniformity adjustment Perform the Clean ROS Windows procedure If the problem continues contact the Customer Support Center Uneven Density side to side light or dark areas P...

Page 171: ...ou run multiple width papers refer to Fuser Hints and Tips and Extended Fuser Life for more information Edgewear Perform Initial Actions If problem continues contact the Customer Support Center Halo or smudges Unfused dry ink toner collected on the ROS windows located above the Drum Cartridge Drawer prevents the image for that color to be captured Streaks will display on the output if the ROS wind...

Page 172: ...zed for the media Create or use an existing Alignment Profile Misregistration or Image Shift Run the Density Uniformity Adjustment routine Create a custom stock and use it If output is still unacceptable contact the Customer Support Center Trail edge of output con tains dry ink toner dele tions density inconsistency or is lacking in color depth this occurs mainly when us ing heavier or lighter wei...

Page 173: ... the document feeder 003 754 003 755 Document Feeder Decrease Scan Resolution to 300 dpi or less and rescan When scanning a mixed size document using the 2 sided simultaneous scan feature with 400 or 600 dpi an er ror occurs 003 757 Scanner Document Feeder Glass Check the selected options An incompatible combina tion of features is specified in the document scan condi tions 003 760 Copy or Scan Fe...

Page 174: ...ccurred on the software settings 016 210 016 211 016 212 016 213 016 214 016 215 Press Software Power cycle the machine Contact your Xerox Customer Support Center The machine does not have the software license 016 219 Power cycle the machine Contact your Xerox Customer Support Center An error occurred in the document scanner 016 220 016 221 016 222 016 223 016 224 016 225 016 226 016 227 016 228 S...

Page 175: ...et tings ESC P command error 016 721 Retry printing after waiting for a period Attempted to print Job Template List while updat ing the job template 016 735 Specify the printable paper size for booklet creation Booklet Creation is not ap plied to the specified paper 016 738 Specify the combination of the printable document and paper size for booklet cre ation Thespecifieddocumentand paper size are...

Page 176: ...sk to increase free disk space Compression conversion is not possible due to insuffi cient hard disk space 016 774 Remove unnecessary data from the hard disk to increase free disk space Image conversion is not possible due to insufficient hard disk space 016 775 Theharddiskmightbedefect ive When replacing a hard disk contact your Xerox Cus tomer Support Center A hard disk error occurred during ima...

Page 177: ...he media with a computer An error occurred when reading data stored in a media such as a card read er for a digital camera 016 794 016 795 Remove all paper from the tray Set the output tray for three fold The envelope folder tray is full 024 987 024 988 General Power Off On the press If error persists contact the Customer Support Center Developer Housing fault 024 923 024 924 024 925 Developer Cre...

Page 178: ...ss If error persists contact the Customer Support Center Fuser temperature faults 059 335 059 399 Fuser Power Off On the press If error persists contact the Customer Support Center Press power faults 060 3 00 99 061 3 00 99 061 6 00 99 061 9 00 99 ROS Contact your Xerox Customer Support Center An error occurred in the document feeder or it mal functioned 062 211 062 220 Document Feeder Contact you...

Page 179: ...terlock faults 071 1 00 99 071 2 00 99 072 1 00 99 072 2 00 99 073 1 00 99 073 2 00 99 075 1 00 99 075 2 00 99 075 3 00 99 075 6 00 99 076 1 00 99 076 2 00 99 076 3 00 99 077 1 00 99 077 2 00 99 077 3 00 99 077 4 00 99 077 6 00 99 077 9 00 99 078 1 00 99 078 2 00 99 078 3 00 99 078 4 00 99 078 6 00 99 078 9 00 99 Paper Handling Transport Power Off On the press If error persists contact the Custome...

Page 180: ...rror 092 333 Process Control Replace Reinsert Cartridge Ensure Doors are closed Power Off On the press Con tact Customer Support Dry Ink Toner Cartridge 093 3 00 99 093 4 00 99 093 6 00 99 093 9 00 99 Power Off On the press If error persists contact the Customer Support Center Transfer Belt or Roll fault 094 312 094 318 Transfer Fuser Belt Assembly is out of position Reseat the assembly and make s...

Page 181: ...Add paper to Tray 6 Tray 6 is empty out of paper 024 955 Reset the paper or cancel the job The designated paper size and size of paper in the tray differ when feeding paper from the inserter 024 974 1 Check the paper loaded in Tray 6 2 Power off and then power on the machine 3 If the tray errors are not fixed by performing the relevant remedy contact the Customer Support Center Optional Paper Tray...

Page 182: ...specific tray of the feeder If you experience these fault codes frequently you should follow the procedure on how to replace the feed rolls Replacing the OHCF Bypass Tray Feed Rolls Trays 6 and 7 and Replacing the OHCF Feed Rolls Trays 6 and 7 Recommended Solution Possible Cause Fault Code Fault Area 1 Fan the paper to eliminate paper adhesion especially in high humidity or high temperature enviro...

Page 183: ...1 Remove or clear any jammed paper 2 Replace and fan the paper in tray 3 Replace the OHCF Feed Rolls refer to Replacing the OHCF Feed Rolls Trays 6 and 7 Pre registration sensor jam during paper trans portation feed sensor is not turned on within peri od of time paper is trans porting from tray 078 100 078 101 078 102 078 103 Tray 6 Perform the following in this order 1 Remove or clear any jammed ...

Page 184: ...r Weight Switches are set correctly the switches are located on paper tray 3 Check the position of Skew Adjustment Levers The levers should be retracted refer to Skew Adjustment Levers Trays 6 and 7 4 Replace the tray feed rolls feed retard nudger refer to Replacing the OHCF Feed Rolls Trays 6 and 7 5 If problem still persists contact the Customer Sup port Center Repetitive misfeeds or multifeeds ...

Page 185: ...Rolls refer to Replacing the OHCF Feed Rolls for the OHCF Trays 8 and 9 Pre registration sensor jam during paper transportation feed sensor is not turned on within period of time paper is transporting from tray 178 100 178 101 Tray 8 178 103 Trays 5 By pass 8 and 9 1 Fan the paper to eliminate pa per adhesion especially in high humidity or high temperature environments 2 Check the position of Skew...

Page 186: ... any jammed paper 2 Replace and fan the paper in tray 3 Replace the OHCF Feed Rolls refer to Replacing the OHCF Feed Rolls for the OHCF Trays 8 and 9 Pre registration or feed sensor jam dur ing paper transporta tion from Tray 9 178 150 178 151 Tray 9 1 Remove or clear any jammed paper 2 Replace and fan the paper in tray 3 Power Off On the press 4 If problem still persists contact the Customer Supp...

Page 187: ...t door 3 If necessary Power Off On the press 4 If error persists contact the Customer Support Center Misfeed in the finisher paper path 012 108 012 110 012 113 12 114 012 115 012 117 012 120 012 122 012 128 012 130 012 131 012 132 012 135 012 136 012 152 012 171 012 172 012 180 1 Power Off On the press 2 If error persists contact the Customer Support Center General finisher malfunction 012 161 012...

Page 188: ... 024 979 024 987 024 988 124 711 124 712 124 713 Fault Codes Interface Module Interface Cooling Module Recommended Solution Possible Cause Fault Code 1 Open the Module front door 2 Remove all sheets or pieces from the jam clear ance areas 3 Close the front door 4 Verify that the paper be ing used is within specifica tions Paper Jam during feeding 048 100 to 048 107 Ensure door is fully closed Modu...

Page 189: ... the GBC AdvancedPunch are displayed on the press User Interface Control Panel as an AdvancedPunch fault code Remedy Cause Fault Code 1 Open AdvancedPunch front door and look for a paper jam 2 Remove any paper jam 3 Close front door JamisdetectedintheAdvanced Punch 040 100 040 101 040 900 040 901 Close front door of the AdvancedPunch Front door of the Advanced Punch is not closed 040 300 Install p...

Page 190: ...ully insert it close front door The punch die set is missing or not fully installed 040 940 Install and or fully insert punch container close front door Punch chip container is missing or not fully installed 040 941 Empty punch container and then reinstall it Punch chip container is full 040 942 Empty punch container and then reinstall it Punch chip container is near full 140 700 Fault Codes High ...

Page 191: ...lt 049 940 Check the position of the Stacker Tray Cart Stacker Tray Cart fault 049 941 Remove paper from the Top Tray Stacker Top Tray fault 049 945 Remove paper from the Stacker Tray Cart Stacker Tray Cart fault 049 960 049 964 Open the HCS front door and remove any paper from the Stacker cart Close the door to resume operation Stacker Full Detection fault 049 965 to 049 972 Open the HCS front do...

Page 192: ...a new one The Staple Waste Container is full or near full 024 931 Check that the Staple Waste Container is installed in the finisher and inserted correctly The Staple Waste Container is not attached 024 932 Check the staple cartridge and reset cor rectly If needed replace with a new cartridge Resume job The booklet staple cartridge is empty or stapling error oc curred 024 943 Add paper to the pape...

Page 193: ...hen reinstall it completely The Punch Waste Container is full or near full 112 700 Confirm the staple position and try to print again The settings for stapling are canceled and prints the data 116 790 Confirm the punching position and try to print again The settings for punching are canceled 124 705 Confirm the folding settings and try to print again The settings for folding are canceled 124 706 D...

Page 194: ...er scraps from jam clearance areas Make sure the Top Left and Right Covers are fully closed Check the Trimmer Waste Container If full empty it and reinsert into the mod ule Make sure it is pushed in completely Follow any instructions on the touch screen If fault persists power off on the press If fault persists call for service Open interlocks A top cover or door is open A jam or fault occurred wi...

Page 195: ...omer Support Center The sensor or exit sensor in the Finishing Transport did not switch ON or did not switch OFF within a specified amount of time 013 108 to 013 110 1 Check for any obstructions or paper jams in the Finishing Module and Finishing Transport paper paths and clear them 2 If necessary power Off On the press and rescan or resend your job 3 If the fault persists contact the Customer Sup...

Page 196: ...tion and follow in structions to bring the device back online 2 Power Off On the press and re send rescan the job 3 If the fault persists contact the Customer Support Center Either the DFA device is not ready or another fault has oc curred with it 051 910 051 911 Refer to the DFA device user document ation and follow instructions on how to clear the fault and replenish the supplies The DFA device ...

Page 197: ...ng a paper jam printing is automatically resumed from the state before the paper jam occurred If a paper jam occurred during printing press the Start button Printing is resumed from the state before the paper jam occurred Warning When removing jammed paper make sure that no pieces of jammed paper are left in the press A piece of paper remaining in the press can cause fire If a piece of paper is st...

Page 198: ...overs by feeding first a yellow sheet from T1 and then the offset in the set 6 At that point it is easy for the user to verify if all pages are present in the job by accessing the set with the Yellow insert Conditions Required for the Jam Recovery Offset Feature to Work For the insert paper to work correctly the following conditions needs to be met A specific paper tray must be selected for the ja...

Page 199: ...ired tray to use for the jam recovery insert sheet Note Ensure that the selected tray meets all the required conditions for using that tray refer to Conditions Required for the Jam Recovery Offset Feature to Work 10 Select Save 11 Select Close The main Tools screen displays 12 Exit the administrator mode a Press the Log In Out button b When the Logout screen appears select Logout Paper Jams in the...

Page 200: ... inside of the left cover remove the jammed document 6 Close the following open covers until they click into place Close them in the following order Inner cover Top cover Left cover 7 If a document jam cannot be found slowly raise the document feeder and if the document is there remove it 8 Close the document feeder 9 If indicated raise the feeder tray area and remove the document 10 Gently return...

Page 201: ...eeder Belt 1 Open the document feeder 2 Open the belt of the document cover while gripping the lever and remove the jammed document 3 Gently return the belt to the original position 4 Close the document feeder 5 Follow the instructions to reload the entire document set into the document feeder Note Ensure that there are not any torn wrinkled or folded documents in the document set To scan torn wri...

Page 202: ...ntil it is in the horizontal position and then pull out the transfer module 3 Remove the visible jammed paper 4 After clearing the jammed sheets ensure that no torn paper pieces are left in the machine 5 Move Handle 2b and remove any jammed paper 6 Return Handle 2b to its original position 7 Move Handle 2e and remove any jammed paper 8 Return Handle 2e to its original position Xerox Versant 80 Pre...

Page 203: ...r roll and resume the copying printing process Paper Jams in Trays 1 3 Note Paper is sometimes torn and remains inside the press if you open a tray without checking the paper jam position This may cause a malfunction Check where the paper jam occurred before clearing the problem 1 Open the tray where the paper jam occurred 2 Remove the jammed paper 3 Push the tray in gently until it comes to a sto...

Page 204: ...ny copy print jobs 1 Remove the jammed paper and any paper that is loaded from the Bypass tray Note If paper is torn check inside the machine and remove it 2 Open the Bypass Top Cover and remove jammed paper 3 Close the cover 4 Reload paper into the tray and resume copying printing Paper Jams When the Bypass is Installed on Trays 6 and 7 Tip Always ensure that all paper jams including any small ri...

Page 205: ...ypass Tray 5 5 Reload paper into the tray and resume printing Paper Jams When the Bypass is Installed on Trays 8 and 9 Tip Always ensure that all paper jams including any small ripped pieces of paper are cleared before proceeding with any print jobs 1 Remove the paper currently loaded in the Bypass Tray 5 14 43 Xerox Versant 80 Press User Guide Press Problem Solving ...

Page 206: ...Remove any jammed paper Note If paper is torn check inside the press and remove it 4 Close the Top Cover of the Bypass Tray 5 5 Pull open the OHCF Top Drawer located at the top of Trays 6 and 7 Xerox Versant 80 Press 14 44 User Guide Press Problem Solving ...

Page 207: ...quency you may want more than one fuser available such as the following for example One fuser roll for narrower paper One fuser for wider paper Preventing Fuser Damage 1 To reduce 11 in 279 4 mm lines and wear marks you may require the use of two fusers one when running 8 5x 11 in A4 stock and the other when running 12 x 18 in 304 8 x 457 2 mm or larger stock This is especially true for the graphi...

Page 208: ... clip Before using the new fuser the system administrator must update the NVM width setting values to match the specific width used for this fuser The following table defines the media sizes and width ranges that can be set for the fuser Table 1 Bypass Connector used for Default Paper Width NVM Settings Width range Media size Bypass Connect or Range No 98 0 330 2 mm 3 858 13 0 in All paper widths ...

Page 209: ...print server 4 Color Mode CMYK Black and White Mode Greyscale Maximum Printable Area Default Border 2 mm on all sides Adjustable Border 0 5 mm up to 400 mm on all sides Print Image Quality Assurance Area 12 48 x 18 98 in 317 mm x 482 mm For Trays 1 2 or 3 12 72 x 18 98 in 323 x 482 mm Paper Size Ranges Minimum Trays 1 3 5 51 x 7 17 in 140 x 182 mm Bypass Tray 3 86 x 5 75 in 98 x 146 mm Maximum 15 ...

Page 210: ...times are listed as follows From a cold start either power on or power saver mode less than 5 minutes From Sleep Mode Power Saver less than 5 minutes From Standby Mode less than 1 minute When switching print modes such as from black only to full color approximately 2 minutes Document Feeder Specifications Specification Item Size Maximum A3 11 17 in 297 432 mm Minimum A5 5 82 x 8 26 148 x 210 mm We...

Page 211: ...racket minimum size is 101 6 x 152 4 mm 4 x 6 inches Note For more information on the optional Postcard bracket refer to the Paper and Media section of this guide Stock types include transparencies heavyweight coated and uncoated predrilled and tabs Loading paper Long Edge Feed LEF portrait or Short Edge Feed SEF landscape dependent on the actual paper size Auto size detection capability Automatic...

Page 212: ...ted and coated 60 ppm 30 ppm Simplex Duplex 64 to 256 gsm A4 uncoated and coated 60 ppm 30 ppm Simplex Duplex 64 to 256 gsm 8 5 x 14 B4 uncoated and coated 52 ppm 26 ppm Simplex Duplex 64 to 256 gsm 11 x 17 A3 uncoated and coated 50 ppm 24 ppm Simplex Duplex 64 to 256 gsm 12 x 18 SRA3 un coated and coated 50 ppm 24 ppm Simplex Duplex 64 to 256 gsm 13 x 19 2 coated and uncoated 32 ppm Simplex 106 t...

Page 213: ...x Duplex 52 to 300 gsm SEF 11 x17 A3 un coated and coated 41 ppm 21 ppm Simplex Duplex 52 to 300 gsm SEF 12 x 18 SRA3 coated and un coated 40 ppm 20 ppm Simplex Duplex 52 to 300 gsm SEF 13 x 19 2 coated and uncoated Copy Specifications 110 125 Item Console Copier Type 600 600dpi 23 6 23 6 dots mm Scanning Resolution 600 600dpi 23 6 23 6 dots mm Output Resolution 256 gradation Gradation 5 minutes o...

Page 214: ... in 11 17 in 12 18 in 12 6 x 19 2 in 320 x 488 mm 13 x 19 in 330 x 483 mm 8K 16K Non standard size X direction from 5 8 19 in 148 488 mm Y direc tion from 4 13 in 100 330 mm Trays 1 3 6 7 13 57 lb 52 216 gsm Tray 5 Bypass 13 67lb 52 253 gsm Use Xerox recommended papers for best results Copy Paper 3 5 seconds When the Document Glass 100 Reduction Enlarge ment Tray 1 8 5 x 11 in A4 are used 5 0 seco...

Page 215: ...5 Bypass 280 sheets Maximum paper capacity 9080 pages including Trays 6 and 7 optional High Capacity Feeder The maximum paper capacity 9080 is based on 20 lb 75 gsm Paper Feed Method Ca pacity 9 999 sheets The machine may pause temporarily to perform an image stabiliza tion Continuous Copy Pages Scan Specifications Color scanner Type Maximum size 297 432 mm A3 11 17in for both sheets and books Sca...

Page 216: ... 2003 Windows Server 2008 Windows Vista Windows 7 Novell NetWare 5 x 1 SMB protocol only is supported 2 FTP protocol only is supported Output format Monochrome 2 colors TIFF compression type MH and MMR DocuWorks PDF Scan to PC Supported protocol TCP IP SMTP Output format Monochrome 2 colors TIFF compression type MH and MMR DocuWorks documents PDF E mail Paper Specifications Note Always refer to th...

Page 217: ...CO SEF Plain paper coated uncoated Drilled paper coated un coated 64 to 105 All Trays Recycled paper coated un coated 106 to 256 106 to 350 Trays 1 to 3 Trays 5 6 and 7 Embossed coated uncoated All Trays 8 5 x 11 in A4 LEF Transparency 106 to 350 Trays 5 6 and 7 Postcard coated uncoated 215 9 x 330 2 8 5 x 13 in Government Legal SEF LEF 226 0 x 310 0 8 90 12 20 in DT Special A4 SEF LEF 310 0 x 432...

Page 218: ...imits for the press system to operate correctly Ambient temperature The operating temperature range is 10 to 32 Celcius 50 F to 90 F Relative humidity The required humidity range is 15 to 85 relative humidity RH J zone Dew condensation is inhibited Altitude The press functions at the elevation of 0 to 2 500 meters 0 to 8 200 feet Xerox Versant 80 Press 15 10 User Guide Press Technical Data ...

Page 219: ... x 11 in A4 paper source Note Only letter size 8 5 x 11 in A4 paper Long Edge Feed LEF can be used in this tray Loading Paper in the 1 Tray High Capacity Feeder HCF Tray 6 Tips about the 1 tray HCF Tray 6 This tray accommodates only 8 5 x 11 in A4 Long Edge Feed LEF stock Stock weights between 18 lb 64gsm bond to 80 lb 220 gsm cover may be used in this tray 16 1 Xerox Versant 80 Press User Guide ...

Page 220: ...ve been made to the paper tray select the Change Settings button otherwise proceed to the next step a Make the desired selections for Paper Type Paper Weight Paper Size and Paper Color b If necessary make the desired changes to paper curl and alignment adjustment Note Refer to the System Administration Guide for detailed information on the paper curl and alignment adjustment options c Select Save ...

Page 221: ... Paper Tray 6 malfunc tioned 078 100 078 101 078 102 078 151 Power cycle the machine If the machine is not improved by performing the relevant remedy contact your Xerox Customer Sup port Center The high capacity tray the Tray 6 malfunctioned 078 250 1 Check the paper loaded in Tray 6 2 Power off and then power on the machine 3 If the tray errors are not fixed by performing the relevant remedy cont...

Page 222: ...to the left until it stops 4 Grasp the top cover handle and open the top cover 5 Remove any jammed paper from the top cover area of Tray 6 6 Close the Tray 6 top cover 7 Return Tray 6 to its original position Clearing HCF Paper Jams in the Lower Left Cover 1 Gently move Tray 6 to the left until it stops Xerox Versant 80 Press 16 4 User Guide 1 Tray High Capacity Feeder HCF Tray 6 Letter Size A4 On...

Page 223: ...nside the machine 4 Gently close the lower left cover 5 Gently move Tray 6 back into position HCF Specifications Specification Item 2 000 sheets Paper Capacity 8 5 x 11 in or A4 Sheet Size 18 lb bond to 80 lb cover 64 220 gsm uncoated or coated Paper Weight 16 5 Xerox Versant 80 Press User Guide 1 Tray High Capacity Feeder HCF Tray 6 Letter Size A4 Only ...

Page 224: ...Xerox Versant 80 Press 16 6 User Guide 1 Tray High Capacity Feeder HCF Tray 6 Letter Size A4 Only ...

Page 225: ...ed High Capacity Feeder OHCF is available in a 1 tray or 2 tray option The OHCF feeds a variety of stock sizes including standard and oversized stock up to 13 x 19 2 in 330 2 x 488 mm Each tray holds 2 000 sheets 2 tray OHCF with Bypass 1 1 tray OHCF with Bypass and storage cabinet above the tray 2 17 1 Xerox Versant 80 Press User Guide ...

Page 226: ...ed rolls for OHCF bypass tray should be replaced when experiencing frequent multifeeds single feeds or blank prints in the stack of the output prints Use this procedure to replace the OHCF Bypass tray feed rolls which includes Feed Roll Nudger Roll Retard Roll Note After you replace all of the feed rolls contact your system administrator who will reset the HFSI usuage counter for these CRU compone...

Page 227: ... up down arrow buttons to access the next Maintenance screens e Select the Technical Key Operator icon The Technical Key Operator feature displays f Select the MSI rolls item that corresponds with the newly replaced components g Select Reset Current Value The system resets the HFSI to 0 9 Exit the administrator mode by pressing the Log In Out button on the UI When prompted selectLogout Replacing t...

Page 228: ...squeezing the metal shaft on both ends with your other hand Lift out the nudger roll 4 Replace the new roll by squeezing both ends of the metal shaft and pushing down on the black tab insert and release the roll ends into the notches 5 Next remove the retard roll assembly at the side of the feeder tray to access the retard roll Unscrew the 3 thumbscrews 6 Slide the retard assembly all the way to t...

Page 229: ...ly all the way to the right using the pin as a guideline Ensure the device is all the way into the slots and the 3 screw areas align 11 Screw in the 3 thumbscrews to attach the assembly Do not overtighten 12 Close the tray and verify that the tray is operating successfully by feeding paper using that tray 13 Either log in as the administrator or ask the administrator to perform the following steps...

Page 230: ...aper to eliminate paper adhesion especially in high humidity or high temperature environments 2 Clean the Bypass Tray feed retard and nudger rolls with a damp cloth 3 Replace feed rolls feed re tard nudger refer to Repla cing the OHCF Bypass Tray Feed Rolls Trays 6 and 7 4 If problem persists Call for service Repetitive misfeeds or multifeeds 078 105 078 120 078 125 078 126 078 127 Bypass Tray 5 P...

Page 231: ...e the OHCF Feed Rolls refer to Replacing the OHCF Feed Rolls Trays 6 and 7 Pre registration or feed sensor jam during paper transportation from Tray 7 078 150 078 151 Tray 7 Perform the following in this order 1 Remove or clear any jammed paper 2 Replace and fan the paper in tray 3 Power Off On the press 4 If problem still persists contact the Customer Sup port Center Regi sensor not turned on fau...

Page 232: ... 127 078 156 Trays 6 and 7 OHCF Jam Clearance Trays 6 and 7 Clearing OHCF Jams Trays 6 and 7 Nip Release levers inside of the Transport area of the Feeder hold back large size sheets such as A3 11 x 17 inches 12 x 18 inches to reduce the chance of jamming as paper enters the print engine Note Follow the jam clearance instructions displayed on the touch screen Always ensure that all paper jams incl...

Page 233: ...ide the press and remove it 4 Close the Top Cover of the Bypass Tray 5 5 Reload paper into the tray and resume printing Paper Jams Inside the OHCF Trays 6 and 7 1 Pull out the tray where the paper jam occurred 17 9 Xerox Versant 80 Press User Guide 1 or 2 Tray Oversized High Capacity Feeder OHCF Trays 6 and 7 ...

Page 234: ...ever 1a to the right and turn the knob 1c to the right Remove the jammed paper Note If paper is torn check inside the machine and remove it 3 Return the lever 1a to the original position 4 Close the front cover of the OHCF Note If the front cover of the OHCF is not completely closed a message will appear and the machine will not operate Xerox Versant 80 Press 17 10 User Guide 1 or 2 Tray Oversized...

Page 235: ... the machine and remove it 3 Return the lever 1b to the original position 4 Close the front cover of the OHCF Note If the front cover of the OHCF is not completely closed a message will appear and the machine will not operate OHCF Paper Jams at Lever 1d and Knob 1c Trays 6 and 7 1 Open the front cover of the OHCF 17 11 Xerox Versant 80 Press User Guide 1 or 2 Tray Oversized High Capacity Feeder OH...

Page 236: ... remove the jammed paper Note If paper is torn check inside the machine and remove it 4 Return the lever 1d to the original position 5 Close the front cover of the OHCF Note If the front cover of the OHCF is not completely closed a message will appear and the machine will not operate Xerox Versant 80 Press 17 12 User Guide 1 or 2 Tray Oversized High Capacity Feeder OHCF Trays 6 and 7 ...

Page 237: ...ng up to Xerox 24 lb 90 gsm paper Paper Capacity 1 Tray 7 2 x 10 in 182 x 250 mm B5 to 13 x 19 2 in 330 x 488 mm SRA3 2 Tray 4 x 6 in 102 x 152 mm to 13 x 19 2 in 330 x 488 mm SRA3 Sheet Sizes 18 lb bond to 110 lb cover 64 to 300 gsm uncoated and coated Paper Weight 17 13 Xerox Versant 80 Press User Guide 1 or 2 Tray Oversized High Capacity Feeder OHCF Trays 6 and 7 ...

Page 238: ...Xerox Versant 80 Press 17 14 User Guide 1 or 2 Tray Oversized High Capacity Feeder OHCF Trays 6 and 7 ...

Page 239: ...ed to the system to extend the paper capacities by providing two additional trays This second chained OHCF is referred to as Trays 8 and 9 and it feeds a variety of stock sizes including standard sizes and oversized stock up to 13 x 19 2 in 330 x 488 mm paper Each tray holds 2 000 sheets of 24 lb 90 gsm paper The weight range supported is 52 to 350 gsm Note The OHCF comes equipped from manufacturi...

Page 240: ...0 x 10 in Custom sizes 182 330 mm 7 2 13 in Width and 182 488 mm 7 2 19 2 in Length Sheet size 16 lb to 130 lb cover 52 350 gsm Paper weight 2 000 sheets per tray Important When using up to Xerox 24 lb 90 gsm paper Paper capacity Loading Media in the Chained OHCF Trays 8 and 9 Refer to Loading Media in the OHCF Trays 8 and 9 for information and step by step instructions Xerox Versant 80 Press 18 2...

Page 241: ...es Feed Roll Nudger Roll Retard Roll Note After you replace all of the feed rolls contact your system administrator who will reset the High Frequency Service Item HFSI usage counter for these CRU components to zero 0 1 Locate and access the Bypass Tray on top of the OHCF 2 Lift up and open the Bypass Tray cover to access the feed roll components 3 Remove and replace the feed roll by squeezing the ...

Page 242: ... arrow buttons to access the next Maintenance screens e Select the Technical Key Operator icon The Technical Key Operator feature displays f Select the Multisheet Inserter MSI Bypass rolls item that corresponds with the newly replaced components g Select Reset Current Value The system resets the High Frequency Service Item HFSI to 0 9 Exit the administrator mode by pressing the Log In Out button o...

Page 243: ...ed components 2 Notice the feed roll compartment on the right side panel of the drawer 3 Remove the nudger roll by pushing down on the black tab with one hand which raises the roll upward and then squeezing the metal shaft on both ends with your other hand Lift out the nudger roll 4 Replace the new roll by squeezing both ends of the metal shaft and pushing down on the black tab insert and release ...

Page 244: ...he assembly out towards you until completely removed from the tray Set aside 7 With the retard assembly out access and remove the feed roll To remove squeeze both ends of the metal shaft and lift out To replace squeeze both ends of the new roll shaft and insert and release the roll ends into the notches Xerox Versant 80 Press 18 6 User Guide Chained Second Oversized High Capacity Feeder OHCF Trays...

Page 245: ... and the 3 screw areas align 11 Screw in the 3 thumbscrews to attach the assembly Do not over tighten 12 Close the tray and verify that the tray is operating successfully by feeding paper using that tray 13 Either log in as the administrator or ask the administrator to perform the following steps to reset the High Frequency Service Item HFSI count to zero 0 a At the Control Panel press the Tools b...

Page 246: ...mmended Solution Possible Cause Fault Code Fault Area 1 Fan the paper to eliminate pa per adhesion especially in high humidity or high temperature environments 2 Clean the Bypass Tray feed re tard and nudger rolls with a damp cloth 3 Replace feed rolls feed retard nudger refer to Replacing the Bypass Tray Feed Rolls for the OHCF Trays 8 and 9 4 If problem persists Call for ser vice Repetitive misf...

Page 247: ...On the press 4 If problem still persists contact the Customer Support Center Gate sensor not turned on fault during paper transportation from Tray 8 178 112 Tray 8 Perform the following in this order 1 Remove or clear any jammed paper 2 Replace and fan the paper in tray 3 Power Off On the press 4 If problem still persists contact the Customer Support Center Gate sensor not turned on fault during p...

Page 248: ...oblem still persists contact the Customer Support Center Multiple feed of sheets paper jam 178 900 178 904 Trays 8 and 9 OHCF Trays 8 and 9 Jam Clearance Clearing OHCF Trays 8 9 Jams Nip Release levers inside of the Transport area of the Feeder hold back large size sheets such as A3 11 x 17 inches 12 x 18 inches to reduce the chance of jamming as paper enters the print engine Note Follow the jam c...

Page 249: ...r Note If paper is torn check inside the press and remove it 4 Close the Top Cover of the Bypass Tray 5 5 Pull open the OHCF Top Drawer located at the top of Trays 6 and 7 18 11 Xerox Versant 80 Press User Guide Chained Second Oversized High Capacity Feeder OHCF Trays 8 and 9 ...

Page 250: ... and 9 1 Pull out the tray where the paper jam occurred 2 Remove the jammed paper Note If paper is torn check inside the machine and remove it 3 Gently push in the tray until it comes to a stop OHCF Trays 8 and 9 Paper Jams at Lever 1a and Knob 1c 1 Open the front cover of the OHCF Xerox Versant 80 Press 18 12 User Guide Chained Second Oversized High Capacity Feeder OHCF Trays 8 and 9 ...

Page 251: ...ate OHCF Trays 8 and 9 Paper Jams at Lever 1b and Knob 1c 1 Open the front cover of the OHCF 2 Move the lever 1b to the right and turn the knob 1c to the right Remove the jammed paper Note If paper is torn check inside the machine and remove it 3 Return the lever 1b to the original position 4 Close the front cover of the OHCF Note If the front cover of the OHCF is not completely closed a message w...

Page 252: ...e it 3 If the paper cannot be removed turn the knob 1c clockwise and then remove the jammed paper 4 Return the lever 1d to the original position 5 Close the front cover of the OHCF Note If the front cover of the OHCF is not completely closed a message will appear and the machine will not operate Xerox Versant 80 Press 18 14 User Guide Chained Second Oversized High Capacity Feeder OHCF Trays 8 and ...

Page 253: ...rofessional level finishing options to the press while requiring minimal additional space for the finisher The finisher is available with or without an optional booklet maker Business Ready BR Finisher without Booklet Maker The BR Finisher supports hole punching and stapling The Right Top Tray is used for stacked output and can receive up to 500 sheets of paper The Stacker is used for offset and o...

Page 254: ...tom Finisher Tray is used for receiving saddle stapled booklets Identifying the BR Finisher Components 1 Finisher Front Cover 2 Right Top Tray 3 Right Middle Tray 4 Staple Cartridge 5 Booklet Maker Tray optional 6 Booklet Staple Unit optional 7 Booklet Maker Unit optional BR Finisher Maintenance Consumable Supplies for the BR Finisher Approximate Print Yield Full Color 8 5x11 A4 Prints Reorder Qua...

Page 255: ... the Business Ready Finisher 2 Hold the stapler assembly by the orange lever R1 and push it to the right 3 Grip the staple cartridge by the orange handle and pull it firmly toward you to remove it 4 Pinch both sides of the staple refill 1 and remove it from the cartridge 2 5 Insert the front side of the new staple refill into the staple cartridge 1 then push the rear side into the cartridge 2 6 Cl...

Page 256: ... the staple refill press the rear of the refill container as shown 7 Replace the staple refill then return the staple cartridge to the booklet maker 8 Close the front door of the Business Ready Finisher Emptying the Hole Punch Waste Container A message appears on the press User Interface UI when the hole punch waste container is full Warning Do not perform this procedure while the printer is copyi...

Page 257: ...Fault Codes Business Ready BR Finisher and Optional Booklet Maker Recommended Solution Possible Cause Fault Code Follow the instructions shown on the press User Interface UI 1 Remove all sheets or pieces from the jam clear ance areas 2 Close the front door 3 If necessary Power Off On the press 4 If error persists contact the Customer Support Center Misfeed in the finisher paper path 012 108 012 11...

Page 258: ...2 234 012 247 024 926 024 963 112 700 1 Power Off On the press 2 If error persists contact the Customer Support Center Problems in the optional booklet maker 012 243 012 246 012 265 012 266 012 269 012 292 012 297 012 307 012 319 012 983 012 984 012 989 1 Power Off On the press 2 If error persists contact the Customer Support Center Problems with the finisher stapler or booklet stapler 012 291 012...

Page 259: ...lose the front door of the Business Ready Finisher Clearing Jams in the BR Finisher at Position 3c 1 Open the front door of the Business Ready Finisher 2 Move green lever 3c to the left 3 Carefully remove the paper If the paper is torn remove all torn pieces from the finisher If the paper is inaccessible or if the press User Interface UI prompts you to release the paper turn green handle knob 3b i...

Page 260: ...Move green lever 3d to the right 3 Carefully remove the paper Note If the paper is torn remove all pieces from the finisher 4 Return green lever 3d to its original position 5 Close the front door of the Business Ready Finisher Clearing Jams in the BR Finisher at Position 4 1 Open the front door of the Business Ready Finisher Xerox Versant 80 Press 19 8 User Guide Business Ready BR Finisher and Opt...

Page 261: ...oor of the Business Ready Finisher Clearing Jams in the Booklet Tray 1 Open the front door of the Business Ready Finisher 2 To release the jammed paper turn green knob 4 in the direction shown 3 To remove the paper pull it in the direction shown Note If the paper is torn remove all torn pieces from the finisher 4 Close the front door of the Business Ready Finisher 19 9 Xerox Versant 80 Press User ...

Page 262: ...le Punch Europe 2 4 Hole Punch 4 Hole Swedish Punch Optional Hole Punch BR Finisher with Booklet Maker Specification Item Offset Top Tray 500 sheets of 8 5 x 11 in A4 unstapled Stacking Stapling Tray 1 500 sheets of 8 5 x 11 in 11 x 17 in A4 A3 SRA3 unstapled or 200 stapled sets of 8 5 x 11 in A4 single position stapling or dual or 4 position stapling or 100 stapled sets of 11 x 17 in A3 SRA3 Tray...

Page 263: ...nal Hole Punch Saddle stitch 2 to 16 sheets 7 sheets at 106 to 176 gsm coated or 5 sheets at 177 to 220 gsm coated Bi fold up to 5 sheets Letter Legal Tabloid A3 A4 12 x 18 in SRA3 supported Booklet Maker 19 11 Xerox Versant 80 Press User Guide Business Ready BR Finisher and Optional Booklet Maker ...

Page 264: ...Xerox Versant 80 Press 19 12 User Guide Business Ready BR Finisher and Optional Booklet Maker ...

Page 265: ...a paper path between the press and any attached finishing device devices The Interface Cooling Module contains additional fans and associated duct work These fans and duct work aid in cooling the outgoing printed media The Interface Cooling Module is also equipped with an internal spectrophotometer Finishing Devices that Require Either Module The following finishing devices require either the Inte...

Page 266: ...p button This button selects the three values of manual up curl 3 Manual Curl Down button This button selects the three values of manual down curl 4 Curl Up Down indicators These indicate the amount of manual curl up or down that is selected 5 Auto Curl indicator This indicates that the Auto Curl Mode is selected If you want to quickly and at the point of need adjust the paper curl on the printed ...

Page 267: ...ettings The module is designed with several automated presettings for controlling paper curl When using the Auto Decurl function the amount of curl correction is automatically set by the module decurler When the media passes through the module decurler you are notified of the current amount of curl correction through the various LEDs on the module Control Panel If you require more curl correction ...

Page 268: ...ng to scan targets with an external spectrophotometer The digital press prints color targets while the internal spectrophotometer measures them The system then develops a map so that output colors can be produced that accurately replicate a known standard such as GRACoL or SWAP The mapping is written into the profile for the type of media and line screening used Tip These calibration and profiling...

Page 269: ...oor is open 048 300 1 Power Off On the press 2 If error persists contact the Customer Support Center Decurler Sensor or Belt issue 048 310 048 311 048 312 048 313 048 314 048 315 048 316 1 Power Off On the press 2 If error persists contact the Customer Support Center Cooling fan failure 048 317 048 318 048 319 1 Ensure all jams are cleared 2 Ensure all handles levers are returned to closed pos iti...

Page 270: ...erface Module Interface Cooling Module Clearing Module Jams Tip Always ensure that all paper jams including any small ripped pieces of paper are cleared before proceeding with your print jobs Note Remedies differ according to the paper jam location Follow the instructions displayed to remove the jammed paper Paper Jams at Lever 1a 1 Open the front cover of the module 2 Move the lever 1a downward a...

Page 271: ...Lever 2a 1 Open the front cover of the module 2 Move the lever 2a upward turn the knob 2c counterclockwise and remove the jammed paper 3 Return the lever 2a to the original position 4 Close the front cover of the module 5 Follow the instructions on the press UI to clear other areas or to resume your print copy or scan job 20 7 Xerox Versant 80 Press User Guide Interface Module Interface Cooling Mo...

Page 272: ...erclockwise and remove the jammed paper 3 Return the lever 2b to the original position 4 Close the front cover of the module 5 Follow the instructions on the press UI to clear other areas or to resume your print copy or scan job Xerox Versant 80 Press 20 8 User Guide Interface Module Interface Cooling Module ...

Page 273: ...5 x 11 in media A4 media supports punch types 21 hole to a maximum of 47 hole Note The GBC AdvancedPunch requires either the Interface Module or Interface Cooling Module It also requires another finishing device for example the High Capacity Stacker GBC AdvancedPunch Specifications Letter 8 5 x 11 in A4 Punch Sheet Size 75 216 gsm coated and uncoated Paper Stock Supports tab stock no wider than 9 ...

Page 274: ...ges 3 Storage holds up to 3 spare Die Sets Die Set Storage 4 Provides a short straight through paper path for unpunched documents Punch Bypass 5 Wide radius turn support stocks up to 216 gsm cover stock Punch Mode Path 6 Status Indicators on the GBC AdvancedPunch Located on the front of the AdvancedPunch is a panel that provides information relating to the operational state of the punch unit LED l...

Page 275: ...s Fully Insert Punch Die 4 When the front door is open or not completely closed the yellow LED illuminates Close Front Door 5 When a sheet of paper becomes jammed within the punch unit the yellow LED illuminates Remove the sheet that is jammed within the AdvancedPunch Clear Paper Jam 6 Note The LED indicators on the AdvancedPunch will glow dimly if the press is turned on while the AdvancedPunch po...

Page 276: ...y mode and is not in the process of running any copy scan or print jobs 2 Open the AdvancedPunch access door panel 3 Securely grasp the handle and pull firmly This disengages the Automatic Latching Mechanism and allows the punch die to slide out of the unit 4 Continue to pull the handle until the Punch Die Set is fully removed supporting it with both hands Xerox Versant 80 Press 21 4 User Guide GB...

Page 277: ... die or a die that has recently been oiled Pre Punch Job Checkpoints Prior to beginning a job in which the punching feature of the AdvancedPunch will be used perform the following checkpoints 1 Ensure that no yellow LED indicators are illuminated on the front panel of the AdvancedPunch 2 If a yellow LED indicator is illuminated then correct the fault prior to starting the punch job Note The Advanc...

Page 278: ...being used 1 If using the optional HCF letter size A4 or the OHCF load the tabs upside down and change the order one by one as shown in the illustration 2 If using the press Trays 1 2 or 3 load the tabs upside down as shown in the illustration 3 If using an optional finisher with a post processor inserter T1 load the tabs upside down as shown in the illustration GBC AdvancedPunch Maintenance Empty...

Page 279: ...ront door The punch die set is missing or not fully installed 040 940 Install and or fully insert punch container close front door Punch container is missing or not fully installed 040 941 Empty punch container and then reinstall it Punch container is full 040 942 Empty punch container and then reinstall it Punch container is near full 140 700 GBC AdvancedPunch General Problems Remedy Cause 1 Chec...

Page 280: ...learance Solution Jam Area If paper is jammed in the Punch Bypass lift the paper guide plate located inside and remove the jammed paper If paper is jammed in the downward paper path chute move the door to the right remove the jammed paper If paper is jammed or the Punch Die Set is jammed turn Knob J3 to the HOME position arrows line up slide the Die Set out and remove the jammed paper If paper is ...

Page 281: ...a variety of optional multiple hole punch die sets Similar to the GBC AdvancedPunch the GBC AdvancedPunch Pro may be attached to a variety of optional finishing accessories and provides the same capabilities as the AdvancedPunch However the AdvancedPunch Pro also provides additional capabilities that are not available with its predecessor those additional capabilities include the following A bigge...

Page 282: ...eet bypass on the device AdvancedPunch Pro Specifications Descrption Capabilities US Sizes Letter LTR LEF Letter LTR SEF Statement LEF Legal SEF Ledger SEF 9 x 12 in SEF 9 x 12 in LEF 12 x 18 in SEF ISO Sizes A4 LEF A4 SEF A5 LEF A3 SEF SRA4 SEF SRA4 LEF SRA3 SEF Punch Sheet Size and Edge Long Edge Feed LEF and Short Edge Feed SEF Plain 75 gsm 300 gsm 20 lb bond 110 lb cover Coated 120 gsm 300 gsm...

Page 283: ...age 4 Easy to access chip tray for quick chip disposal Punch Chip Container 5 Punch Chip Container Periodically empty the drawer for the Punch Chip Container The AdvancedPunch Pro uses a sensor to determine when the punch container is full Once the punch container is full the User Display Panel shows a Chip Tray Full message furthermore a message also appear on the press User Interface UI Punch Mo...

Page 284: ...er Display Panel provides Messages Settings and Information relating to the functions of the punch unit User Display Panel Main Screen Information Settings Messages When required Information is displayed such as regarding Punch Cycles Die Cycles and Firmware Refer toInformation on User Display Panel Settings include Punch Mode Backgage Alignment Units Refer to Settings on the User Display Panel Wh...

Page 285: ...ys when the Punch Chip Container is full of waste paper chips The container must be emptied Chip Tray Out This message displays when the Punch Chip Container is removed or not fully inserted into the punch unit Check Die This message displays when the Die Set is removed or not fully inserted into the punch unit When this message displays the punch unit will run in the Bypass Mode only Close Door T...

Page 286: ... buttons on the User Display Panel Pressing Up increases the Alignment position and pressing Down decreases the Alignment position 1 Alignment 2 The plus sign on the User Display Panel increases the Alignment offset 3 The minus sign on the User Display Panel decreases the Alignment offset Language The User Display Panel can be configured to display the desired language Language sets available incl...

Page 287: ... die set as an example the Pin Number 1 and Pin Number 47 last pin locations are indicated in the illustration Note All square and round hole die sets follow the same pin numbering format Tables Pin Removal Table for US Paper Sizes and Pin Removal Table for ISO Paper Sizes show the information on which pins need to be removed to correctly punch each sheet size and configuration that the AdvancedPu...

Page 288: ...SEF 1 34 1 23 1 21 3H 5H 7H 1 34 1 23 1 2 47 12 x 18 in SEF Table Legend N A Not Applicable Long Edge Feed LEF Indicates that the paper is being fed through the system so that the longer side of the sheet will be punched Short Edge Feed SEF Indicates that the paper is being fed through the system so that the shorter side of the sheet will be punched Letter LTR Size is 8 5 inch x 11 inch Statement ...

Page 289: ...5 30 31 4 21 4 19 1 4 1 4 4 5 30 31 4 21 6 7 42 41 SRA4 SEF None None None 2H 4H 2H 4H None None None SRA3 SEF Table Legend For CombBind 20H Configuration Pull Pin Number 1 N A Not Applicable Long Edge Feed LEF Indicates that the paper is being fed through the system so that the longer side of the sheet will be punched Short Edge Feed SEF Indicates that the paper is being fed through the system so...

Page 290: ... will not be centered on the sheet 3 Position A This is when the arrow on the die stop knob points down towards the handle and lines up with the lower arrow on the die stop handle label 4 Position B This is when the arrow on the die stop knob points to the side and lines up with the side arrow on the die stop handle label Refer to these tables Die Stop Position Guide for US Paper Sizes and Die Sto...

Page 291: ...e Die Stop Position Based On Paper Size or Orientation A A A A A A A4 LEF A B B A B A A4 SEF A B B A B A A5 LEF A A A A A A A3 SEF A A A A A A SRA4 LEF A B B A B A SRA4 SEF A A A A A A SRA3 SEF For CombBind 20H Configuration set to die stop position B Available Die Sets for the AdvancedPunch Pro The AdvancedPunch Pro uses a variety of easily interchangeable die sets that allow you to punch documen...

Page 292: ...h Hole Size 0 250 x 0 214 in 6 4 x 5 4 mm Length x Width Center to Center Hole Spacing 0 500 in 12 7 mm W3 Wire Round 3 Holes per inch Hole Size 0 158 in 4 mm Diameter Center to Center Hole Spacing 0 335 in 8 5 mm W2 Wire Round 2 Holes per inch Hole Size 0 256 in 6 6 mm Diameter Center to Center Hole Spacing 0 5 in 12 7 mm Color Coil Binding C4 Coil Round 4 Holes per inch Hole Size 0 174 in 4 4 mm...

Page 293: ...terns Hole Size 0 316 in 8 mm Diameter 3 Ring 5 Ring 7 Ring Binder U S Standard Loose leaf Patterns Hole Size 0 316 in 8 mm Diameter 4 Ring Binder European Standard Loose leaf Patterns Hole Size 0 315 in 8 mm Diameter 4 Ring Binder European Standard Loose leaf Patterns Hole Size 0 256 in 6 5 mm Diameter 4 Ring Binder Scandinavian Standard Loose leaf Patterns Hole Size 0 256 in 6 5 mm Diameter Adva...

Page 294: ...the desired punching feature from File Print Printer Properties 7 For Copy jobs select the desired punching feature from the press User Interface Control Panel a From the main home screen on the press User Interface Control Panel select the Copy feature b Select Copy Output to enter the Hole Punch More menu c From the Hole Punch More menu select the AdvancedPunch Pro option from the hole punch col...

Page 295: ...sent around the punched holes on the sheet After punching 25 to 50 sheets the die will no longer leave oil on the sheets It is recommended that a short test print job be run after installing a new die or a die that has recently been oiled 1 Ensure that the press is in standby mode and is not in the process of running any copy scan or print jobs 2 Open the AdvancedPunch Pro Front Door 3 Securely gr...

Page 296: ...lly engaged as shown on the die set label Warning Possible pinch point hazard When installing the punch die set always keep fingers and other body parts out of the unit s die set slot and away from all areas of the punch die set except for the finger hole in the die set Failure to follow these precautions may result in injury 8 Close the AdvancedPunch Pro Front Door 9 Proceed with your printing an...

Page 297: ...set 1 Rotate the two Quarter Turn Fasteners counter clockwise to release the Pressure Bar 2 Remove the Pressure Bar and set aside 3 Lift up and remove the appropriate pins according to either the Pin Removal Table for US Paper Sizes or the Pin Removal Table for ISO Paper Sizes 4 Store the pins in the pin storage tray inside the Front Door of the AdvancedPunch Pro Important Ensure that the pins can...

Page 298: ... die set always refer to the Pin Removal Table for US Paper Sizes and the Pin Removal Table for ISO Paper Sizes this ensures that the correct pins are being added to the die set 1 Rotate the two Quarter Turn Fasteners counter clockwise to release the Pressure Bar 2 Remove the Pressure Bar and set aside 3 Retrieve the pins from the pin storage tray inside the Front Door of the AdvancedPunch Pro If ...

Page 299: ...set and the AdvancedPunch Pro ensure that the Pressure Bar is attached and both Quarter Turn Fasteners are in the locked position prior to inserting the die set into the AdvancedPunch Pro Changing the Die Stop Position On some of the AdvancedPunch Pro die sets there is an adjustable die stop which is used to change the hole position for the die set for certain sheet sizes For die sets with a die s...

Page 300: ...with the desired Die Stop Arrow as indicated on the Die Stop Handle Label 5 When the arrows align release the Die Stop Knob 6 Ensure that the Metal Die Stop on the bottom fully seats against the Die Plate 7 Choose one of the following Reinstall the Die Set in the AdvancedPunch Pro Return the Die Set to the storage area AdvancedPunch Pro Maintenance Ordering Supplies for the AdvancedPunch Pro Die S...

Page 301: ...e Set Xerox 3 5 7 Hole 8 mm 1 per box Die Set Xerox 4 Hole 8 mm 1 per box Die Set Xerox 4 Hole 6 5 mm 1 per box Die Set Xerox 4 Hole Scan Cleaning the Exterior of the AdvancedPunch Pro Clean the exterior of the AdvancedPunch Pro using only a soft damp cloth Do not use detergents or solvents as damage to the punch may occur Emptying the Punch Container The Punch Container for the AdvancedPunch Pro ...

Page 302: ...s may also be used The procedure for lubricating the die set pins is slightley different depending on whether or not the die set has a felt pad Important After oil has been applied reinstall the die set into the AdvancedPunch Pro and run a small set of test prints It is normal for oil to be present on the first set of sheets punched after oiling the die set After approximately 25 to 50 sheets the ...

Page 303: ...h Pro Fault codes for the GBC AdvancedPunch Pro are displayed on the press User Interface Control Panel Remedy Cause Fault Code 1 Open AdvancedPunch Pro front door and look for a paper jam refer to Clearing Paper Jams in the Ad vancedPunch Pro 2 Remove any paper jam 3 Close front door JamisdetectedintheAdvanced Punch Pro 040 100 040 101 040 900 040 901 Close front door of the AdvancedPunch Pro Fro...

Page 304: ...Punched holes are not aligned with the edge of the paper 1 Remove the die set and inspect the die throat for any stuck paper chads 2 Remove the paper chads Sheets are jamming repeatedly at the die set area Ensure that the Punch Chip Container is fully inserted If the problem continues contact the Customer Support Center Insert the Punch Chip Container message is displayed on the User Display Panel...

Page 305: ...ute perform the following steps 1 Press the top lever while holding the bottom lever this un latches the chute 2 Continue to open the chute until it contacts the magnet on the left side 3 Remove the paper 4 Return the chute to the closed position by returning the lever to its original position the latch mechanism is activ ated If paper is jammed in the right bottom chute perform the following step...

Page 306: ...nsure Areas 3 and 5 are clear of any jammed paper 2 If there is not any paper found in these two areas then remove the die set from the punch unit refer to Changing Die Sets in the AdvancedPunch Pro Removing Installing 3 Remove any jammed paper 4 Reinstall the die set into the punch unit Xerox Versant 80 Press 22 26 User Guide GBC AdvancedPunch Pro ...

Page 307: ...arge capacity stacking and offsetting capabilities for production output to a Stacker Tray Also provides a Top Tray convenient for short stack runs Tip The HCS requires either the Interface Module or the Interface Cooling Module 1 Interface Module or Interface Cooling Module 2 High Capacity Stacker HCS 23 1 Xerox Versant 80 Press User Guide ...

Page 308: ...ough the HCS to another connected finishing device 4 Stacker Tray Cart Collated sets up to a total of 5000 sheets are transported to the Stacker Tray which is located on a movable Stacker Cart Note The Stacker Tray Cart capacity may be less than 5000 sheets if the media being used is heavyweight or thicker sheets HCS Control Panel The HCS control panel consists of 1 Top Tray jam This indicator bli...

Page 309: ... blink when there is a jam in Areas E1 E2 and or E3 HCS Top Tray The Top Tray offers the following Convenience for short stack runs up to 500 sheets without offsetting Delivery of purged sheets Unloading the HCS Stacker Tray Cart The HCS has Unload While Run capability 1 Press the Unload button on the HCS control panel 2 After the Unload Indicator lights open the HCS front door 3 Position the secu...

Page 310: ... If the problem persists contact the Customer Support Center HCS communication fault 049 300 Check the properties of the tabs job and resend the job Tabbed sheet fault 049 700 Check the paper path of the module and carefully remove all sheets from the paper path areas Sheets remain in the paper path 049 900 049 908 Open the HCS front door and remove all sheets and paper scraps from jam clearance a...

Page 311: ...tampers no longer in contact with paper Loss of Power to the HCS If power is interrupted to the High Capacity Stacker perform the following 1 Ensure that the power cord is plugged in to the proper wall receptacle 2 Ensure that the press power is switched on 3 Ensure that the Ground Fault Indicator is in the On position 4 If the power has not been restored by checking the above items then call for ...

Page 312: ...cates there is a jam in the print engine follow the instructions on the screen to remove any paper in the area indicated 6 Follow the instructions displayed on the UI to resume printing HCS Transport Jams E4 E5 and E6 Perform the following steps to clear the jam and resume printing 1 Open the HCS Front Cover 2 Lift the green handle s and or rotate the green knob and remove all paper in the entranc...

Page 313: ...straight into the HCS 9 Close the front door 10 If the press UI indicates there is a jam in the print engine follow the instructions on the screen to remove any paper in the area indicated 11 Follow the instructions displayed on the UI to resume printing HCS Top Tray Jam E7 Perform the following steps to clear the jam and resume printing 1 Remove any output delivered to the Top Tray 2 Open the HCS...

Page 314: ... rotate the green knob and remove all paper in the entrance area 3 Close the green handle s 4 Close the HCS Front Cover 5 If the press UI indicates there is a jam in the print engine follow the instructions on the screen to remove any paper in the area indicated 6 Follow the instructions displayed on the UI to resume printing Information about Paper Curl and the HCS Check the output in the Stacker...

Page 315: ...coated uncoated 500 sheet top tray up to 13 x 19 2 in 330 x 488 mm HCS Media Guidelines Stacker Tray Cart will accept 52 350 gsm either coated or uncoated stock with the possibility of degraded stock quality and increased jam rate for stocks that are heavier than 300 gsm Transparencies may be run to either the Top Tray or the Stacker Tray Cart Stack height should be limited to 100 transparencies C...

Page 316: ...Xerox Versant 80 Press 23 10 User Guide High Capacity Stacker HCS ...

Page 317: ...tically creates saddle stitched booklets of up to 25 sheets This device offers hole punching stapling and bifold options 1 Interface Module or Interface Cooling Module Both finishers require one of these modules The module acts as a communication device and as a paper path between the press and the Standard Finisher or the Booklet Maker Finisher 2 Standard Finisher or Booklet Maker Finisher The Bo...

Page 318: ...t optional 5 Booklet Output Tray This is available only with the Booklet Maker Finisher The Booklet Tray receives saddle stitched booklets when you select Single Fold or Single Fold Stapling 6 Booklet Output Tray Button This is available only with the Booklet Maker Finisher When you press this button the Booklet Output Tray is raised so you can retrieve booklets from the output area 7 Right Cover ...

Page 319: ...re on the Finisher The Finisher has a manual decurling feature which allows you to adjust the curl of the print output at point of need Pressing the Decurler button on the finisher switches the decurl feature between the Auto On and Off modes 1 Auto button When this indicator is lit the appropriate curl correction is automatically performed depending on the sizes and orientation of the printed out...

Page 320: ...ld types The folding option is selected from the print driver Note In order to use the folding option the orientation of documents must be short edge feed SEF You must select a paper tray that contains SEF stock Fold Types Important The Single Fold Bi Fold option is available only with the Booklet Maker Finisher The C Fold and Z Fold options are available only with the C Z Folder These fold types ...

Page 321: ...erter Tray T1 Note This tray is available only on the following finishers Standard Finisher with or without optional C Z Folder Booklet Maker Finisher with or without optional C Z Folder Standard Finisher Plus with or without optional C Z Folder 1 If necessary remove any remaining media that is currently loaded in the tray 2 Hold the center of the paper guides and slide them to their desired paper...

Page 322: ...ormation product family and model type Note Always refer to www xerox com for the latest Customer Replaceable Units CRUs part numbers Store supply items and Xerox parts in their original packages in a convenient location Supply Unit Shipped with finisher Reorder Quantity Supply Item 4 staple cartridges 5 000 staples per cartridge and 1 staple waste container per carton Staple Cartridge and Staple ...

Page 323: ...se the right cover on the finisher Note A message will display and the machine will not operate if the right cover is open even slightly Replacing the Booklet Staple Cartridge In addition to the standard stapler the Booklet Maker Finisher is equipped with a booklet stapler When this booklet stapler needs to be replaced a message appears on the UI 1 Make sure that the machine has stopped printing 2...

Page 324: ...inal position in the machine 7 Close the right cover on the finisher Note A message will display and the machine will not operate if the right cover is open even slightly Replacing the Staple Waste Container The press displays a message indicating that the Staple Waste Container is full To replace the container 1 Make sure that the machine has stopped printing 2 Open the right cover on the finishe...

Page 325: ...ed used container to the Customer Support Center 6 Hold the new staple waste container by the R5 handle area and push it into the press Note To prevent injury do not put your fingers on top of the container 7 Push R5 until the lock lever moves to the locked position 8 Close the right cover on the finisher Note A message will display and the machine will not operate if the right cover is open even ...

Page 326: ... the container was emptied 1 Make sure that the machine has stopped printing 2 Open the right cover on the finisher 3 Pull the container out of the finisher R4 4 Discard all the punch scraps in an appropriate container 5 Reinsert the empty container into the machine 6 Close the right cover on the finisher Note A message will display and the machine will not operate if the right cover is open even ...

Page 327: ... paths 012 100 to 012 104 012 108 to 012 115 012 117 to 012 120 Check for any paper jams in the paper path and remove all sheets Power Off On the press and if needed resend the print job If fault persists call for service The finisher malfunctioned 012 125 012 132 012 211 to 012 265 012 282 to 012 296 Make sure the module door is fully closed Power Off On the press if fault persists Interlock Fail...

Page 328: ...mpty 024 979 Remove all paper from the stacker tray The stacker tay is full 024 980 Remove all paper from the Finisher top tray The top tray is full 024 981 Remove all paper from the stacker tray and remove any other obstructions The Finisher stacker tray lower safety warning is on 024 982 Remove all paper from the Booklet tray The Finisher Booklet tray is full 024 983 Remove all paper from the Bo...

Page 329: ... the stapling settings Resend the print job The number of pages exceeds the number of pages that can be stapled 124 709 Jam Clearance in the Finisher Paper Jams in the Post Process Inserter Tray T1 1 Press the Cover button 2 Open cover 1e and then remove the jammed paper and all paper loaded in the tray Note If paper is torn check inside the machine and remove it 3 Fan the paper you removed making...

Page 330: ...r is torn check inside the machine and remove it 3 Open and close the finisher right cover Note The machine will not operate if the cover is open even slightly Paper Jams at Finisher Stacker Tray 1 Make sure that the machine has stopped printing 2 Remove jammed paper from the finisher stacker tray Note If paper is torn check inside the machine and remove it Xerox Versant 80 Press 24 14 User Guide ...

Page 331: ...n knob 4a and remove any jammed paper from the optional booklet maker tray Note If paper is torn check inside the machine and remove it 4 Close the right cover on the finisher Note A message will display and the machine will not operate if the right cover is open even slightly Paper Jams at Lever 1a and Knob 1c 1 Make sure that the machine has stopped printing 24 15 Xerox Versant 80 Press User Gui...

Page 332: ...nd remove it 4 Return lever 1a to the original position 5 Close the finisher left cover completely Note The machine will not operate if the cover is open even slightly Paper Jams at Lever 1d 1 Make sure that the machine has stopped printing 2 Open the finisher left cover Xerox Versant 80 Press 24 16 User Guide Standard Finisher Booklet Maker Finisher ...

Page 333: ...er completely Note The machine will not operate if the cover is open even slightly Paper Jams at Lever 1b 1 Make sure that the machine has stopped printing 2 Open the finisher left cover 3 Move the lever 1b to the right and remove the jammed paper Note If paper is torn check inside the machine and remove it 24 17 Xerox Versant 80 Press User Guide Standard Finisher Booklet Maker Finisher ...

Page 334: ...ng 2 Open the right cover on the finisher 3 Move the levers 3b and 3d remove the jammed paper Note If paper is torn check inside the machine and remove it 4 Return the levers 3b and 3d to their original positions 5 Close the right cover on the finisher Note A message will display and the machine will not operate if the right cover is open even slightly Xerox Versant 80 Press 24 18 User Guide Stand...

Page 335: ...side the machine and remove it 4 Return the lever 3e its original position 5 Close the right cover on the finisher Note A message will display and the machine will not operate if the right cover is open even slightly Paper Jams at Lever 3g and Knob 3f 1 Make sure that the machine has stopped printing 2 Open the right cover on the finisher 24 19 Xerox Versant 80 Press User Guide Standard Finisher B...

Page 336: ...message will display and the machine will not operate if the right cover is open even slightly Paper Jams at Lever 4b and Knob 3a 1 Make sure that the machine has stopped printing 2 Open the right cover on the finisher 3 Move the lever 4b and turn the knob 3a remove the jammed paper Note If paper is torn check inside the machine and remove it Xerox Versant 80 Press 24 20 User Guide Standard Finish...

Page 337: ...e that the machine has stopped printing 2 Open the right cover on the finisher 3 Move the lever 2a and turn the knob 3a remove the jammed paper Note If paper is torn check inside the machine and remove it 4 Return the lever 2a to its original position 5 Close the right cover on the finisher Note A message will display and the machine will not operate if the right cover is open even slightly 24 21 ...

Page 338: ...nside the machine and remove it 4 Return the lever 2b to its original position 5 Close the right cover on the finisher Note A message will display and the machine will not operate if the right cover is open even slightly Paper Jams at 2c 2e 2f and 2d 1 Make sure that the machine has stopped printing 2 Open the right cover on the finisher Xerox Versant 80 Press 24 22 User Guide Standard Finisher Bo...

Page 339: ... jammed paper Note If paper is torn check inside the machine and remove it 5 Return the opened lever 2f or 2e to its original position and close the output tray 2d 6 Close the right cover on the finisher Note A message will display and the machine will not operate if the right cover is open even slightly Paper Jams at 2d and Lever 2g 1 Make sure that the machine has stopped printing 2 Open the rig...

Page 340: ...ose the right cover on the finisher Note A message will display and the machine will not operate if the right cover is open even slightly Paper Jams at Unit 4 and Knob 4a 1 Make sure that the machine has stopped printing 2 Open the right cover on the finisher 3 Pull out unit 4 4 Turn the knob 4a to remove the jammed paper from the left side of unit 4 Xerox Versant 80 Press 24 24 User Guide Standar...

Page 341: ...s are bent Contact our Customer Support Center if the problem persists after you have tried the following solutions Stapler faults on output may look similar to the ones shown in the following illustration 1 No staple 2 Bent staple 3 One side of staple rising up 4 Staple bent in reverse direction 5 Flattened staple 6 Entire staple rising up 7 Staple rising up with the center pressed in If the outp...

Page 342: ...ge Note Always check inside the finisher for any individual staples or staple remnants 1 Make sure that the machine has stopped printing 2 Open the right cover on the finisher 3 Grasp the Staple Cartridge handle located at R1 and pull out the staple cartridge from the finisher 4 Check the inside of the finisher for any remaining staples and if necessary remove them 5 Open the staple cartridge unit...

Page 343: ...ividual staples or staple remnants 1 Make sure that the machine has stopped printing 2 Open the right cover on the finisher 3 While pressing the lever to the right pull out the booklet staple cartridge unit 4 Hold the tabs of the staple cartridge unit by the tabs and lift to remove it 5 Remove the jammed staples from the cartridge Warning To avoid injury to your fingers carefully remove the jammed...

Page 344: ...ot operate if the right cover is open even slightly Reinserting the Basic Staple Cartridge Use this procedure if the standard staple cartridge is inserted incorrectly into the machine Note Always check inside the finisher for any individual staples or staple remnants 1 Make sure that the machine has stopped printing 2 Open the right cover on the finisher Xerox Versant 80 Press 24 28 User Guide Sta...

Page 345: ...e the jammed staple 5 Move the lever on the rear of the staple cartridge unit in the downward direction 6 While holding the lever down turn over the unit and remove the staple cartridge from the unit 7 Detach the outside staples along the line 8 Push a new staple cartridge into the unit 24 29 Xerox Versant 80 Press User Guide Standard Finisher Booklet Maker Finisher ...

Page 346: ...e finisher ONLY Transparencies cannot be sent to the stacker middle tray Stacker middle Tray Collated Uncollated Offset available Tray Type Top Tray Maximum SRA3 13 x19 in 12 6 x19 2 in 330 x 488 mm custom size Minimum 100 x 148 mm SEF 4 x 6 in SEF A6 SEF postcards Stacker middle Tray Maximum 13 x 19 in 330 x 488 mm SRA3 Minimum B5 Executive 7 25 x 10 5 in Optional C Z Folder tray Supports A4 SEF ...

Page 347: ...aple sheets 100 sheets When using paper of size larger than A4 or 8 5 x 11 in the max imum number of sheets that can be stapled is 65 Staple nails may bend when using certain paper types Paper size Maximum A3 11 x 17 in Minimum B5 Executive 7 25 x 10 5 in Staple position 1 location front angled stapling center parallel stapling back parallel stapling 2 locations parallel stapling 4 locations A4 LE...

Page 348: ...m Uncoated 25 sheets 81 90 gsm Uncoated 20 sheets 91 105 gsm Uncoated 10 sheets 106 128 gsm Uncoated 10 sheets Coated 10 sheets 129 150 gsm Uncoated 10 sheets Coated 10 sheets 151 176 gsm Uncoated 10 sheets Coated 10 sheets 177 220 gsm Uncoated 5 sheets Coated 5 sheets 221 256 gsm 4 sheets max coated or uncoated 257 350 gsm 3 sheets max coated or uncoated Booklet Creation Single Fold Note Non stap...

Page 349: ... 90 gsm Output tray Stacker middle tray Z Fold Half Sheet Paper size A4 8 5 x 11 in Number of sheets to be folded 1 sheet Capacity Minimum 30 sheets When using Xerox 20 lb 75 gsm paper Paper type 16 24 lb 64 90 gsm Output tray C Z Folder tray C Fold Z Fold Refer to Booklet Creation Single Fold specifications for more inform ation Single Fold 24 33 Xerox Versant 80 Press User Guide Standard Finishe...

Page 350: ...Xerox Versant 80 Press 24 34 User Guide Standard Finisher Booklet Maker Finisher ...

Page 351: ...pearance of a perfect bound book Trims cuts away the face edge of the booklet resulting in a neat finished edge The booklet is assembled and stapled in the booklet area of the finisher The booklet then enters the SquareFold Trimmer Module already assembled Any adjustments to the image of the original and its placement on the booklet page must be set at the print server Note Always refer to the Hin...

Page 352: ... amount 2 20 mm adjustable in 0 1 mm increments Trim capacity 16 lb bond 90 lb cover Paper weights 64 to 300 gsm uncoated 106 to 300 gsm coated Note Refer to the Booklet Maker Finisher specifications in this guide Identifying the Module Components Main Components The main components consist of 1 Top Left Cover Open this cover to remove paper jams The square fold mechanism is found in this area 2 T...

Page 353: ... fold area 3 Once the booklet spine reaches the square fold area the booklet is clamped and the square folding operation begins 4 The booklet is flattened and the spine squared according to the square fold setting indicated on the control panel 5 After the booklet is flattened and the spine squared it is moved to the trimmer area a Based on the finished booklet size the booklet is moved until the ...

Page 354: ...ights when the Trimmer Waste Container is pulled out or when it is full 2 Square Fold options This area of the control panel consists of the a Settings button Press this button to adjust the SquareFold setting b SquareFold options Select the desired setting These settings are discussed in detail in the SquareFold options section Note The Square Fold options are available from your computer print d...

Page 355: ... booklet is 2 Select the 1 High High 1 setting when you want a greater amount of pressure applied to the spine of the booklet but not as much as the 2 setting uses Auto Normal is the default setting and is used for most jobs Select the 1 Low Low 1 setting when you want less pressure applied to the spine of the booklet The less pressure applied to the booklet the more rounded the booklet spine will...

Page 356: ...items The number of sheets in the finished booklet The finished booklet width size The media type coated or uncoated The media weight Note Experiment with various settings to determine the best selections for your job You may want to run one or more test prints before running larger jobs for best booklet output Note Trim settings cannot be adjusted to remove less than 2 mm 0 078 in or more than 20...

Page 357: ...8 5 x 14 in B4 250 x 353 mm 6 6 170 24 lbs 90 gsm 8 5 x 7 in 250 x 176 5 mm 8 5 x 14 in B4 250 x 353 mm 7 14 200 24 lbs 90 gsm 8 5 x 11 in A4 210 x 297 mm 11 x 17 in A3 297 x420 mm 8 5 205 80 lbs 216 gsm 8 5 x 11 in A4 210 x 297 mm 11 x 17 in A3 297 x420 mm 9 22 210 20 lbs 80 gsm 8 5 x 11 in A4 210 x 297 mm 11 x 17 in A3 297 x420 mm 10 8 210 24 lbs 90 gsm 8 5 x 11 in A4 210 x 297 mm 11 x 17 in A3 ...

Page 358: ...click on the job to open it and select Properties 4 Select the Finishing and Output area and ensure that the correct output tray is selected Booklet Maker Tray 5 Ensure that the correct Stapling Finishing Folding features are selected 6 Select the desired Square Fold Book Pressing options a Select On b Select the desired pressure to be applied refer to Square Fold Options 7 Select the desired Trim...

Page 359: ...hese images are not truncated The following are examples of a booklet with preprinted front back covers with full page image but different size 1 Printed on 8 5 x 14 in B4 paper The front cover which was trimmed displays the entire image 2 Printed on 8 5 x 11 in A4 paper The image on the front cover is truncated after trimming it Before you print any booklet consider the following Image location o...

Page 360: ...ng normal operation or when the press is idle The covers can be opened only when an indicator is lit and a fault occurs within the finisher module For indicator details refer to the control panel information Recommended solution Possible cause Fault code Open the Top Left and Right Covers of the Finisher Module Carefully remove all sheets and paper scraps from jam clearance areas Close the Top Lef...

Page 361: ... the Top Left and Right Covers of the Finisher Module Carefully remove all sheets and paper scraps from jam clearance areas Make sure the Top Left and Right Covers are fully closed Check the Trimmer Waste Container If full empty it and reinsert into the mod ule Make sure it is pushed in completely Follow any instructions on the touch screen If fault persists call for service Static jams 013 900 01...

Page 362: ...e Clearing Jams Use the following procedure to clear jams or faults and then resume printing 1 Follow any instructions displayed on the press User Interface UI and the SquareFold Trimmer Module control panel 2 Open the Top Left Cover and the Top Right Cover of the module and look for any jammed booklets in the paper path and remove them 3 Check for loose trim scraps in the paper path and remove th...

Page 363: ...n on the left cover of the Trimmer unit to open the cover 2 Remove the jammed paper 3 If you cannot remove the paper in Step 2 open the right cover of the finisher 4 Turn the knob 4a to the right and then remove the jammed paper 5 Close the left cover of the Trimmer unit 6 If you opened the right cover of the finisher in Step 3 close the cover 25 13 Xerox Versant 80 Press User Guide SquareFold Tri...

Page 364: ...g procedure to clear jams when the E3 LED is lit on the SquareFold Trimmer Module control panel 1 Make sure that the machine is not in operation and press the button on the right cover of the Trimmer unit to open the cover 2 Remove the jammed paper 3 Close the right cover of the Trimmer unit Xerox Versant 80 Press 25 14 User Guide SquareFold Trimmer Module ...

Page 365: ...tures as the Standard Finisher with up to 2 000 sheet stacking capacity and includes a Finishing Transport Module The Transport Module enables connectivity to third party Document Finishing Architecture DFA in line finishing options Standard Finisher Plus Components Standard Finisher Plus Main Components Note The Standard Finisher Plus requires either the Interface Module or the Interface Cooling ...

Page 366: ...is used to load preprinted stock SEF or LEF as separators and covers that will be inserted into the printed output Paper loaded in this tray is not printed on The tray holds up to 200 sheets when using 20 lb 75 gsm paper 3 Punch Scrap Container Collects the scraps from the puncher Open to remove the scraps 4 Standard Staple Cartridge Contains staples Remove this cartridge to replace staples and cl...

Page 367: ...ss Inserter Tray T1 For information on the loading media in the Post Process Inserter Tray T1 refer to Loading Paper Tabs in the Post Process Inserter Tray T1 Finishing Transport Finishing Transport Main Components The Finishing Transport is comprised of the following components Function Component No The Finishing Transport serves as an interface to transfer paper from the Finisher Module and the ...

Page 368: ... Transport power is off OFF May be one of the following Paper jam indication Open front door ON Red Fault indicator Paper jam in Area 1 ON Red Area 1 Paper jam in Area 2 ON Red Area 2 Paper jam in Area 3 ON Red Area 3 Paper jam in Area 4 ON Red Area 4 Standard Finisher Plus Maintenance Consumable Supplies for the Standard Finisher Plus Xerox supplies paper and throughput material can be ordered fr...

Page 369: ...k for any obstructions or paper jams in the Finishing Module and Finishing Transport paper paths and clear them 2 If necessary power Off On the press and rescan or resend your job 3 If the fault persists contact the Customer Support Center The sensor or exit sensor in the Finishing Transport did not switch ON or did not switch OFF within a specified amount of time 013 108 to 013 110 1 Check for an...

Page 370: ...ault 051 211 Close the front door of the Finishing Transport Finishing Transport front door is open 051 300 Power Off On the press and resend rescan the job If the fault persists con tact the Customer Support Center Finishing Transport firmware fault upgrade 051 310 1 Refer to the DFA device user documentation and follow in structions to bring the device back online 2 Power Off On the press and re...

Page 371: ... T1 Paper Jams at Finisher Top Tray Paper Jams at Finisher Stacker Tray For paper jams inside the Finisher Left Cover refer to the following procedures Paper Jams at Lever 1a and Knob 1c Paper Jams at Lever 1d Paper Jams at Lever 1b For paper jams inside the Finisher Right Cover refer to the following procedures Paper Jams at Lever 3b and 3d Paper Jams at Lever 3e and Knob 3c Paper Jams at Lever 3...

Page 372: ...c remove the jammed paper Note If paper is torn check inside the machine and remove it 4 Return the opened levers 4b and 4c their original positions 5 Close the right cover on the finisher Note A message will display and the machine will not operate if the right cover is open even slightly Paper Jams in the Finishing Transport Paper Jams in Area 1 Remedies differ according to the paper jam locatio...

Page 373: ...er Module and the entry of the Finishing Transport remove it by pulling the paper towards the Finishing Transport 4 Return the green handle 1 to its original position 5 Close the Finishing Transport front door 6 Ensure that the paper jam indication is cleared from the Finishing Transport status display 7 Follow the instructions on the press to restart your print job Paper Jams in Area 2 Remedies d...

Page 374: ...ecessary rotate the green knob in the direction shown to remove any jammed paper in this area 5 Return the green handle 2 to its original position 6 Close the Finishing Transport front door 7 Ensure that the paper jam indication is cleared from the Finishing Transport status display 8 Follow the instructions on the press to restart your print job Paper Jams in Area 3 Remedies differ according to t...

Page 375: ...ard the left 3 Remove the jammed paper 4 Return the green handle 3 to its original position 5 Close the Finishing Transport front door 6 Ensure that the paper jam indication is cleared from the Finishing Transport status display 7 Follow the instructions on the press to restart your print job Paper Jams in Area 4 Remedies differ according to the paper jam location Follow the instructions displayed...

Page 376: ...e Finishing Transport exit and the entrance to the attached third party device 5 Return the green handle 4 to its original position 6 Close the Finishing Transport front door 7 Ensure that the paper jam indication is cleared from the Finishing Transport status display 8 Follow the instructions on the press to restart your print job Standard Finisher Plus Specifications Finisher Module Specificatio...

Page 377: ...y 2 000 sheets 200 sets Optional C Z Folder tray Minimum 30 sheets When using A4 LEF B5 LEF 8 5 x 11 in LEF 8 x 10 in LEF 7 5 x 10 5 in LEF only When using paper of other sizes tray capacity is 1 500 sheets and 100 sets Tray may not support some paper types Tray Capacity Maximum staple sheets 100 sheets When using paper of size larger than A4 or 8 5 x 11 in the max imum number of sheets that can b...

Page 378: ...Staple 55 350gsm uncoated 106 300gsm coated Paper Weights Booklet Capacity 64 80 gsm Uncoated 25 sheets 81 90 gsm Uncoated 20 sheets 91 105 gsm Uncoated 10 sheets 106 128 gsm Uncoated 10 sheets Coated 10 sheets 129 150 gsm Uncoated 10 sheets Coated 10 sheets 151 176 gsm Uncoated 10 sheets Coated 10 sheets 177 220 gsm Uncoated 5 sheets Coated 5 sheets 221 256gsm 4 sheets max coated or uncoated 257 ...

Page 379: ... be folded 1 sheet Capacity Minimum 30 sheets When using Xerox 20 lb 75 gsm paper Paper type 16 24 lb 64 90 gsm Output tray C Z Folder tray C Fold Z Fold Finishing Transport Specifications Specification Item 7 16 x 19 2 in 182 x 488 mm Process direction Center Registered 7 16 x 13 in 182 x 330 2 mm Process direction Paper size 52 350 gsm Paper weight Transparencies Coated Paper Stock can be used T...

Page 380: ...Xerox Versant 80 Press 26 16 User Guide Standard Finisher Plus ...

Page 381: ......

Page 382: ......

Reviews: