October 2012
1-6
ColorQube 8570/8870 Service Manual
Initial Actions, Routine Maintenance Activities
Revised, 3rd Revision - Xerox Internal Use Only
Service Call Procedures
Initial Actions
Purpose
Use the following procedure to determine the reason for the service call and to identify and
organize the actions which must be performed.
Procedure
1.
Gather the information about the service call and the condition of the printer.
•
Question the operator(s). Ask about the location of most recent paper jams. Ask
about the image quality and the printer performance in general, including any
unusual sounds or other indications.
•
After informing the customer that the printer will not be available for printing, discon-
nect the printer from the customer’s network.
•
If a new installation, be sure all packing material is removed.
•
Check that the power cords are in good condition, directly plugged in to the power
source, and free from defects. Repair or replace the power cords as required. Check
that the circuit breaker, if present, is not tripped.
•
If the printer appears is inoperative, go to Chapter 6 -
Electrical Troubleshooting
and
repair the problem, then continue below.
•
Inspect any rejected copies. Inquire as to, or otherwise determine, the paper quality
and weight. Print the Paper Tips page for specific media specifications. Look for any
damage to the prints, oil marks, image quality defects, or other indications of an
unreported problem.
NOTE: If a fault code is displayed while performing a diagnostics procedure, go to
that fault code RAP and repair the fault. Return to Diagnostics and continue with the
procedure that you were performing.
•
Display and review the information in the Fault History, Jam History, and Service
Usage Profile. Classify this information into categories:
–
Information that is related to the problem that caused the service call.
–
Information that is related to secondary problems.
–
Information that does not require action, such as a single occurrence of a prob-
lem.
2.
Perform any required routine maintenance activities. Refer to the
Routine Maintenance
Activities
section.
3.
Try to duplicate the problem by running the same jobs that the customer ran once repairs
are complete to verify repairs are effective.
4.
Go to Chapter 6 -
General Troubleshooting
to further investigate the problem.
Routine Maintenance Activities
Procedure
1.
Clean the Pick Rollers on every call.
2.
Use the Control Panel to check maintenance item counters.
3.
Compare the counter values to those listed in
Table 1
.
4.
Advise the customer of any routine maintenance items that are approaching or over the
service limit.
Inspection
Rollers
Replace the Rollers when you see any of the following defects:
•
Flat spots
•
Out of roundness
•
Cracked rubber
•
Loss of traction (tackiness) causing pick or feed failures
Gears
Replace Gears that show any signs of wear or damage. Look for these problems:
•
Thinned gear teeth
•
Bent or missing gear teeth; check especially where a metal gear drives a plastic gear.
•
Fractured or cracked Gears (oil or incorrect grease on a plastic Gear can cause the Gear
to crack).
Belts
There are 3 rubber Belts in the printer. Inspect the Belts for wear. Look for these problems:
•
Loose rubber particles below the Belts indicate a worn Belt.
•
Missing teeth in the Belts.
•
Cracking or moderate fraying; a small amount of fraying is inevitable, so look for other
signs of wear before replacing the Belt.
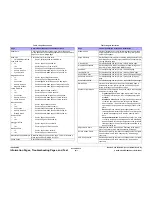
Table 1 Routine Maintenance Item Life Expectancy
Item Routine Maintenance Items
Print Life
1
Drum Maintenance Kit (Extended-
Capacity)
30,000 cycles (0-20% coverage)
20,000 cycles (20-100%) coverage
Drum Maintenance Kit (Standard-
Capacity)
10,000 cycles
2
Waste Tray
Empty every 7 Purges
Summary of Contents for COLORQUBE 8570
Page 1: ...ColorQube 8570 8870 Printer ColorQube 8570 8870 Service Manual Xerox Internal Use Only...
Page 2: ......
Page 423: ......


