October 2012
4-20
ColorQube 8570/8870 Service Manual
REP 2.3
Revised, 3rd Revision - Xerox Internal Use Only
Repairs and Adjustments
REP 2.3 Printhead Assembly
Parts List on
PL 2.1 Item 3
Removal
WARNING
Disconnect the Power Cord before servicing the printer. Line Voltage present on the
Fuse and Fuse Holder Contacts.
NOTE: Use the Printhead Troubleshooting Checklist to troubleshoot Printhead operation
before replacement. A copy of this checklist is included with the replacement Printhead. Return
the completed checklist with the defective part if Printhead replacement is necessary.
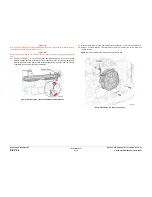
When parked, the Printhead is held in place by pins that are captured by the left and right Print-
head Restraints. If the Restraints are released, tension from the Printhead Tilt Spring will force
the Printhead toward the Drum. Gradually release the spring tension when unlocking the Print-
head Restraints.
WARNING
Allow adequate time for the printer to cool before servicing. The Roll Block that retains
the Printhead Shaft remains hot longer than other nearby components.
CAUTION
To prevent the Printhead from contacting the Drum while releasing the Printhead Restraints,
perform the Manual Printhead Parking procedure (
ADJ 1.4
) to move the Printhead away from
the Drum.
CAUTION
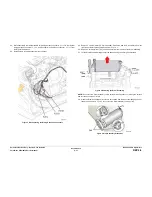
Perform the Printhead removal steps in the order given and use the Printhead finger recesses
to lift the Printhead from the chassis. Do not touch the Printhead Jetstack.
NOTE: For additional tips, refer to the
Printhead Removal
video (also available in the Col-
orQube 8570/8870 Training materials).
1.
Remove the Control Panel Cover (
REP 1.5
).
2.
Remove the Left Side Cover (
REP 1.10
).
3.
Remove the Right Side Cover (
REP 1.11
).
4.
Remove the Exit Cover (
REP 1.7
).
5.
Remove the Ink Loader (
REP 1.8
).
6.
Remove the Funnel Cap (
REP 2.1
).
7.
Remove the Jetstack Cap (
REP 2.2
).
8.
Place several sheets of paper between the Printhead and Drum to protect the Drum.
9.
Hold the Printhead back.
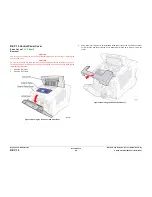
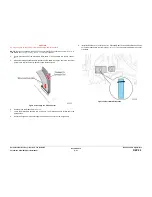
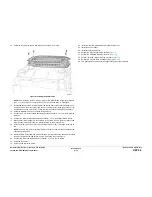
10. Lower the Wiper Blade to its lowest position by rotating the Wiper Drive Gears.
Figure 1 Lowering the Wiper Blade
11.
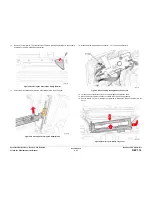
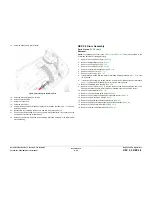
Use a small flat tip screwdriver to adjust the X-Axis Motor to center the Printhead and
allow removing the Printhead Restraints.
•
Adjust counter-clockwise to remove the Printhead pin from the right Restraint
(adjusting the Head to X-Axis Tilt position).
•
Turn the Motor counter-clockwise until resistance, then 1 rotation clockwise to set to
tilt position.
Figure 2 Adjusting the X-Axis Motor
Summary of Contents for COLORQUBE 8570
Page 1: ...ColorQube 8570 8870 Printer ColorQube 8570 8870 Service Manual Xerox Internal Use Only...
Page 2: ......
Page 423: ......

