October 2012
3-9
ColorQube 8570/8870 Service Manual
IQ4
Image Quality
Xerox Internal Use Only - Revised, 3rd Revision
Initial Actions
1.
Check that supported media is being used. Some glossy media can cause smearing or
blocking.
Troubleshooting Reference
Applicable Parts (Chapter 5 - Parts List)
•
Drum Maintenance Unit,
PL 1.1 Item 16
•
Drum Wiper Blade Assembly,
PL 2.1 Item 18
•
Preheater and Deskew Assembly,
PL 2.1 Item 20
•
Lower Inner Duplex Guide,
PL 3.1 Item 2
•
Upper Duplex Guide with Solenoid,
PL 3.1 Item 5
Procedure
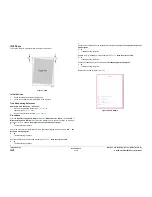
If ink is transferred from adjacent print in the stack, this is blocking. To prevent this, do not allow
print job to sit in the Exit Tray for long time or allow large stack to accumulate in the Exit Tray.
Some glossy media are susceptible to blocking and should be removed from the tray immedi-
ately.
Clean the Print Engine exit path and Lower Duplex Guide, and wipe the Stripper Blade with a
lint-free cloth. Does the error persist?
Y
N
Troubleshooting complete.
Perform the Remove Print Smears routine (Control Panel Menu -> Troubleshooting ->
Print Quality Problems -> Remove Print Smears). Does the error persist?
Y
N
Troubleshooting complete.
Repeat the previous step up to 3 times if ink is seen on the Remove Print Smears page. Load
fresh media and reprint the test page. Does the error persist?
Y
N
Troubleshooting complete.
If smudges occur only on 1st printed side of 2-sided print:
•
For manually printing 2-sided prints, when you load a tray with paper already printed on
one side, at the printer Control Panel, set the tray’s paper type to 2nd Side. Also, at your
computer’s printer driver, select 2nd Side as the Paper Type. This ensures the best print
quality.
•
Check that the Preheater Solenoid works correctly (Service Diagnostics Menu -> Exer-
cise Menu -> Activators -> Preheater Solenoid).
Open the Front Door. Remove the Lower Inner Duplex Guide (
REP 3.2
). The Preheater
should alternate between open and closed position. Replace the Solenoid (
REP 3.5
) and/
or the Preheater and Deskew Assembly (
REP 2.20
) if necessary.
Check for possible random light stripes (
IQ2
). Clean the Rollers and Stripper Blade. Does the
error persist?
Y
N
Troubleshooting complete.
Check the Drum Wiper Blade Assembly for damage or debris. Replace the Wiper Blade
Assembly (
REP 2.17
) if necessary. Does the error persist?
Y
N
Troubleshooting complete.
Does the error persist?
Y
N
Troubleshooting complete.
Check the Drum Maintenance Unit. Replace the Drum Maintenance Unit (
REP 1.16
) if neces-
sary. Does the error persist?
Y
N
Troubleshooting complete.
Replace the Preheater and Deskew Assembly (
REP 2.20
).
If ink spots appear after Eliminate Light Stripes, inspect the Face Plate for ink and follow the
Printhead Checklist if ink is seen.
Summary of Contents for COLORQUBE 8570
Page 1: ...ColorQube 8570 8870 Printer ColorQube 8570 8870 Service Manual Xerox Internal Use Only...
Page 2: ......
Page 423: ......


