October 2012
2-99
ColorQube 8570/8870 Service Manual
Jam Codes
Fault Messages and Codes
Xerox Internal Use Only - Revised, 3rd Revision
C3T
C3X
89,121
89,122
The Strip Flag time-out during
transfix.
The Strip Flag time-out during
exit.
1.
Check that the media is the correct size
and type for the tray.
2.
Check for service bulletin related to
fault 89,121 (C3T) Jams. If unavailable,
replace the Process Drive (
REP 4.13
).
3.
Check the Drum Maintenance Unit for
proper operation. Replace if necessary
or near end of life (
REP 1.6
).
4.
If the image is off-center (top to bot-
tom), replace Preheater and Deskew
Assembly (
REP 2.20
).
5.
Check the Stripper Blade for damage or
bending. Replace the Stripper Carriage
Assembly (
REP 2.13
) if damaged.
6.
Replace the Upper Duplex Guide and
Solenoid (
REP 3.5
).
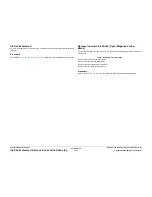
NOTE: Maybe caused by overheated
Motor.
7.
Open all doors and Tray 2, wait 1 hour
and try printing again.
D2*
83,149
The Exit Flag unexpected
event or stuck open during any
action.
1.
Check printer grounds.
2.
Verify the Exit Sensor Flag (
PL 3.1 Item
13
) moves freely and is not blocked by
paper in the output tray.
3.
Check the Exit Sensor Flag for proper
installation or damage. Replace if nec-
essary.
D3R
83,151
The Exit Flag timed out during
duplexing.
1.
Check that the media is not too thick
and is supported by the printer.
2.
Check that the exit path is free of
obstructions.
3.
Ensure the paper guides are snug
against the media in the tray.
4.
If the Drum Maintenance Unit is near
end of life, replace it (
REP 1.16
).
5.
Clean and inspect the Exit Rollers (
PL
3.1 Item 6
). Check that the Rollers
rotate freely.
6.
Check the Exit Sensor Flag
(
PL 3.1
Item 13
) for proper installation or dam-
age. Replace the Exit Module (
REP
3.13
) if necessary.
D3T
89,147
The Exit Flag timed out during
transfix.
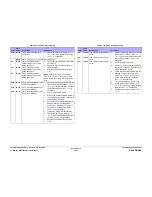
Table 2 Jam Code Troubleshooting
Code
Fault
Code
Description
Procedure
F2*
01,510
The Front Door Interlock
tripped during any action.
1.
Check the Front Door for damaged
hinges, latch, or Interlock Actuator.
2.
Check the covers for proper alignment
and fit.
3.
Check the Front Door Interlock Switch
installation and wiring. Replace if nec-
essary (
REP 6.6
).
H2N
73,300
Tray 3 removed during pick
from Tray 3.
1.
Check the Tray Switch Sensor opera-
tion. Replace if necessary (
REP 6.1
).
J2N
74,300
Tray 4 removed during pick
from Tray 4.
K2N
75,300
Tray 5 removed during pick
from Tray 5.
N2T
89,119
Y-Axis Motor event during
transfix (Tray 1 only - probably
a multi-pick).
1.
Check that the media is supported by
the printer.
2.
Try a heavier media.
3.
Clean the Tray 1 Pick Roller
(refer to
Service Call Procedures Chapter).
4.
Replace the appropriate Separator Pad
Assembly (
REP 3.9
).
N4*
94,526
The Y-Axis Motor stalled during
any action.
1.
Check for supported media, generally
label, trifold or envelopes cause this
error.
2.
Check that the correct media type is
selected in the Control Panel.
3.
Try running fewer sheets through the
tray. Watch for multi-picks.
4.
Clean the Y-Axis pulley and belt with
Isopropyl Alcohol (IPA).
5.
Replace the Tray 1 Separator Pad
Assembly (
REP 3.9
).
NOTE: Possibly due to motor overheat-
ing.
6.
Open all doors and Tray 2. Wait 1 hour
and try printing again.
N5*
10,550
Y-Axis Motor position error dur-
ing any action.
1.
Check for supported media, generally
label, trifold or envelopes cause this
error.
2.
Check that the correct media type is
selected in the Control Panel.
3.
Try using heavy media setting even for
non-heavy media.
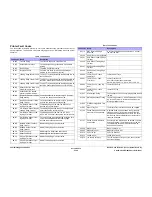
Table 2 Jam Code Troubleshooting
Code
Fault
Code
Description
Procedure
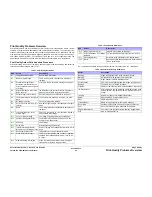
Summary of Contents for COLORQUBE 8570
Page 1: ...ColorQube 8570 8870 Printer ColorQube 8570 8870 Service Manual Xerox Internal Use Only...
Page 2: ......
Page 423: ......


