


October 2012
4-63
ColorQube 8570/8870 Service Manual
REP 3.13
Repairs and Adjustments
Xerox Internal Use Only - Revised, 3rd Revision
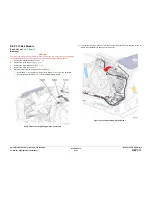
REP 3.13 Exit Module
Parts List on
PL 3.1 Item 13
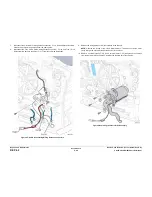
Removal
CAUTION
The Drum Temperature and Exit Module Sensor harnesses are routed through an opening in
the Exit Module frame. Use care during removal to avoid damaging these harnesses.
1.
Remove the Control Panel Cover (
REP 1.5
).
2.
Remove the Left Side Cover (
REP 1.10
).
3.
Remove the Right Side Cover (
REP 1.11
).
4.
Remove the Exit Cover (
REP 1.7
).
5.
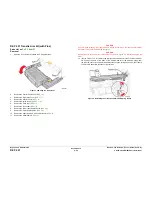
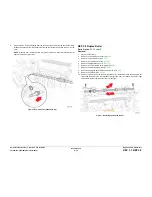
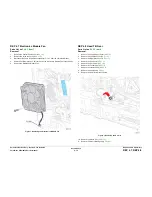
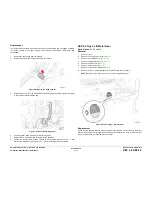
Disconnect the following wiring harness connectors:
•
Exit Module
P/J601
and Drum Temperature Sensor
P/J902
from the I/O Board
•
Head Maintenance Clutch
P/J119
from the Right Side Harness
Figure 1 Disconnecting Wiring Harness Connectors
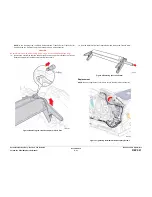
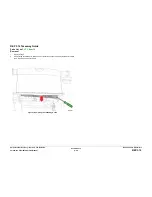
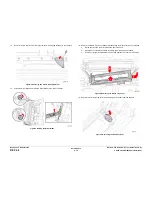
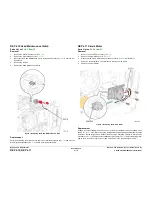
6.
Loosen the 6 screws (plastic, T-20) that secure the Media Drive Assembly. Allow the
Media Drive Assembly to hang next to the printer.
Figure 2 Loosening the Media Drive Screws
Summary of Contents for COLORQUBE 8570
Page 1: ...ColorQube 8570 8870 Printer ColorQube 8570 8870 Service Manual Xerox Internal Use Only...
Page 2: ......
Page 423: ......


