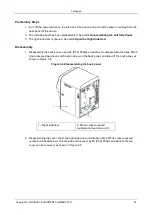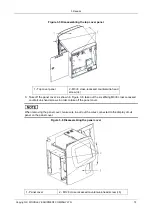
3 Repairs
Copyright © WOODLEY EQUIPMENT COMPANY LTD.
76
3.3 Display Screen Assembly Replacement
3.3.1 Replacing the Touch Screen
Purpose
The display screen can be disassembled and replaced by following the procedures specified in this
section; however, in each case,
3.2 Preparatory Work before Repairs
begin.
Tools/Spare Parts
⚫
#2 (Ph2) Phillips screwdriver
⚫
Display screen
Disassembly
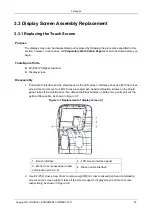
1. Pull out both interfaces at the shield panel of the LCD screen interface panel, use #2 (Ph2) cross
screw driver to remove four M3×8 cross recessed pan-head combination screws on the shield
panel, take off the shield panel, then detach the black buckles on both ends, gently pull out the
golden ribbon cable, as shown in Figure 3-7.
Figure 3-7 Replacement of display screen (1)
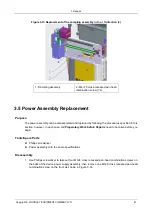
2. Use #2 (Ph2) cross screw driver to remove eight M3×8 cross recessed pan-head combination
screws on the screen support, take off the screen support, display screen and touch screen
respectively, as shown in Figure 3-8.
1 - Bunch interface
2 - LCD screen interface panel
3 - M3×8 cross recessed pan-head
combination screw (×4)
4 - Ribbon cable interface


