9. Selecting Accompaniments
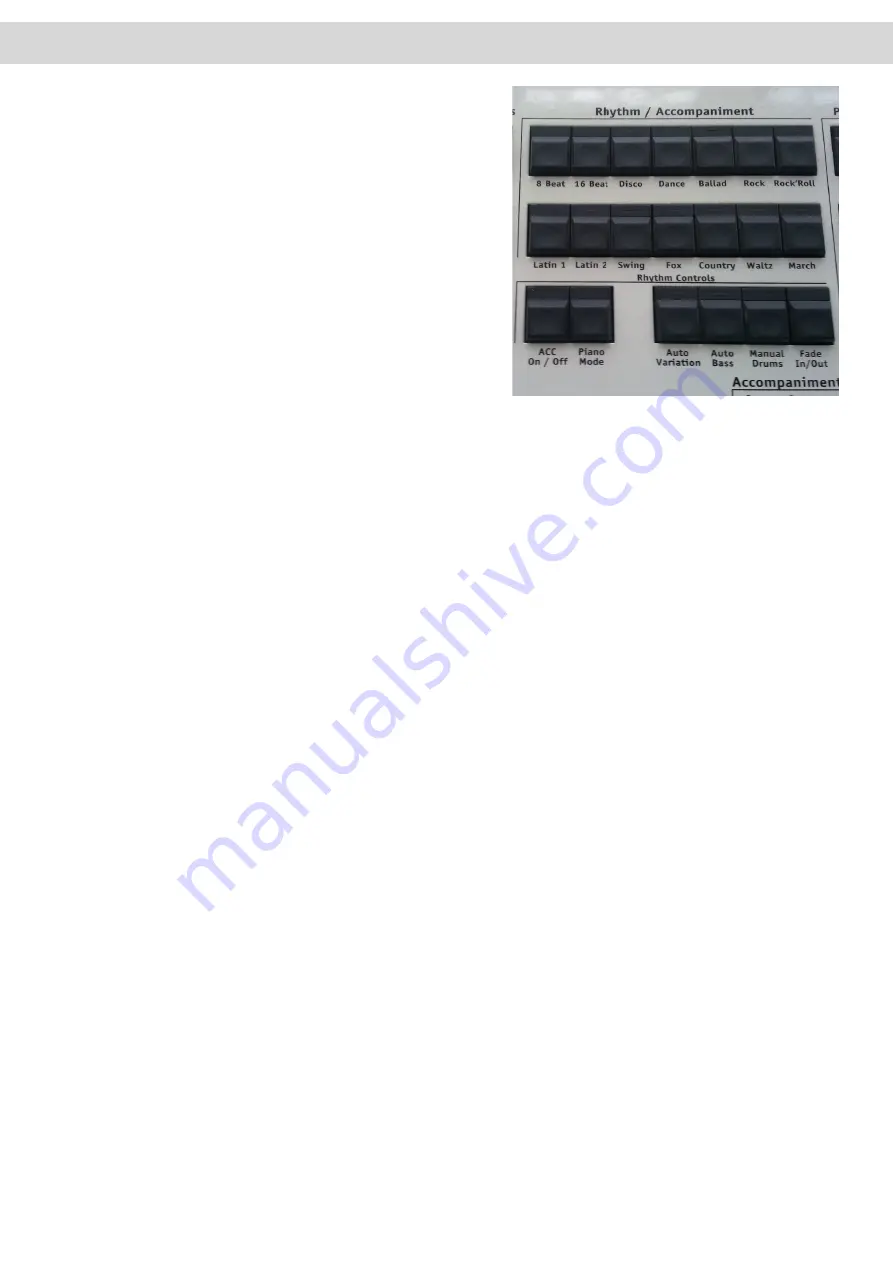
You select Styles (rhythms), Realdrums, MIDI files, Waves, MP3’s
or Video files with the 14 push buttons of the ‘Rhythm / Accompan
-iment’ group on the left control panel.
As shipped by the factory, the Factory Styles of your instrument,
ordered in groups are assigned to these buttons. Of course you
can change these assignments if you wish.
Each push button can activate up to nine different styles (or Real
-drums, MIDI-files, Waves, MP3 or Video Multimedia) in up to 5
levels. You can select another accompaniment by touching one of
the buttons. The nature of the accompaniment you have selected
(Style, Realdrum, Wave or Video etc) together with its name is
shown in the Lower part of the Main Display (on the right near the
Quickload button).
10. Playing With Styles & Realdrums
Use the push buttons in the ‘Rhythm Controls’ group in the left control panel to operate Style and Realdrums. These
are the available functions:
•
Start / Stop
- This push button starts and stops the playback of Styles and Realdrums. During playback, the LED
blinks Green on beat one, and Red on the remaining beats. You can also see the beat on the Main Display in the
form of a flashing ‘Virtual LED Chain’.
•
Var A, B, C and D
- Each Style and Realdrum patterns have four variations (A,B,C and D). Usually variation A
offers a fairly basic rhythm and accompaniment pattern. The variations B, C & D progress in their musical pattern
complexity. When you change between the different variations, the next variation will start on the first beat of the
next bar (during the change over, the Variation LED will blink).
•
Intro 1 / Ending 1
- When the accompaniment is stopped, the Intro 1 / Ending 1 pushbutton starts playback with
an intro, and then continues playback with the currently selected variation. While the accompaniment is running,
pushing this button will cause an ending to be played, and finally stop the playback. Both Intro 1, and Ending 1
have a lenght of up to two bars.
•
Intro 2 / Ending 2
- When the accompaniment is stopped, the Intro 2 / Ending 2 pushbutton starts playback with
an intro, and then continues playback with the currently selected variation. While the accompaniment is running,
pushing this button will cause an ending to be played, and finally stop the playback. Both Intro 2, and Ending 2
can be much longer than Intro 1 / Ending 2 and may contain complete melody sequences. So that you can see
how long the selected intro is, and come in at the right moment, the beats still to be played are displayed as an
LED chain in the Main Display.
•
Sync. Start
- If no accompaniment is running, and you press the pushbutton Sync. Start, the accompaniment will
start automatically when a key on the Lower manual is pressed. You can also use this button to start Fills & Intros.
Just press the Sync. Start button, select the Intro or Fill button you desire and as soon as you press a key on the
Lower manual, the accompaniment pattern will start.
The harmonies played by Styles and Realdrums depend on the harmonies you play on the Lower Manual. Your instru
-
ment ‘understands’ ‘Single Finger’ playing as well as ‘Full Harmonies’. There is no need to switch between different
modes as your OAS instrument detects which mode you playing. The Chord and Harmony type is displayed on the
Main Display near the Tempo and Accompaniment type.
Changing Styles and Realdrums ‘On The Fly’
A special feature of your OAS instrument if the possibility of changing Styles or Realdrums ‘on the fly’, meaning while
they are running (playing). Simply select the next accompaniment (Style or Realdrum) while the original accompani
-
ment is playing. You’ll notice that the LED will start blinking and the accompaniment will change on the first beat of
Summary of Contents for Abacus
Page 1: ...Abacus Verona Vegas User Manual Edition 18 02 2011 V 1 Gedownload bij www wersi fan nl ...
Page 88: ...User Notes ...
Page 89: ...User Notes ...
Page 90: ...User Notes ...
Page 91: ...User Notes ...
Page 92: ...User Notes ...
Page 93: ...User Notes ...
Page 94: ...User Notes ...
Page 95: ...User Notes ...


