Electrical System
Maintenance
Electrical System Safety
•
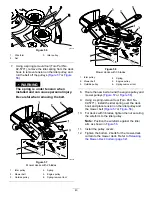
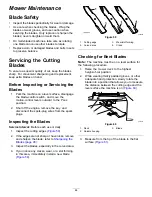
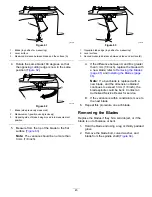
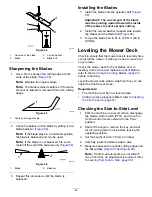
Disconnect the cable from the negative terminal of
the battery before repairing the machine.
•
Charge the battery in an open, well-ventilated
area, away from sparks and flames. Unplug the
charger before connecting or disconnecting the
battery. Wear protective clothing and use insulated
tools.
Servicing the Battery
Removing the Battery
WARNING
Battery terminals or metal tools could short
against metal machine components, causing
sparks. Sparks can cause the battery gasses
to explode, resulting in personal injury.
•
When removing or installing the battery,
do not allow the battery terminals to touch
any metal parts of the machine.
•
Do not allow metal tools to short between
the battery terminals and metal parts of the
machine.
1.
Park the machine on a level surface, disengage
the blade-control switch, and move the
motion-control levers outward to the P
ARK
position.
2.
Shut off the engine, remove the key, and wait
for all moving parts to stop before leaving the
operating position.
3.
Raise the seat to access the battery.
4.
Disconnect the negative (black) ground cable
from the battery post (
).
Note:
Retain all fasteners.
WARNING
Incorrectly removing the cables from
battery could damage the machine and
cables, causing sparks. Sparks can
cause the battery gasses to explode,
resulting in personal injury.
•
Always disconnect the negative
(black) battery cable before
disconnecting the positive (red)
cable.
•
Always connect the positive (red)
battery cable before connecting the
negative (black) cable.
5.
Slide the rubber cover off the positive (red)
cable.
6.
Disconnect the positive (red) cable from the
battery post (
).
Note:
Retain all fasteners.
7.
Remove the battery hold-down (
), and
lift the battery from the battery tray.
g293472
Figure 49
1.
Battery
5.
Negative (–) battery post
2.
Positive (+) battery post
6.
Wing nut, washer, and bolt
3.
Bolt, washer, and nut
7.
Battery hold-down
4.
Terminal boot
39
Summary of Contents for TimeCutter MX 4275T
Page 2: ......
Page 58: ...Schematics g307974 Electrical Diagram 139 2356 Rev A 56 ...
Page 59: ...Notes ...
Page 60: ...Notes ...
Page 62: ......
Page 71: ...decal140 2748 140 2748 decal142 5864 142 5864 9 ...
Page 121: ...Schaltbilder g307974 Elektrisches Schaltbild139 2356 Rev A 59 ...
Page 131: ...decal140 2748 140 2748 decal142 5864 142 5864 9 ...
Page 180: ...Schémas g307974 Schéma électrique139 2356 Rev A 58 ...
Page 181: ...Remarques ...
Page 238: ...Schema s g307974 Installatieschema139 2356 Rev A 56 ...
Page 240: ......


