


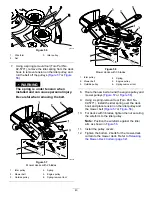

5.
Separate the foam and paper elements (
g333887
Figure 39
1.
Paper element
2.
Foam element
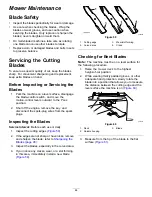
Servicing the Foam Element
1.
Wash the foam element in liquid soap and
warm water. When the element is clean, rinse
it thoroughly.
2.
Dry the element by squeezing it in a clean cloth.
Important:
Replace the foam element if it
is torn or worn.
3.
Lightly oil the foam element using new engine oil
and squeeze out any excess oil.
Servicing the Paper Air-Cleaner
Element
Service Interval:
Every 100 hours or yearly,
whichever comes first—Replace the
paper air-cleaner element (more
often in dirty or dusty conditions).
1.
Clean the paper element by tapping it gently to
remove dust.
Note:
If it is very dirty, replace the paper
element with a new one.
2.
Inspect the element for tears, an oily film, or
damage to the rubber seal.
3.
Replace the paper element if it is damaged.
Important:
Do not clean the paper filter.
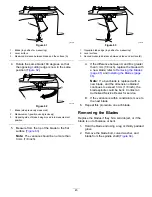
Installing the Air Cleaner
1.
Install the foam pre-cleaner element over the
paper element.
Note:
Ensure that you do not damage the
elements.
2.
Install the air-cleaner elements onto the
air-cleaner base.
3.
Install the cover and secure it with the latches
(
).
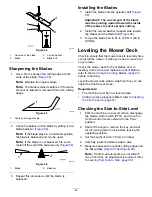
Servicing the Engine Oil
Engine-Oil Specifications
Oil Type:
Detergent oil (including synthetic) of API
service SJ or higher
Crankcase Capacity:
1.9 L (64 fl oz) with oil filter
Viscosity:
See the table below.
g017552
Figure 40
34
Summary of Contents for TimeCutter MX 4275T
Page 2: ......
Page 58: ...Schematics g307974 Electrical Diagram 139 2356 Rev A 56 ...
Page 59: ...Notes ...
Page 60: ...Notes ...
Page 62: ......
Page 71: ...decal140 2748 140 2748 decal142 5864 142 5864 9 ...
Page 121: ...Schaltbilder g307974 Elektrisches Schaltbild139 2356 Rev A 59 ...
Page 131: ...decal140 2748 140 2748 decal142 5864 142 5864 9 ...
Page 180: ...Schémas g307974 Schéma électrique139 2356 Rev A 58 ...
Page 181: ...Remarques ...
Page 238: ...Schema s g307974 Installatieschema139 2356 Rev A 56 ...
Page 240: ......


