OPERATION
2-13
550E MM149 (3--91)
POST OPERATION CHECKLIST -- MOTOR
OPERATING
Check the scrub brush pattern for width and
evenness.
Check the squeegees for proper deflection.
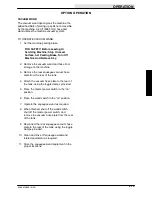
TO STOP MACHINE
1. Return the directional pedal to the “neutral”
position. Apply the brake.
2. Move the solution lever to the “OFF”
position.
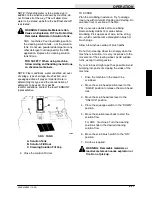
3. Move the scrub head position lever to the
“RAISE” position to set the scrub head lock.
4. Move the scrub head lock lever to the
“LOCK” position.
5. Move the scrub brush lever to the “OFF”
position.
6. Place the squeegee switch in the “Squeegee
Up” position.
7. Turn off the operating lights if used.
8. Turn the master power key switch to the
“OFF” position.
9. Set the machine parking brake.
FOR SAFETY: Before Leaving Or
Servicing Machine; Stop On Level
Surface, Set Parking Brake, Turn Off
Machine And Remove Key.
POST OPERATION CHECKLIST -- MOTOR
STOPPED
Check for wire or string tangled on the scrub
brushes.
Check the squeegees for wear or damage.
Empty and clean the debris hopper.
Drain and clean the recovery tank.
Check the vacuum hoses for debris or
obstructions.
Check for leaks.
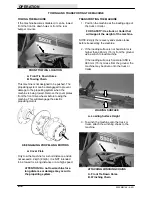
DOUBLE SCRUBBING OPERATION
Double pass scrubbing should be necessary only
for heavy soilage and build-up of dirt, wax, etc.
Operate the machine as desired for normal
scrubbing but keep the rear squeegee up while
making the first scrubbing pass. Allow the solution
to soak on the floor for 15 to 20 minutes. Then
make a second pass in the normal manner with
the rear squeegee down.
FOR SAFETY: When Using Machine: Go
Slow On Grades And Slippery Surfaces.
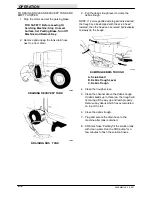
OPERATION ON GRADES
Drive the machine slowly on grades. Some loss of
rear wheel steering traction could occur when
braking with empty solution tanks.
The maximum rated ramp climb angle is 8
_
with
empty tanks, and 6
_
with full tanks.
FOR SAFETY: When Using Machine: Go
Slow On Grades And Slippery Surfaces.
Summary of Contents for 550
Page 10: ...GENERAL INFORMATION 550E MM149 3 94 viii ...
Page 12: ...OPERATION 550E MM149 3 91 2 2 ...
Page 30: ...OPERATION 550E MM149 9 00 2 20 ...
Page 32: ...MAINTENANCE 550E MM149 3 91 3 2 ...
Page 62: ...MAINTENANCE 550E MM149 2 05 3 32 ...
Page 66: ...APPENDIX 550E MM149 3 91 4 4 ...
Page 74: ...STANDARD PARTS 550E MM149 5 01 6 4 Fig 2 Replacement Brushes 1 ...
Page 96: ...STANDARD PARTS 550E MM149 5 01 6 26 Fig 17 Electric Motor Group 1 2 3 4 5 6 ...
Page 105: ...STANDARD PARTS 6 35 550E MM149 5 01 Fig 23 Electrical Schematic 1 2 3 4 5 01228 550E ...
Page 106: ...STANDARD PARTS 550E MM149 5 01 6 36 Fig 23 Electrical Schematic 1 2 3 4 5 01228 550E ...
Page 117: ...STANDARD PARTS 6 47 550E MM149 5 01 Fig 31 Hydraulic Schematic 001330 005607 02361 550E ...
Page 118: ...STANDARD PARTS 550E MM149 5 01 6 48 Fig 32 Hydraulic Schematic 005608 11118 550E ...
Page 168: ...OPTIONS 550E MM149 9 99 8 18 ...
Page 182: ...BREAKDOWNS 550E MM149 10 10 9 14 ...


