TELOS 2101 USER’S MANUAL
PART IV
THE STUDIO INTERFACE & ADDITIONAL HYBRIDS
IV-5
SECTION 1 – STUDIO INTERFACE INSTALLATION
1
Series 2101 Studio Interface - INSTALLATION
1.1
Getting Started
If you have not done so already, you should read the material in Part I (Introduction
to the Series 2101 and its components) and Part II (Series 2101 Planning & Design).
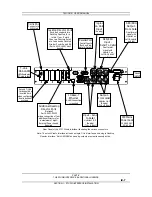
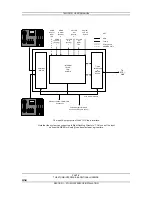
In this section we will cover the various input/output connections of the 2101 Studio
Interface and what you need to know to install the system. Later, in section 2, we will
cover the steps necessary to configure the unit for initial operation and test it. Section
3 has a detailed reference of all menus in the Studio Interface.
The Telos Series 2101 Studio Interface mounts in a 2RU high space in a standard 19”
rack. The unit will operate in any environment where the ambient air temperature is
between 0 to 40 degrees Celsius (32 to 104 degrees Fahrenheit). and relative
humidity is between 0 to 98% (non-condensing). The unit will operate on any
commonly available AC mains voltage between 90 and 240 volts 50 – 60 Hz. You
will want to mount the unit in a position convenient for cable access for the T-Link,
Ethernet, and audio connections.
w
IMPORTANT TIP!
Please see Part II Section 1 of this manual for Series 2101 System Design Criteria. We
assume here that you are familiar with the concepts presented there.
You will need to:
•
Connect the T-Link circuits from the 2101 Hub
•
Connect audio, via either analog or digital (AES/EBU)
•
Connect 1 or more Desktop Directors (screener phone/control surfaces)
•
Connect to power
•
Assign each Studio Interface a unique IP address
•
Assign each Studio Interface a unique Host Name (i.e. Studio name)
•
Connect to a 10/100Base-T LAN (local area network)
•
Configure the hybrids’ audio characteristics for the requirements of your
installation
•
Connect and configure optional Telos TWO hybrid (for studios which
require 4 hybrids)


