


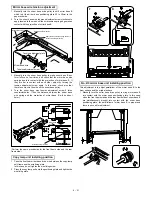


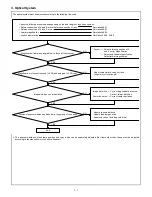


E. Adjusting the Separation Charger Output
1
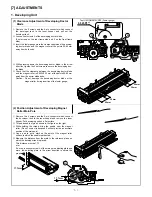
Attach the developing unit and the drum holder unit to the
machine and turn on the machine.
(Do not use the electrode sheet).
2
Attach the separation charger unit and drum holder unit to the
machine. The machine should have all the charger units in-
stalled.
3
Remove the rear cover.
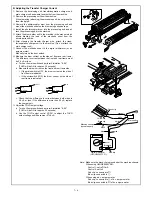
4
Connect the digital multimeter to the SHVG output check pin
(BCDCCP).
5
Set the measuring range of the digital multimeter to DCV.
6
Turn on the door switch manually.
7
Perform Simulation "8-07". (The SHVG will go on for approx. 30
seconds).
8
During the simulation, adjust the SHVG output control VR502 so
that the output monitoring voltage (bias) BCDCCP of the separa-
tion charger is –100
±
10 Vdc.
(3) Notes on maintenance for high-voltage units
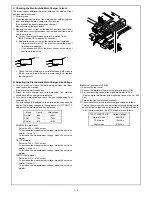
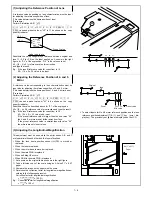
A. Electrostatic Charger Unit
1
Do not distort nor stain the screen grid during handling. Be sure
that the screen grid is secured in place.
2
The teeth of the saw-tooth assembly must be free of distortion.
3
Do not touch the inside of the MC case(saw-tooth assembly
side), the screen grid, and the saw-teeth.
4
The saw-teeth should be cleaned with polystyrene foam as
shown in the figure.
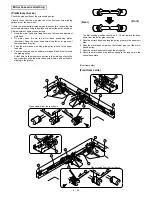
B. Transfer/Separation Charger Unit
1
The charger spring must be 11
±
0.5 mm in length.
2
The charger wire must be free of distortion and fitted in the
holder groove.
3
The charger case must be free of oil, grease and foreign matter.
4
The wire must be cleaned with alcohol.
11
0.5 mm
3~5mm
7 – 6
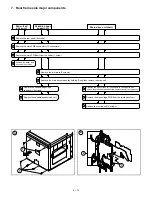
Summary of Contents for SF-2040
Page 27: ...9 Desk unit SF D23 11 12 16 17 13 18 10 9 8 7 6 2 5 4 3 1 23 21 22 19 20 14 15 4 10 ...
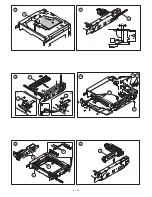
Page 63: ...5 5 C F 10 D 7 6 11 G E 8 9 H 12 6 2 ...
Page 65: ...3 B 3 E 13 C 4 5 6 7 8 F 14 D 10 11 9 6 4 ...
Page 67: ...2 1 3 A D 9 8 11 10 B 4 5 E 12 13 14 C 7 6 6 6 ...
Page 69: ...A a 1 1 D 4 4 B 1 b 1 1 E 5 5 7 6 8 9 8 5 C 2 3 3 F 5 11 12 6 8 ...
Page 71: ...1 2 3 3 4 5 A D 13 11 10 7 6 6 7 B E 14 8 12 9 C F 15 G 16 16 6 10 ...
Page 73: ...A a 1 D 11 10 10 9 8 B 4 2 3 E 13 12 12 C 5 7 6 7 6 12 ...
Page 75: ...C 4 F 9 9 9 10 9 5 6 D G 11 E 8 7 6 14 ...
Page 78: ...Volume PWB 8 9 10 10 6 17 ...
Page 80: ...C 5 F 11 P D F R 7 6 6 12 13 G 12 13 E 8 9 a 8 H 14 6 19 ...