1 - 41
ADJUSTMENT
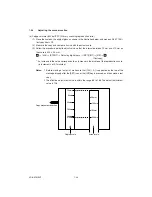
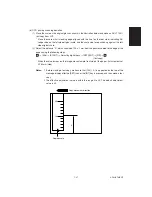
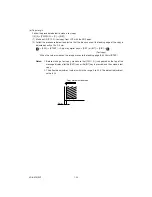
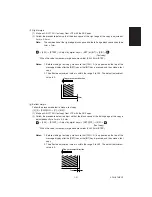
(b) Laser write start position (primary scanning)
Follow the procedure below to make a test print (Paper source: LCF, size: A4/LT).
(1) [0] [5] + [PWR] ON
→
[1]
→
[E/S]
→
1
(Digital keys)
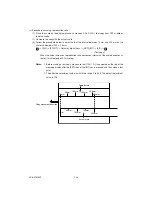
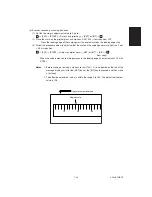
(2) Measure the distance “B” the distance from the edge of the test print paper to the 6th line.
(3) In order to set the distance “B” to 52 mm ± 0.5 mm, adjust using the following steps:
1
→
[411]
→
[START]
→
Set the value
→
[SET]/[INT]
→
[1]
→
[E/S]
→
1
* An increase in the value makes the distance “B” longer (in increments of 0.0423 mm/step).
2
[0] [5] + [PWR] ON
→
[410]
→
[START]
→
Value set in
1
→
[SET]/[INT]
→
[PWR] OFF
Notes:
1. Before making a test print, make sure that [100% A] is appeared on the top of the
message display after the [SET] icon or the [INT] key is pressed, and then make a test
print or turn [PWR] OFF.
2. The effective adjustment value is within the range 0 to 255. The default adjustment
value is 128.
3. Take notice that the first line may be illegible or invisible in some cases.
Print movement direction
B
Summary of Contents for AR-650
Page 103: ...MAINTENANCE 2 6 Rear drive system 38 36 37 3 54 54 54 54 54 54 96 12 81 63 63 46 ...
Page 104: ...2 7 MAINTENANCE ADF front sectional view 100 104 109 105 106 102 108 99 101 103 107 98 ...
Page 122: ...SUPPLIES 3 10 13 CONNECT 15 CLOSE 2 1 14 CLOSE 1 2 16 TURN ON 17 PRESS 18 END ...
Page 169: ...Click Finish button then Virtual Modem installation is completed 5 5 ...
Page 179: ...To make the connection ONLINE mode click button before firmware downloading 5 15 ...
Page 194: ......
Page 195: ...MEMO ...
Page 196: ...MEMO ...
Page 197: ...MEMO ...
Page 198: ...MEMO ...
Page 199: ...MEMO ...


